14ENGLISH
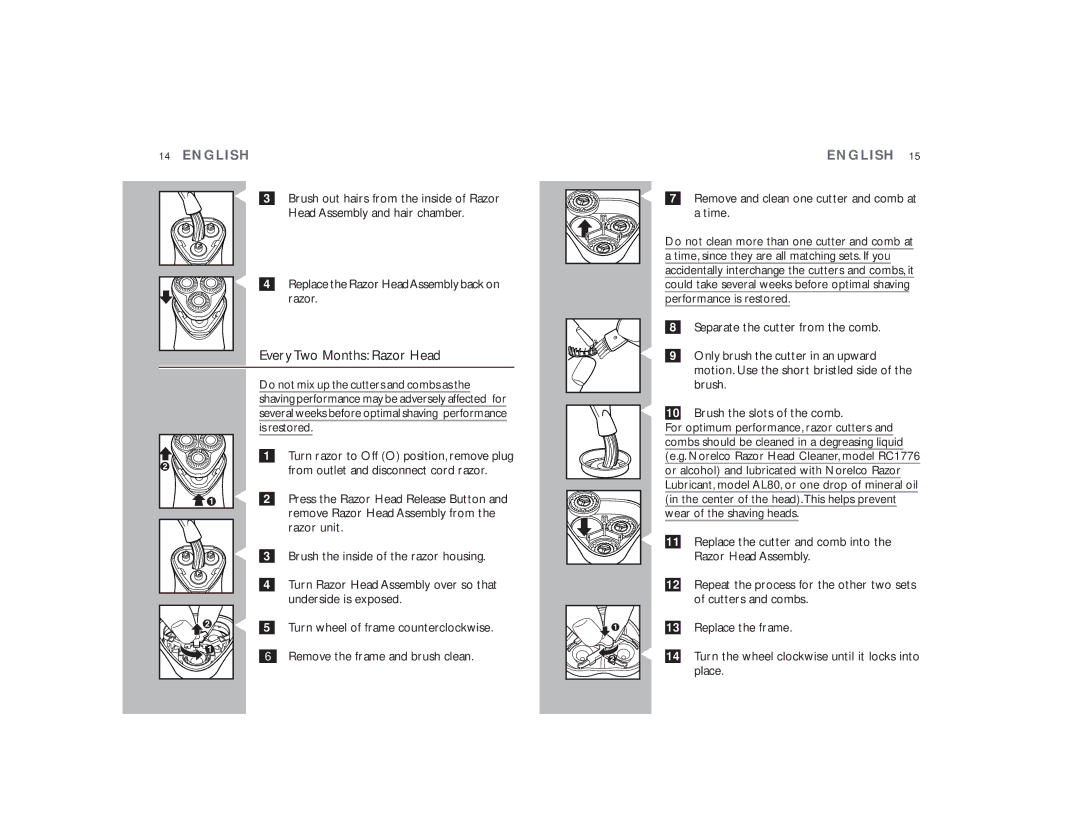
C 3 Brush out hairs from the inside of Razor Head Assembly and hair chamber.
C 4 | Replace the Razor HeadAssembly back on |
| razor. |
Every Two Months: Razor Head | |
Do not mix up the cutters and combs as the | |
shaving performance may be adversely affected for | |
several weeks before optimal shaving performance | |
is restored. | |
1 | Turn razor to Off (O) position, remove plug |
| from outlet and disconnect cord razor. |
C 2 | Press the Razor Head Release Button and |
| remove Razor Head Assembly from the |
| razor unit. |
C 3 Brush the inside of the razor housing. |
ENGLISH 15
C 7 Remove and clean one cutter and comb at a time.
Do not clean more than one cutter and comb at a time, since they are all matching sets. If you accidentally interchange the cutters and combs, it
could take several weeks before optimal shaving performance is restored.
8 | Separate the cutter from the comb. |
C 9 | Only brush the cutter in an upward |
| motion. Use the short bristled side of the |
| brush. |
C 10 | Brush the slots of the comb. |
For optimum performance, razor cutters and | |
combs should be cleaned in a degreasing liquid | |
(e.g. Norelco Razor Head Cleaner, model RC1776 | |
or alcohol) and lubricated with Norelco Razor | |
Lubricant, model AL80, or one drop of mineral oil | |
(in the center of the head).This helps prevent | |
wear of the shaving heads. | |
C 11 | Replace the cutter and comb into the |
| Razor Head Assembly. |
|
|
|
|
|
|
| 4 |
| Turn Razor Head Assembly over so that |
|
|
|
|
|
|
|
|
| underside is exposed. |
|
|
|
|
|
|
|
|
| |
|
|
|
|
|
| C |
|
| Turn wheel of frame counterclockwise. |
5 | |||||||||
|
|
|
|
|
|
|
|
| Remove the frame and brush clean. |
|
|
|
|
|
|
|
|
| |
|
|
|
|
|
|
| 6 |
| |
|
|
|
|
|
|
|
|
|
|
12 |
13 |
C 14 |
Repeat the process for the other two sets of cutters and combs.
Replace the frame.
Turn the wheel clockwise until it locks into place.
