DVDR615/69 specifications
The Philips DVDR615/69 is a versatile and user-friendly DVD recorder that has made a significant mark in the world of home entertainment. With its sleek design and robust features, this device serves as a perfect addition to any home theater setup, providing a seamless way to record and play back your favorite content.One of the standout features of the DVDR615/69 is its ability to record in high-quality formats, including DVD-R, DVD-RW, DVD+R, and DVD+RW. This flexibility allows users to choose the best recording media for their needs, ensuring compatibility with a variety of players. Additionally, the device supports progressive scan output, which enhances video quality by providing smoother and sharper images, making your viewing experience even more enjoyable.
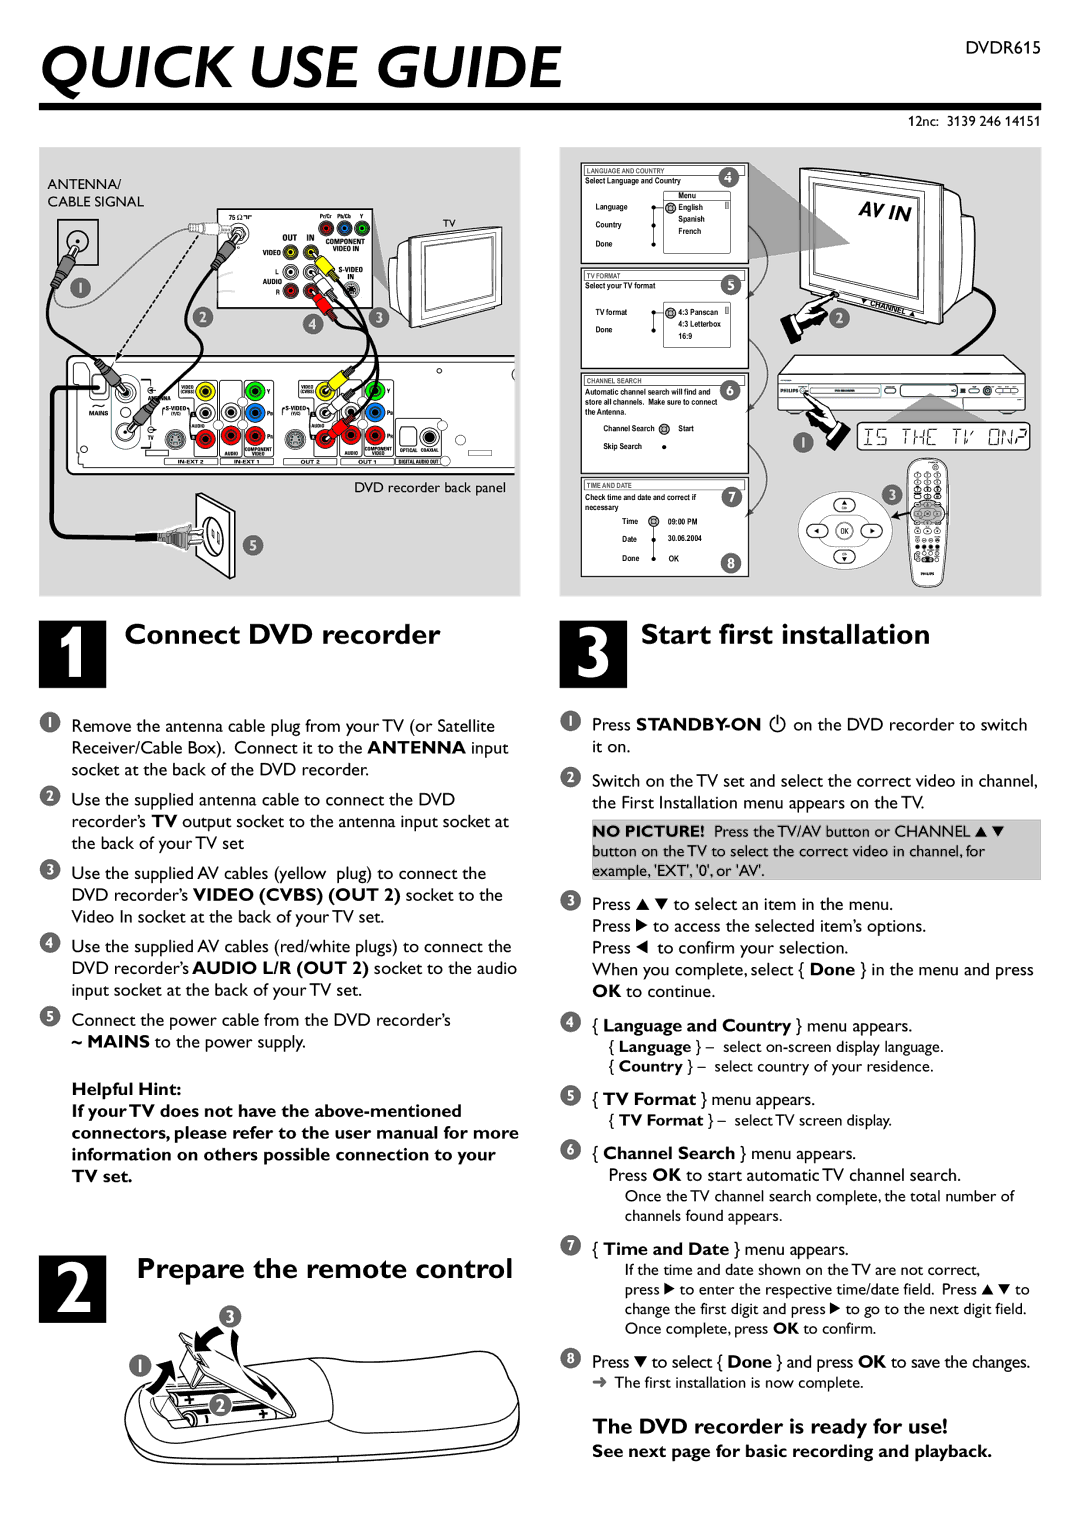
Equipped with a built-in TV tuner, the DVDR615/69 allows you to directly record television shows onto DVD without the need for an external video source. This functionality is complemented by a user-friendly electronic program guide (EPG), making it simple for users to schedule recordings of their favorite programs effortlessly. The one-touch recording feature adds to the convenience, enabling users to start recording their content with just the push of a button.
In terms of connectivity, the Philips DVDR615/69 is well-equipped with multiple ports. It includes composite video, S-Video, and RCA outputs, along with digital audio outputs for enhanced sound quality. The device also features front and rear USB connectivity, allowing users to connect external devices such as flash drives to access and play multimedia files. This integration makes transferring content easy, providing greater versatility in how users manage their media.
Moreover, the DVDR615/69 utilizes advanced technologies for editing and managing recordings. The direct dubbing feature allows for quick and efficient copying of content from DVD to DVD, making it easy to back up important recordings. Additionally, the device offers various editing functions such as chaptering, trimming, and merging, giving users complete control over their video's final presentation.
Overall, the Philips DVDR615/69 is a well-rounded DVD recorder that emphasizes quality, convenience, and flexibility, making it an excellent choice for anyone looking to enhance their home entertainment experience. Its combination of high-quality recording capabilities, user-friendly features, and versatile connectivity options ensures that users can enjoy their media in the best possible way. Whether you're recording your favorite shows, backing up home movies, or playing DVDs, the DVDR615/69 stands out as a reliable and capable solution in the digital age.