
SA4125 specifications
The Philips SA4125 is a compact and portable MP3 player that made waves in the early 2000s for its blend of design, functionality, and sound quality. Designed for users who desire a straightforward and user-friendly experience, the SA4125 serves as an excellent entry point into the world of digital music.One of the main features of the SA4125 is its impressive storage capacity. With options ranging from 128 MB to 1 GB, users could store hundreds of songs, allowing for a diverse selection of music on the go. This made it particularly appealing to those who wanted to curate personalized playlists without the need for constant data management.
The SA4125 also boasts a clear and vibrant display that makes navigation easy. Users can easily browse their music library, view song information, and manage settings with just a few clicks. The intuitive interface minimizes the learning curve, making it accessible for all ages.
In terms of sound quality, the Philips SA4125 doesn’t disappoint. It incorporates advanced audio processing technology, delivering rich and clear audio playback. The player also supports various audio file formats, including MP3 and WMA, allowing users to enjoy their favorite tracks in multiple formats without compromising on sound quality.
Another characteristic that sets the Philips SA4125 apart is its design. Compact and lightweight, it fits comfortably in pockets, bags, and even armbands for those who jog or exercise. Its sturdy construction ensures that it can withstand the wear and tear that comes with an active lifestyle.
Battery life is another strong suit of the SA4125. With a rechargeable battery, users can enjoy hours of uninterrupted music playback. This longevity ensures that users can listen to their favorite tracks during long commutes, workouts, or road trips without the need for frequent recharging.
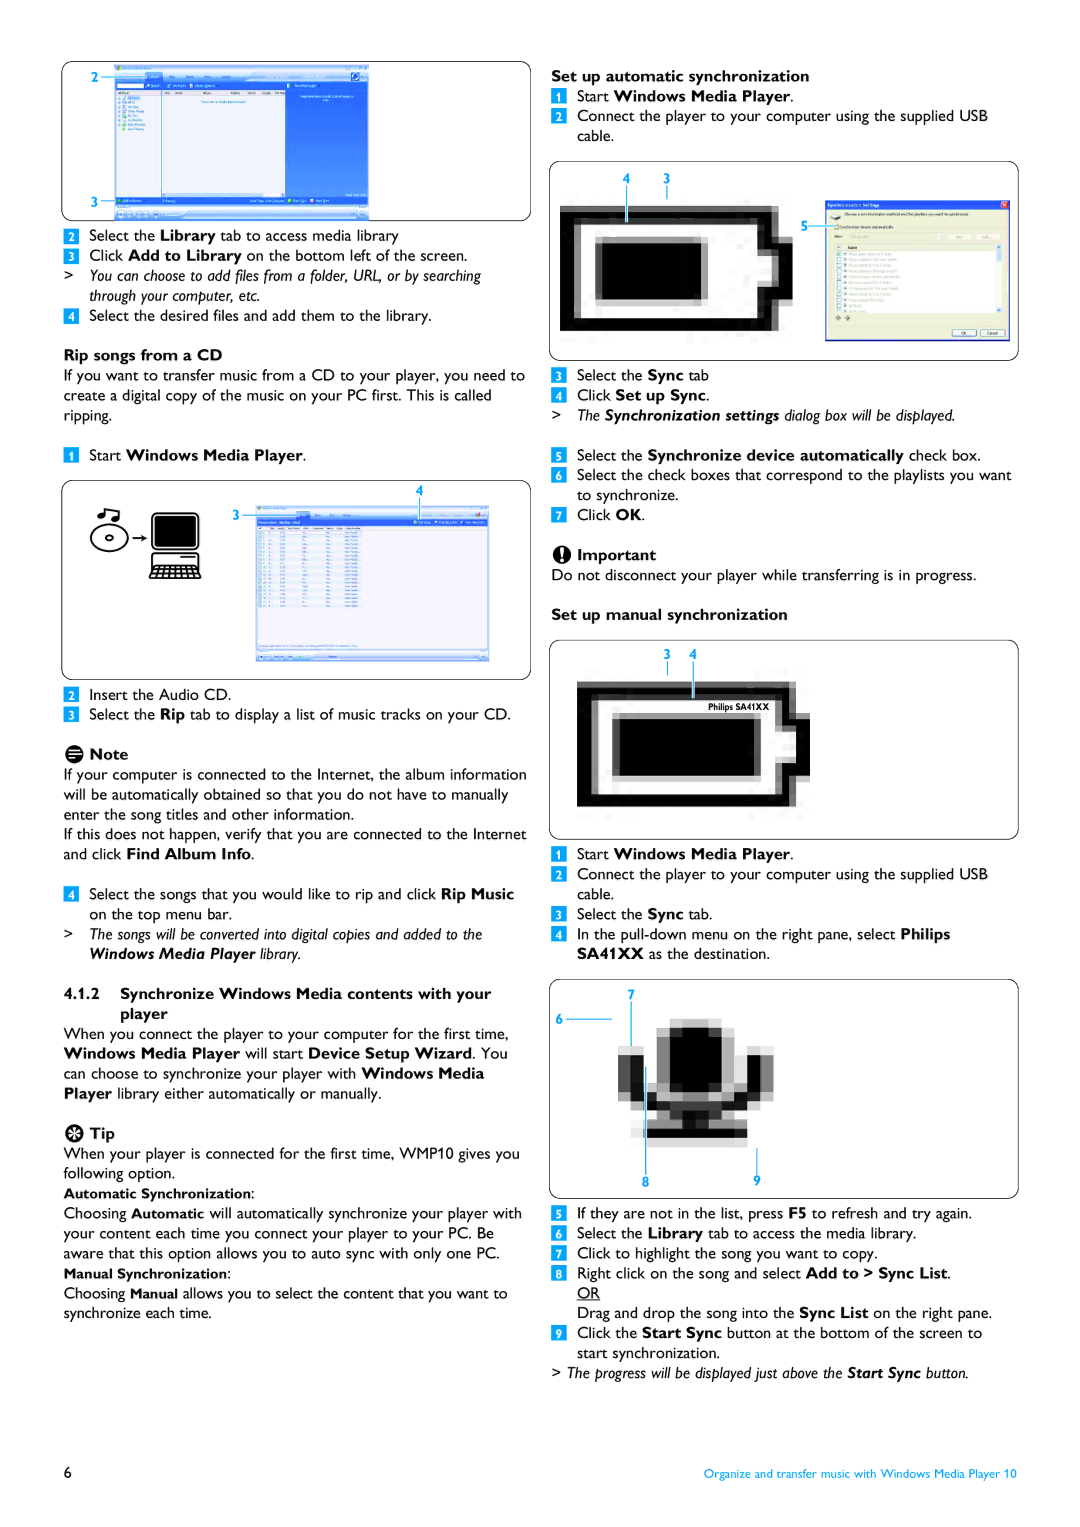
Connectivity is also user-friendly, with simple USB connections for transferring music files. This feature makes it easy to load new music onto the device, ensuring that users always have fresh content at their fingertips.
In conclusion, the Philips SA4125 stands out as a reliable and efficient MP3 player. With its solid storage capacity, user-friendly display, remarkable sound quality, and portable design, it remains a noteworthy device for music enthusiasts who appreciate simplicity and performance in a digital music medium. Whether for casual listening or active use, the SA4125 offers a balance of functionality and style that caters to diverse musical tastes and lifestyles.