10 Hookups with a Stereo TV
VRB611 |
|
| antenna or |
|
| 1 ANT(enna)cable to | |
|
|
| |
AUDIO | ANT | IN Jack | |
| L | IN |
|
|
|
| |
OUT | IN |
|
|
| R |
|
|
VIDEO | OUT |
| |
OUT | IN CH3 CH4 |
| |
VIDEO (yellow) and |
| 2 |
|
AUDIO (red and white) |
| Video Cable | |
OUT Jacks |
| ||
|
| ||
![]() 3
3
VRB411 |
|
| antenna or |
|
| 1 ANT(enna)cable to | |
|
|
| |
|
| ANT | IN Jack |
|
| IN |
|
AUDIO |
|
| |
OUT | IN | OUT |
|
|
|
| |
VIDEO | CH3 CH4 |
| |
|
| ||
VIDEO (yellow) and |
| 2 |
|
AUDIO (white) OUT Jacks |
| Video Cable | |
|
| ||
|
|
| |
● Audio and Video cables are not supplied. | 3 |
Audio and Video
IN Jacks on TV
Stereo Audio Cable
Audio and Video
IN Jacks on TV
Audio Cable
1
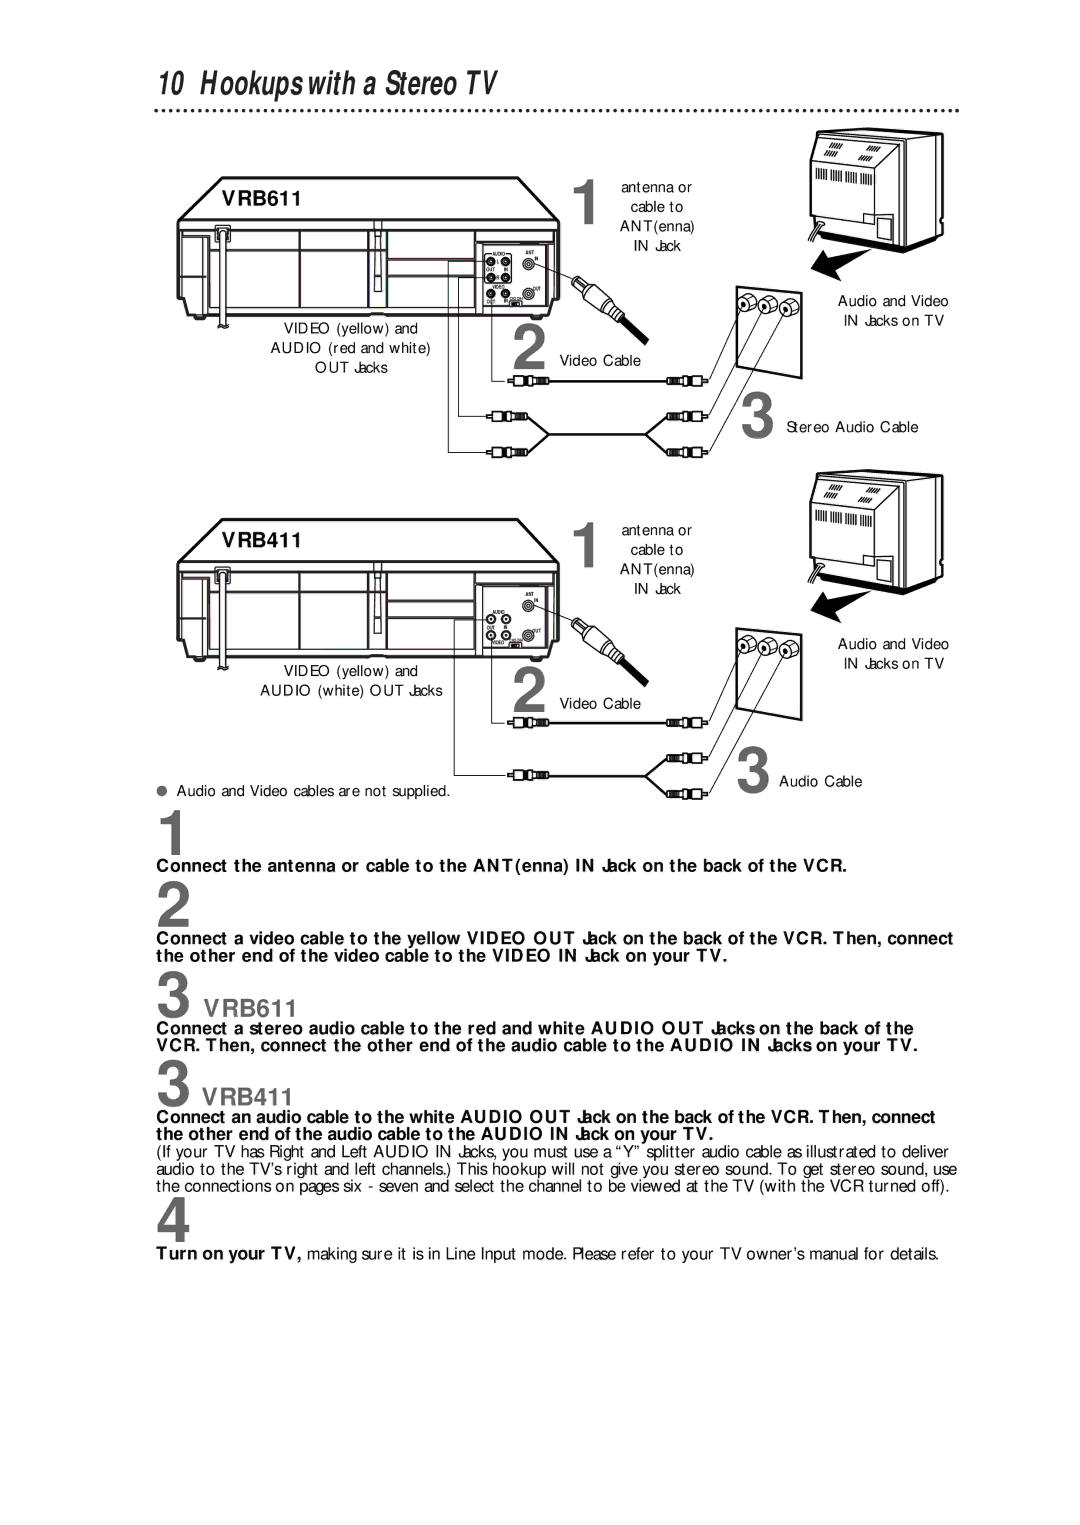
Connect the antenna or cable to the ANT(enna) IN Jack on the back of the VCR.
2
Connect a video cable to the yellow VIDEO OUT Jack on the back of the VCR. Then, connect the other end of the video cable to the VIDEO IN Jack on your TV.
3 VRB611
Connect a stereo audio cable to the red and white AUDIO OUT Jacks on the back of the VCR. Then, connect the other end of the audio cable to the AUDIO IN Jacks on your TV.
3 VRB411
Connect an audio cable to the white AUDIO OUT Jack on the back of the VCR. Then, connect the other end of the audio cable to the AUDIO IN Jack on your TV.
(If your TV has Right and Left AUDIO IN Jacks, you must use a “Y” splitter audio cable as illustrated to deliver audio to the TV’s right and left channels.) This hookup will not give you stereo sound. To get stereo sound, use the connections on pages six - seven and select the channel to be viewed at the TV (with the VCR turned off).
4
Turn on your TV, making sure it is in Line Input mode. Please refer to your TV owner’s manual for details.
