move the screen to the right, [−] button to move to the left. Press [Menu] to return to LCD ADJUST
![]() V–POSITION
V–POSITION
![]()
![]() FINE TUNE Aligns the performance slightly. Select FINE TUNE using the [+] or [−] button, then press [Menu] button to activate the function. Press [+] or [−] button until the screen image looks crisp, sharp and focused. Press [Menu] to return to LCD ADJUST Sub- Menu after alignment.
FINE TUNE Aligns the performance slightly. Select FINE TUNE using the [+] or [−] button, then press [Menu] button to activate the function. Press [+] or [−] button until the screen image looks crisp, sharp and focused. Press [Menu] to return to LCD ADJUST Sub- Menu after alignment.
NOTE:
When setting up this monitor for the first time, perform
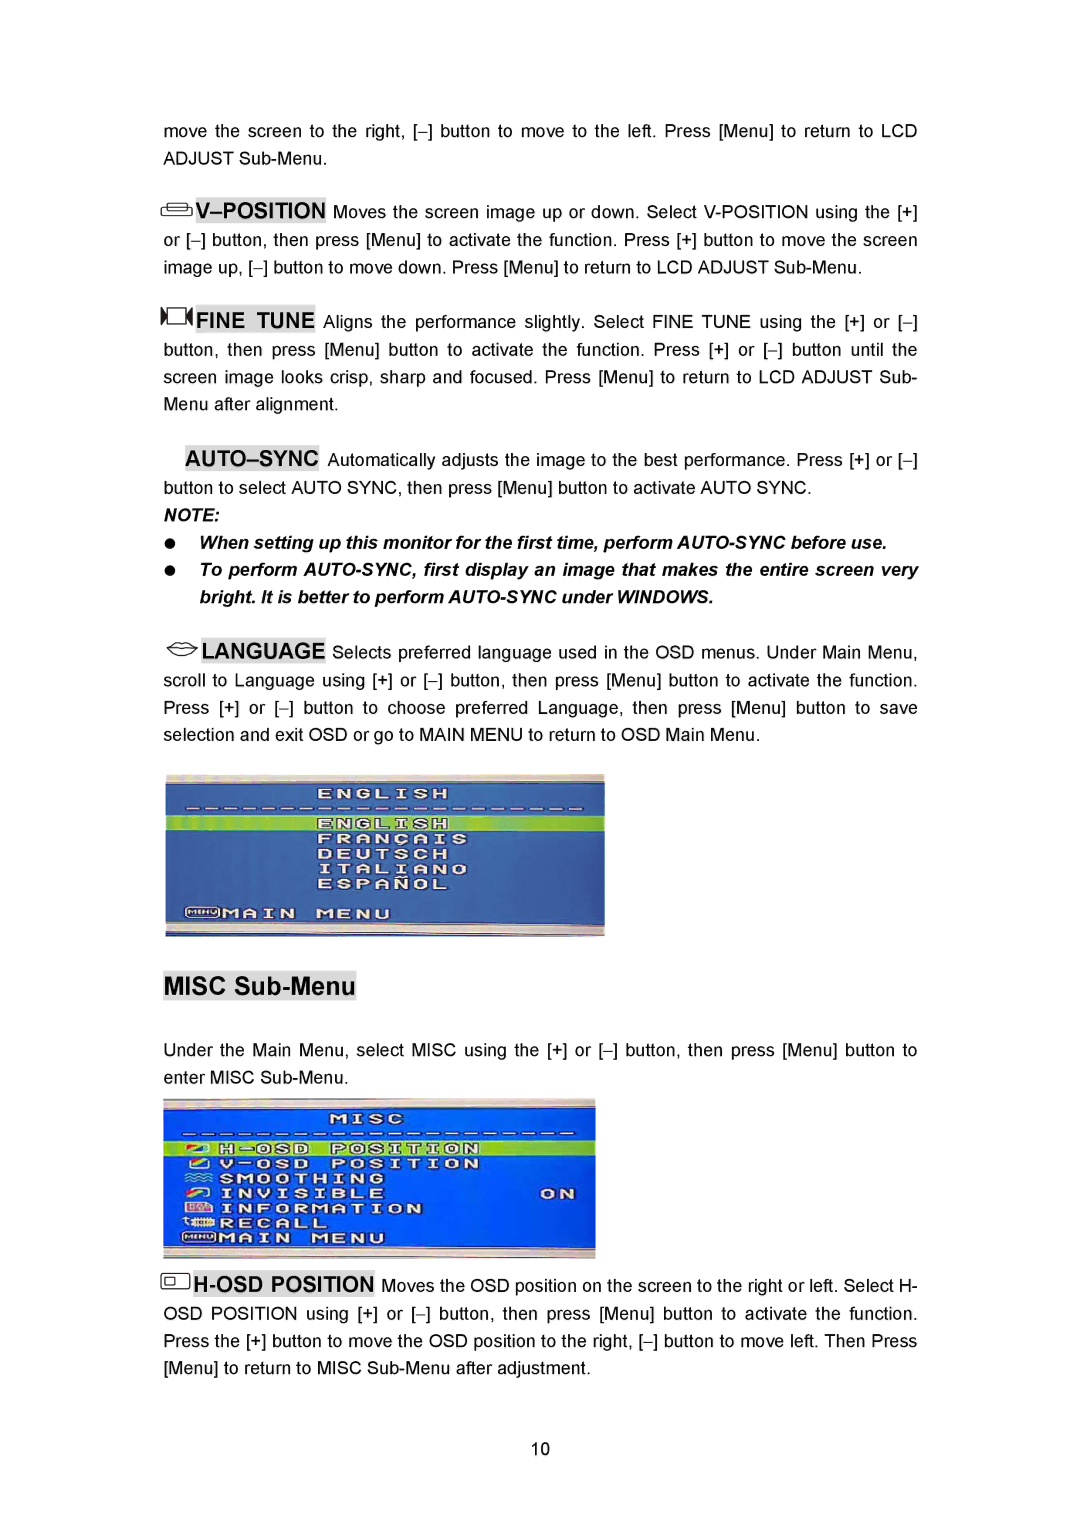
![]() LANGUAGE Selects preferred language used in the OSD menus. Under Main Menu, scroll to Language using [+] or [−] button, then press [Menu] button to activate the function. Press [+] or [−] button to choose preferred Language, then press [Menu] button to save selection and exit OSD or go to MAIN MENU to return to OSD Main Menu.
LANGUAGE Selects preferred language used in the OSD menus. Under Main Menu, scroll to Language using [+] or [−] button, then press [Menu] button to activate the function. Press [+] or [−] button to choose preferred Language, then press [Menu] button to save selection and exit OSD or go to MAIN MENU to return to OSD Main Menu.
MISC Sub-Menu
Under the Main Menu, select MISC using the [+] or [−] button, then press [Menu] button to enter MISC
![]() H-OSD
H-OSD
10