
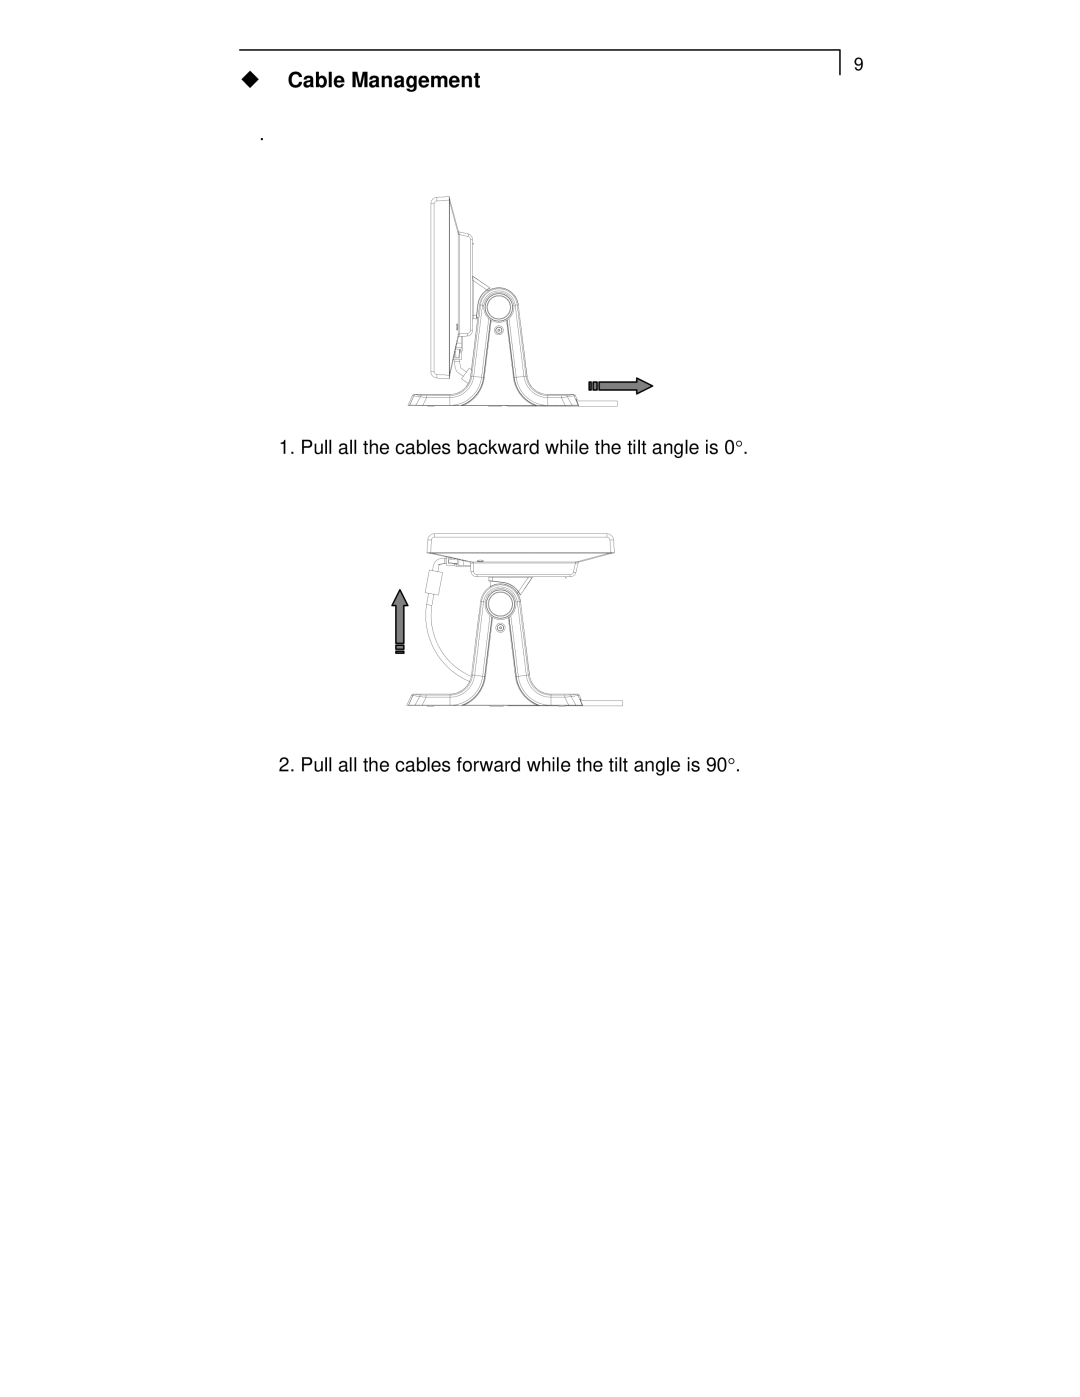
PT1520MU specifications
The Planar PT1520MU, LA1710RTR, LA1500RTR, LA1910RTC, and LA1710RTC models are a part of Planar's renowned line of displays, designed to cater to various commercial and professional applications. Each model showcases unique features, ensuring that businesses and users can select the most suitable option for their specific needs.The Planar PT1520MU is a versatile 15-inch touchscreen monitor that excels in interactive applications. Its multi-touch capabilities allow for intuitive user interaction, making it ideal for point-of-sale systems, kiosks, and information displays. With a vibrant display and a narrow bezel, the PT1520MU provides a modern aesthetic while occupying minimal space.
The LA1710RTR is a 17-inch LED backlit LCD monitor that stands out for its excellent display quality and energy efficiency. This model is equipped with a high resolution that delivers sharp and clear images, making it suitable for demanding graphic applications. The monitor features advanced connectivity options, ensuring effortless integration with various devices.
For those seeking a slightly smaller option, the LA1500RTR is a robust 15-inch LCD display. Its compact form factor does not compromise performance, as it delivers remarkable color accuracy and brightness. The LA1500RTR is perfect for environments where desk space is limited, yet high-quality visuals are still a priority.
The LA1910RTC, a 19-inch touchscreen monitor, is engineered for user engagement. It supports multi-touch functionalities, making it an ideal choice for educational and interactive signage applications. The responsive touchscreen technology ensures that users can navigate seamlessly and efficiently, enhancing the overall experience.
Another notable model is the LA1710RTC, which combines a 17-inch touchscreen display with exceptional visual performance. This monitor is designed for environments that require interactive functionality while maintaining high-quality displays. With robust construction and a polished design, the LA1710RTC is suitable for both commercial and professional settings.
All these models incorporate energy-efficient technologies, ensuring lower running costs and a reduced carbon footprint. Furthermore, they come with various mounting options, making it easy for businesses to find the perfect setup for their space. With a range of sizes, advanced features, and connectivity options, Planar’s display solutions are tailored to meet the needs of diverse industries.