Planar User’s Manual
2.Monitor Stand
The monitor stand supports the LCD panel.
3.LCD Screen
The LCD monitor screen is a
4.LCD Monitor Keypad
Activates and adjusts the monitors settings through an On Screen Display (OSD).
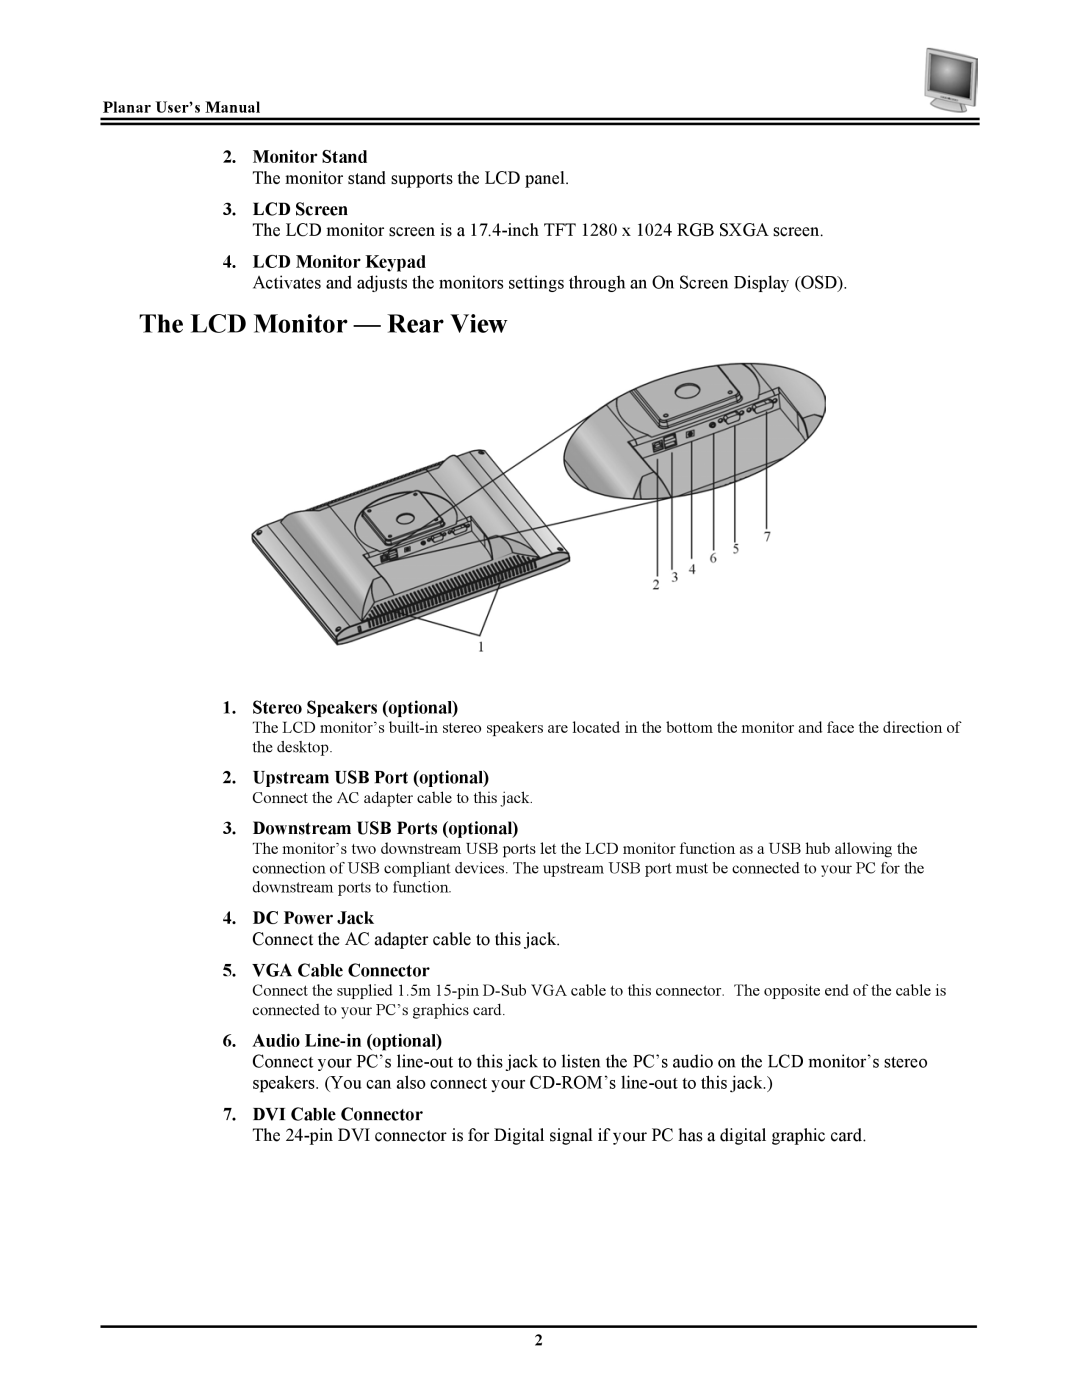
The LCD Monitor — Rear View
1.Stereo Speakers (optional)
The LCD monitor’s
2.Upstream USB Port (optional)
Connect the AC adapter cable to this jack.
3.Downstream USB Ports (optional)
The monitor’s two downstream USB ports let the LCD monitor function as a USB hub allowing the connection of USB compliant devices. The upstream USB port must be connected to your PC for the downstream ports to function.
4.DC Power Jack
Connect the AC adapter cable to this jack.
5.VGA Cable Connector
Connect the supplied 1.5m
6.Audio Line-in (optional)
Connect your PC’s
7.DVI Cable Connector
The
2
