PAINTING YOUR ATRIUM AW
LOUDSPEAKERS
You will need:
•A spray can of primer paint (Krylon Sandable Spray Primer #1318)
•A spray can of the paint of your choice. Choose exterior grade paint if you plan to use the speakers outdoors.
•A paperclip or corkscrew (for removing the
paintable grille)
•Masking tape
•Paint mask (to cover unpaintable parts—not included. To make an easy paint mask, use the grille as a template and cut a mask from heavy, nonporous Kraft paper.)
POUR PEINDRE VOS
ENCEINTES ATRIUMS AW
Vous aurez besoin de:
•Peinture de fond en aérosol (peinture de fond en aérosol Krylon #1318)
•Peinture de finition de votre choix en aérosol. Utilisez une peinture extérieure si vous comptez installer les enceintes à l’extérieur.
•Un trombone ou un ouvre-bouteille (pour retirer la grille)
•Du ruban-cache
•Un cache-peinture (non compris) pour protéger les pièces qu’il ne faut pas peindre. Pour fabriquer facile- ment un cache-peinture, utilisez la grille comme gabarit et découpez le cache dans du papier Kraft non poreux.
PREPARING TO PAINT:
1.Separate the parts of the speaker. Remove the brackets and bracket knobs. Remove the grille by carefully hook- ing it with a bent paper clip and pulling it gently away from the cabinet [figure 4].
2.Mask off the binding posts on the back of the speaker [figure 5], the end panels and bracket knobs, and arefully mask off the front of the speakers to protect the drivers and baffles while painting [figure 6]. The grille features an engraved logo pod. You can mask
this off or paint right over it.
PRÉPARATION À LA PEINTURE:
1.Retirez d’abord les boutons des supports et dégagez l’enceinte. Puis retirez la grille de l’enceinte en la soulevant délicatement à l’aide d’un trombone replié (figure 4).
2.Masquez les bornes situées à l’arrière de l’enceinte (figure 5), les panneaux d’extrémité et la portion filetée (vis) des boutons des supports, puis masquez la surface avant des enceintes avec soin pour protéger les haut-parleurs et les baffles lors de l’application de la peinture (figure 6). La grille est dotée d’un logo – vous pouvez le masquer ou le peindre.
FIGURE 4
Remove the grille using a paper clip.
Quite la rejilla con un sujetapapeles.
Retirez la grille en utilisant un trombone. Entfernen Sie den Gitteraufsatz mit einer Büroklammer.
PAINTING THE CABINET, BRACKET KNOBS AND BRACKET:
1.Apply two thin coats of primer to the cabinet and knobs. The bracket does not require a primer.
2.When the primer is completely dry, apply the
finish color [figure 7].
3.When the paint is completely dry, remove the masking material.
4.Do not reattach the speaker to the bracket until the bracket is mounted. Try to keep all handling of freshly painted parts to a minimum.
PEINTURE DU CAISSON, DES SUPPORTS ET DES BOUTONS DES SUPPORTS:
1.Appliquez deux couches minces de peinture de fond aux caissons et aux boutons. Le support ne requiert pas de couche de fond.
2.Lorsque la peinture de fond est complètement sèche, appliquez la peinture de finition (figure 7).
3.Lorsque la peinture est complètement sèche, retirez les cache-peinture.
4.Installez le support au mur avant d’y monter l’enceinte. Manipulez les pièces fraîchement peintes avec soin.
PAINTING THE GRILLE:
1.The grille of the Atrium speaker features an even, pro- tective powder coating. This powder coating is an ideal primer. The grille features an engraved logo pod. You can mask this off or paint right over it.
2.Using spray paint, spray two thin coats of finish color with no primer [figure 8]. If you’re using a compressor and spray gun, use the finest, most diffuse setting. Be careful not to fill the holes in the grille with paint.
3.When the paint is completely dry, carefully fit the grille into its recess so that it is just resting on the cabinet. Starting with one corner, go around the speaker and push the grille into the grille notch a little bit at a time. Be gentle; the grille may be easily bent out of shape by rough handling.
PEINTURE DE LA GRILLE:
1.La grille des enceintes Atrium est enduite d’un revête- ment de poudre protectrice. Ce revêtement de poudre constitue une peinture de fond idéale. La grille est dotée d’un logo—vous pouvez le masquer ou
le peindre.
2.Appliquez deux couches minces de peinture de finition en aérosol (sans peinture de fond) (figure 8). Si vous utilisez un compresseur ou un pistolet pulvérisateur, choisissez le réglage le plus fin, le plus diffus.
Assurez-vous de ne pas boucher les trous de la grille avec la peinture.
3.Lorsque la peinture est complètement sèche, posez délicatement la grille sur le baffle de l’enceinte. En commençant par un coin, poussez petit à petit la grille dans son encoche tout autour du baffle. Soyez délicat, la grille peut être facilement tordue.
FIGURE 5
Mask the binding posts on the rear of the speaker.
Cubra con cinta de enmascarar los tornillos de presión ubicados en la parte de atrás del altavoz.
Masquez les bornes à l'arrière de l'enceinte.
Decken Sie die Anschlussklemmen auf der Rückseite des Lautsprechers ab.
FIGURE 6
Mask the drivers and baffles.
Cubra con cinta de enmascarar los excitadores y los bafles. Masquez les haut-parleurs et les écrans acoustiques.
Decken Sie die Treiber und Resonanzwände ab.
FIGURE 7
After priming, apply thin coats of finish color
Después de aplicar la capa de imprimación (primer), aplique capas delgadas del color del acabado.
Suite à la couche d'apprêt, appliquez la peinture de finition en couches minces.
Nach der Grundierung tragen Sie eine dünne Schicht des Farbanstrichs auf.
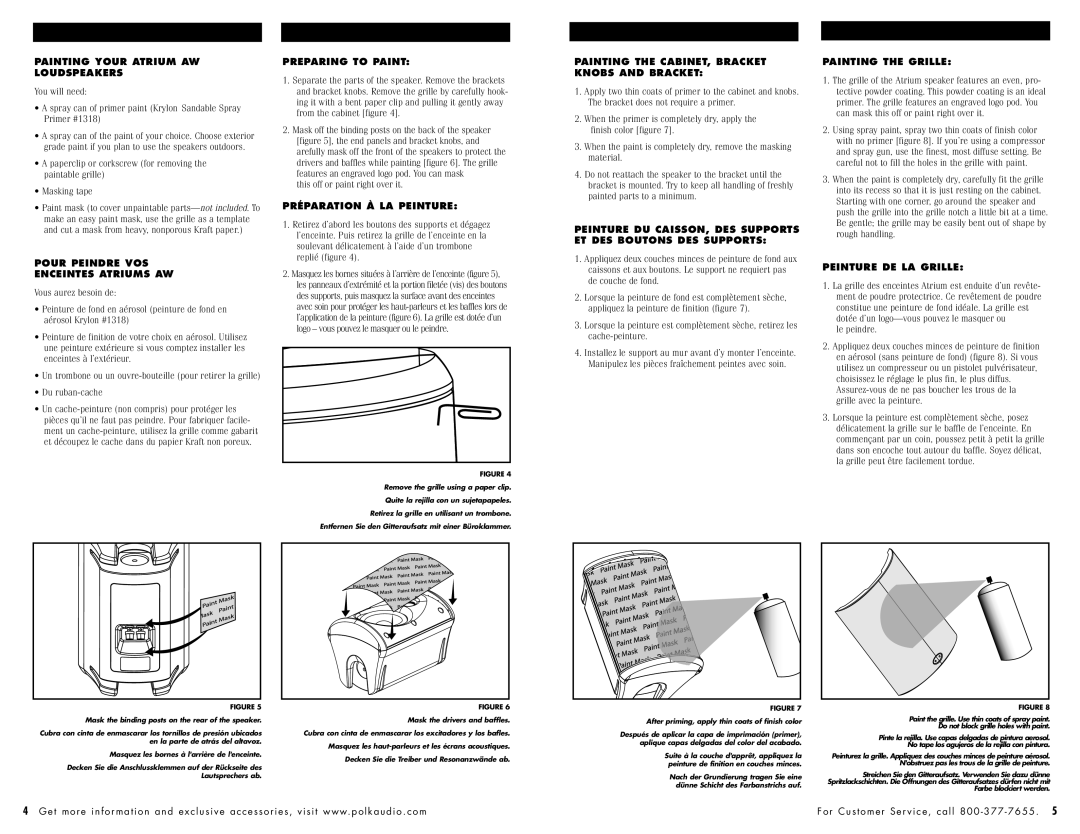
FIGURE 8
Paint the grille. Use thin coats of spray paint.
Do not block grille holes with paint.
Pinte la rejilla. Use capas delgadas de pintura aerosol. No tape los agujeros de la rejilla con pintura.
Peinturez la grille. Appliquez des couches minces de peinture aérosol. N'obstruez pas les trous de la grille de peinture.
Streichen Sie den Gitteraufsatz. Verwenden Sie dazu dünne Spritzlackschichten. Die Öffnungen des Gitteraufsatzes dürfen nicht mit Farbe blockiert werden.