Installing car speakers is a serious project. If you have any doubts about your ability to execute any of the installation steps found in this manual, save yourself a lot of grief and contact a professional installer. Your Polk Audio dealer is a good place to find one. If you intend to do the installation yourself we assume you possess some skill in the proper use of hand and power tools. No matter how much installation experience you have, we recommend that you…
•Read this manual thoroughly before you begin
•Plan your installation carefully
•Allow enough time to complete the installation without rushing
•Take steps to protect your car and upholstery from unwanted scratches and punctures
NECESSARY TOOLS
•Phillips head screwdriver
•Flat blade screwdriver or putty knife
•Door panel
•Electric drill
•3/16" and 1/8" drill bits
•Hole saw of appropriate diameter for the speaker size (for “new location” and flush mount tweeter installation only)
•Indelible ink marker for marking the cutout (for “new location” installation only)
•Metal file
•Solderless,
•Safety glasses
•Wire strippers and cutters
NOTE: For EX3500 installation, please jump to page 8 now.
|
| EX3500 TWEETER |
99.1 |
|
|
RADIO | AMP | CROSSOVER |
| (OPTIONAL) |
|
|
| MIDRANGE |
FIG. 1 |
|
|
INSTALLING EX3 SERIES COMPONENTS
EX3 Series Crossovers
You will need to make wiring connections from your amp or radio to the crossovers and from the crossovers to your mid/woofers and tweeters [figure 1]. Choose crossover box locations that are convenient for making these connections. We do not recommend placing the crossover inside of door panels due to the increased potential for water damage and interference with internal door and window mechanisms.
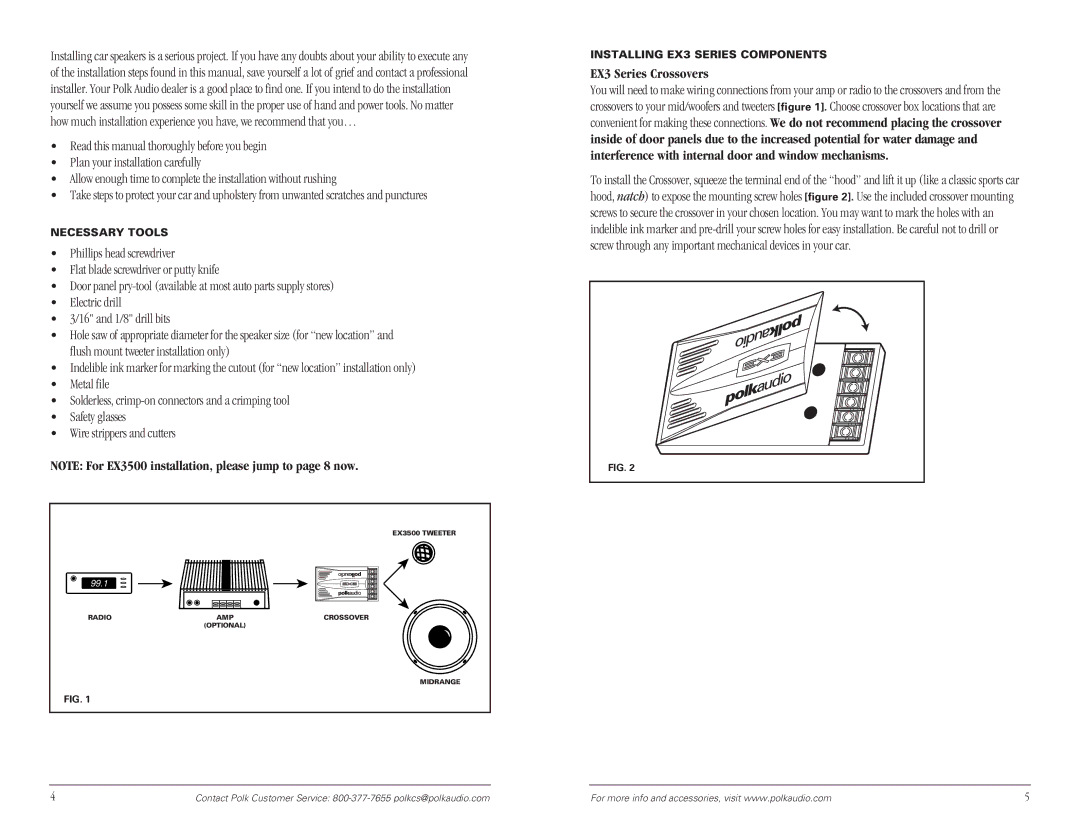
To install the Crossover, squeeze the terminal end of the “hood” and lift it up (like a classic sports car hood, natch) to expose the mounting screw holes [figure 2]. Use the included crossover mounting screws to secure the crossover in your chosen location. You may want to mark the holes with an indelible ink marker and
FIG. 2 |
4 | Contact Polk Customer Service: | For more info and accessories, visit www.polkaudio.com | 5 |