A
B C
Fig. 18 | Fig. 18A |
ATTACHING DUST BAG
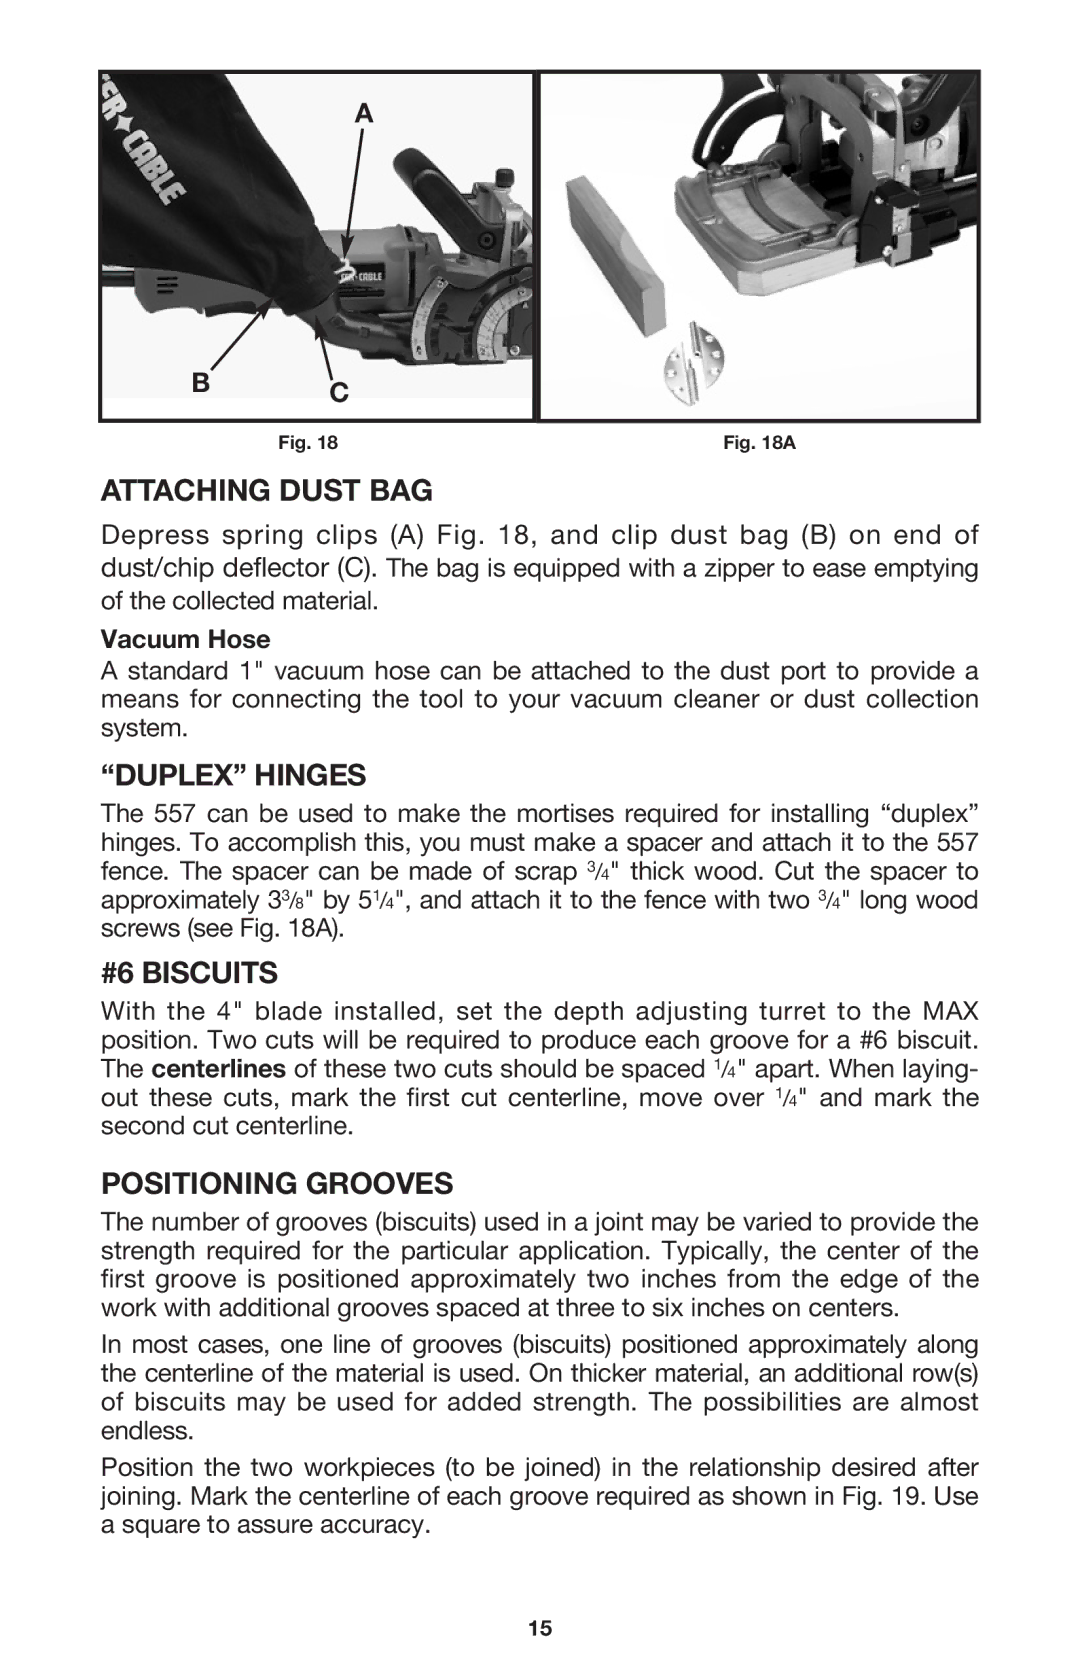
Depress spring clips (A) Fig. 18, and clip dust bag (B) on end of dust/chip deflector (C). The bag is equipped with a zipper to ease emptying
of the collected material.
Vacuum Hose
A standard 1" vacuum hose can be attached to the dust port to provide a means for connecting the tool to your vacuum cleaner or dust collection system.
“DUPLEX” HINGES
The 557 can be used to make the mortises required for installing “duplex” hinges. To accomplish this, you must make a spacer and attach it to the 557 fence. The spacer can be made of scrap 3/4" thick wood. Cut the spacer to approximately 33/8" by 51/4", and attach it to the fence with two 3/4" long wood screws (see Fig. 18A).
#6 BISCUITS
With the 4" blade installed, set the depth adjusting turret to the MAX position. Two cuts will be required to produce each groove for a #6 biscuit. The centerlines of these two cuts should be spaced 1/4" apart. When laying- out these cuts, mark the first cut centerline, move over 1/4" and mark the second cut centerline.
POSITIONING GROOVES
The number of grooves (biscuits) used in a joint may be varied to provide the strength required for the particular application. Typically, the center of the first groove is positioned approximately two inches from the edge of the work with additional grooves spaced at three to six inches on centers.
In most cases, one line of grooves (biscuits) positioned approximately along the centerline of the material is used. On thicker material, an additional row(s) of biscuits may be used for added strength. The possibilities are almost endless.
Position the two workpieces (to be joined) in the relationship desired after joining. Mark the centerline of each groove required as shown in Fig. 19. Use a square to assure accuracy.
15
