SM 2610929106 3-05 3/15/05 10:33 PM Page 7
Assembly
REMOVING AND INSTALLING
SANDING BELTS
!WARNING To prevent personal injury, always disconnect the plug
from the power source before removing or installing the belt.
TO REMOVE BELT
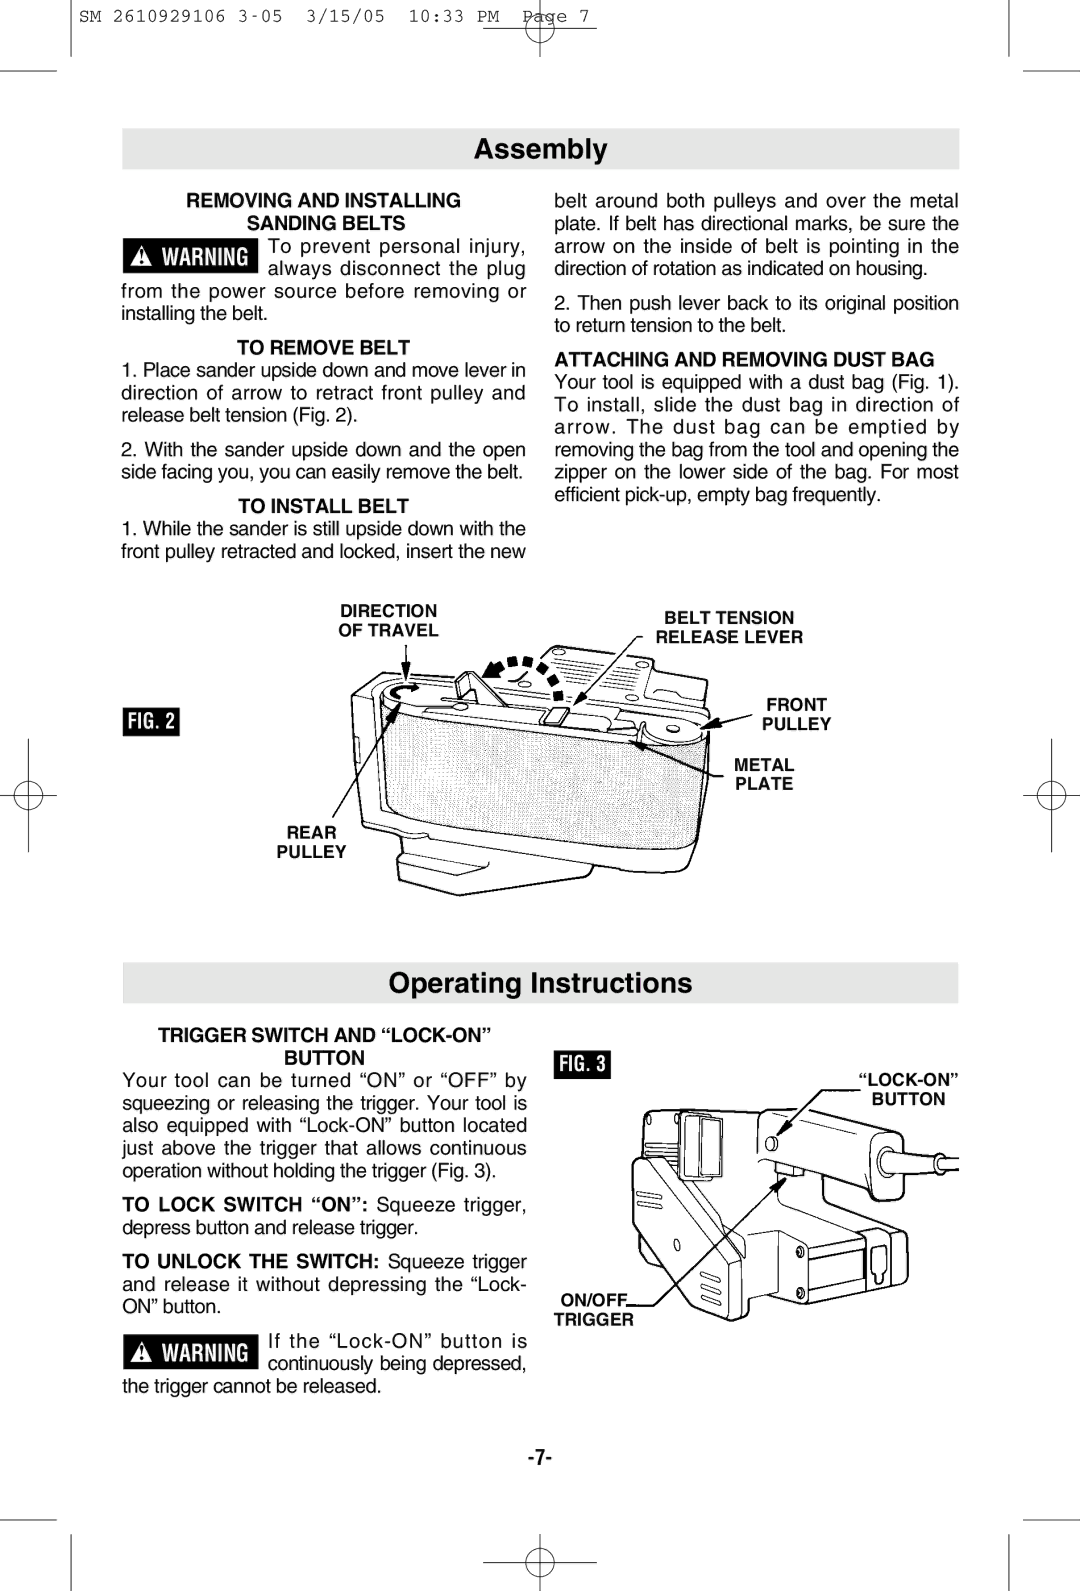
1.Place sander upside down and move lever in direction of arrow to retract front pulley and release belt tension (Fig. 2).
2.With the sander upside down and the open side facing you, you can easily remove the belt.
TO INSTALL BELT
1.While the sander is still upside down with the front pulley retracted and locked, insert the new
belt around both pulleys and over the metal plate. If belt has directional marks, be sure the arrow on the inside of belt is pointing in the direction of rotation as indicated on housing.
2.Then push lever back to its original position to return tension to the belt.
ATTACHING AND REMOVING DUST BAG Your tool is equipped with a dust bag (Fig. 1). To install, slide the dust bag in direction of arrow. The dust bag can be emptied by removing the bag from the tool and opening the zipper on the lower side of the bag. For most efficient
| DIRECTION | BELT TENSION |
| OF TRAVEL | |
| RELEASE LEVER | |
|
| |
|
| FRONT |
FIG. 2 |
| |
| PULLEY | |
|
| METAL |
|
| PLATE |
| REAR |
|
| PULLEY |
|
| Operating Instructions |
TRIGGER SWITCH AND | |
BUTTON | FIG. 3 |
Your tool can be turned “ON” or “OFF” by squeezing or releasing the trigger. Your tool is also equipped with
TO LOCK SWITCH “ON”: Squeeze trigger, depress button and release trigger.
TO UNLOCK THE SWITCH: Squeeze trigger
and release it without depressing the “Lock-
ON” button.ON/OFF
TRIGGER
!If the
the trigger cannot be released.
BUTTON