SSqueeze and hold the throttle trigger. Keep throttle trigger fully squeezed until the en-
gine runs smoothly.
SPull starter rope sharply until engine runs, but no more than 5 pulls.
SAllow engine to run 15 seconds, then move the choke lever to the OFF CHOKE position.
NOTE: If engine has not started, pull starter rope 5 more pulls. If engine still does not run, it is probably flooded.
STARTING A FLOODED ENGINE
Flooded engines can be started by placing the choke lever in the OFF CHOKE position; then, pull the rope to clear the engine of ex- cess fuel. This could require pulling the starter handle many times depending on how badly the unit is flooded.If the unit still doesn’t start, refer to TROUBLESHOOTING TABLE or call
OPERATING POSITION
ALWAYS WEAR: |
|
|
| Eye | |||
|
|
| |||||
|
|
|
|
|
|
| Protection |
Long Pants |
|
|
|
|
|
| |
Heavy Shoes |
|
|
|
|
|
| |
Cut from your left to your right.
TRIMMER LINE ADVANCE
The cutting head advances line automati- cally. Do not tap head on the ground to ad- vance line. This may break parts and cause
cutting head to malfunction.
Upon unit start up, the line will advance auto- matically to the correct cutting path length. Always keep the shield in place when the tool is being operated.
REPLACING THE LINE
S Replacement spools are
NOTE: Always clear dirt and debris from cut- ting head components when performing any type of maintenance.
SHold spool and unscrew cap by turning in the direction shown on top of the cap.
SRemove line guide ring and spool.
SUse a
REFILLING THE SPOOL WITH LINE
![]() WARNING: Use only 0.080” (2 mm) diameter round line. Other sizes and
WARNING: Use only 0.080” (2 mm) diameter round line. Other sizes and
shapes of line will not advance properly and will result in improper cutting head function or can cause serious injury. Do not use other materials such as wire, string, rope, etc. Wire can break off during cutting and become a dangerous missile that can cause serious in- jury.
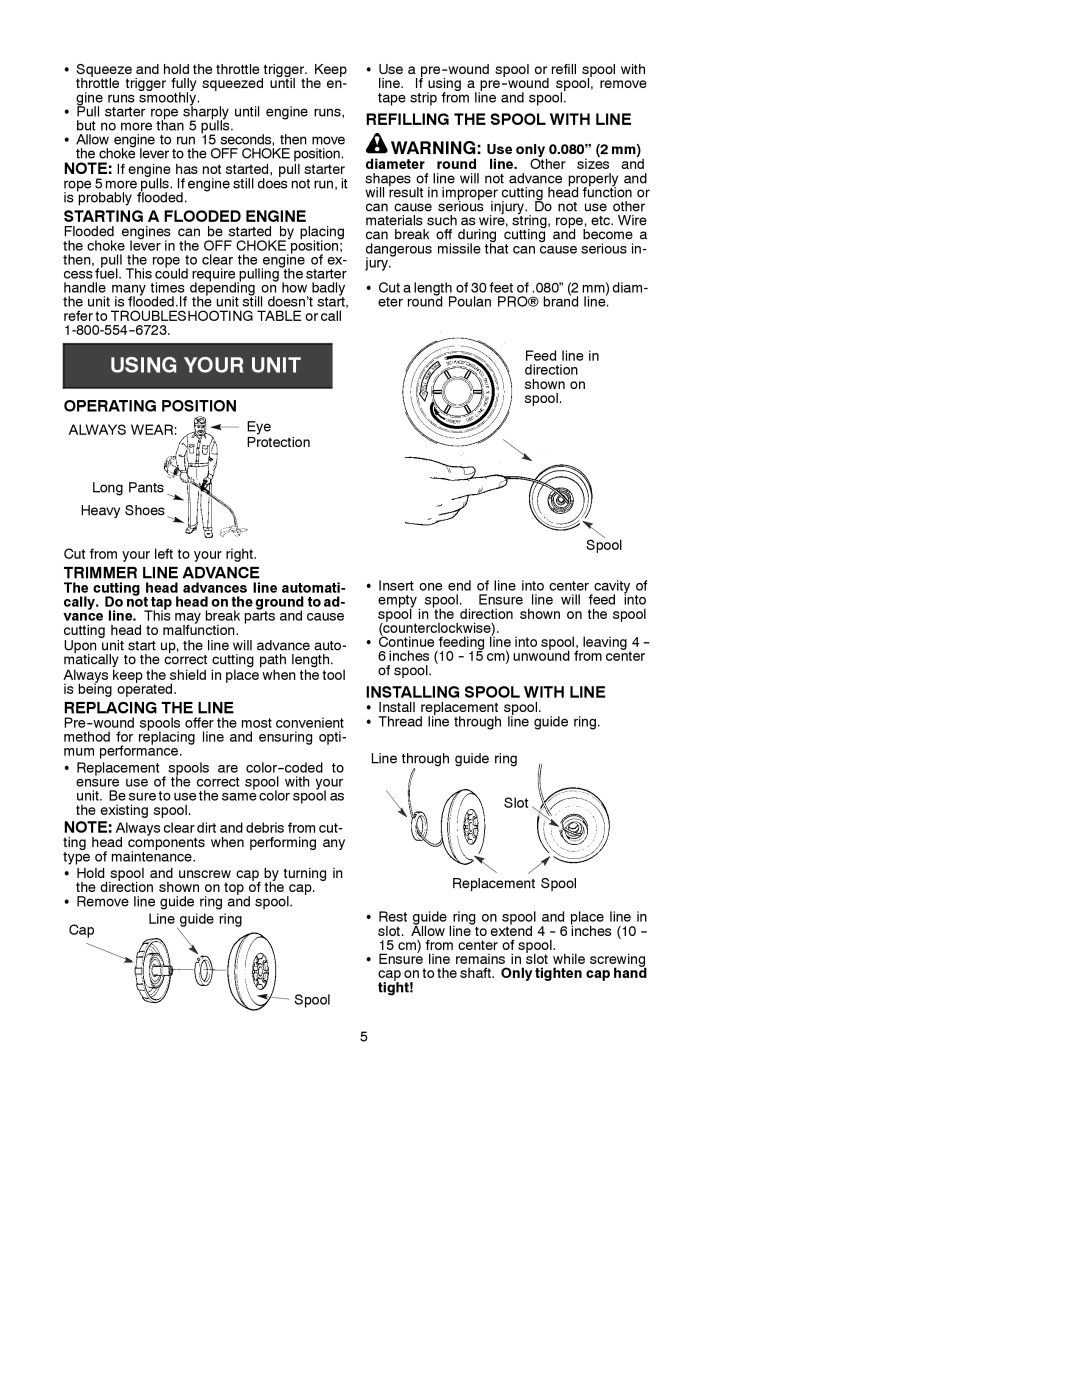
SCut a length of 30 feet of .080” (2 mm) diam- eter round Poulan PRO! brand line.
Feed line in direction shown on spool.
Spool
SInsert one end of line into center cavity of empty spool. Ensure line will feed into spool in the direction shown on the spool
(counterclockwise).
SContinue feeding line into spool, leaving 4
INSTALLING SPOOL WITH LINE
SInstall replacement spool.
SThread line through line guide ring. Line through guide ring
![]()
![]()
![]() Slot
Slot
Replacement Spool
Cap
Line guide ring
![]()
![]()
![]()
![]()
![]()
![]() Spool
Spool
SRest guide ring on spool and place line in slot. Allow line to extend 4
15 cm) from center of spool.
SEnsure line remains in slot while screwing cap on to the shaft. Only tighten cap hand tight!
5
