TO REMOVE MOWER FROM CARTON

Remove all loose parts from carton.

Remove lawn mower housing with care. Avoid touching blade under housing. Always wear gloves or other protection when working under or lifting mower.

THINGS TO KNOW BEFORE YOU ASSEMBLE OR OPERATE YOUR LAWN MOWER

REAR WHEEL DRIVE MODELS:

Disconnect spark plug wire from spark


plug and place wire where it cannot


come in contact with plug.

Remove screws retaining drive cover


(not shown); and remove drive cover


from lawn mower housing.

Remove drive cable from anchor, then

Install new belt by reversing above steps.

NOTE: Always use factory approved belt to assure fit and long life.

• The recommended tightening torque is 35-40 ft. lbs.

IMPORTANT: Blade bolt is grade 8 heat

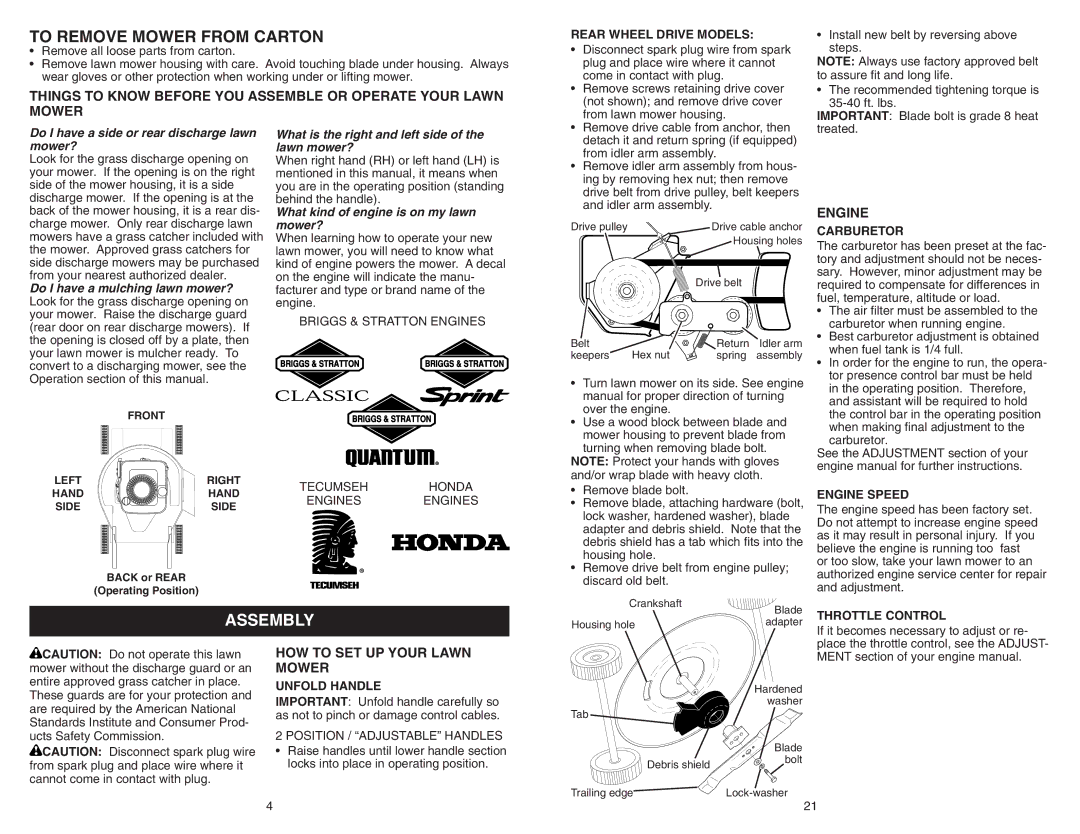
Do I have a side or rear discharge lawn mower?

Look for the grass discharge opening on your mower. If the opening is on the right side of the mower housing, it is a side discharge mower. If the opening is at the back of the mower housing, it is a rear dis- charge mower. Only rear discharge lawn mowers have a grass catcher included with the mower. Approved grass catchers for side discharge mowers may be purchased from your nearest authorized dealer.

Do I have a mulching lawn mower? Look for the grass discharge opening on your mower. Raise the discharge guard (rear door on rear discharge mowers). If the opening is closed off by a plate, then your lawn mower is mulcher ready. To convert to a discharging mower, see the Operation section of this manual.

What is the right and left side of the lawn mower?

When right hand (RH) or left hand (LH) is mentioned in this manual, it means when you are in the operating position (standing behind the handle).

What kind of engine is on my lawn mower?

When learning how to operate your new lawn mower, you will need to know what kind of engine powers the mower. A decal on the engine will indicate the manu- facturer and type or brand name of the engine.

BRIGGS & STRATTON ENGINES

detach it and return spring (if equipped)

from idler arm assembly.

• Remove idler arm assembly from hous-

ing by removing hex nut; then remove

drive belt from drive pulley, belt keepers

and idler arm assembly.

Drive pulley

Drive cable anchor


Housing holes

Drive belt

Belt

Hex nut

Return

Idler arm

keepers

spring

assembly

• Turn lawn mower on its side. See engine

manual for proper direction of turning

over the engine.

treated.

ENGINE

CARBURETOR

The carburetor has been preset at the fac- tory and adjustment should not be neces- sary. However, minor adjustment may be required to compensate for differences in fuel, temperature, altitude or load.

The air filter must be assembled to the


carburetor when running engine.

Best carburetor adjustment is obtained


when fuel tank is 1/4 full.

• In order for the engine to run, the opera-


tor presence control bar must be held


in the operating position. Therefore,


and assistant will be required to hold

FRONT

LEFT

RIGHT

TECUMSEH

HONDA

HAND

HAND

ENGINES

ENGINES

SIDE

SIDE


®

BACK or REAR

(Operating Position)

ASSEMBLY

• Use a wood block between blade and

mower housing to prevent blade from

turning when removing blade bolt.

NOTE: Protect your hands with gloves and/or wrap blade with heavy cloth.

Remove blade bolt.

Remove blade, attaching hardware (bolt, lock washer, hardened washer), blade adapter and debris shield. Note that the debris shield has a tab which fits into the housing hole.

Remove drive belt from engine pulley; discard old belt.

Crankshaft

Blade


Housing hole

adapter

the control bar in the operating position

when making final adjustment to the carburetor.

See the ADJUSTMENT section of your engine manual for further instructions.

ENGINE SPEED

The engine speed has been factory set. Do not attempt to increase engine speed as it may result in personal injury. If you believe the engine is running too fast or too slow, take your lawn mower to an authorized engine service center for repair and adjustment.

THROTTLE CONTROL

CAUTION: Do not operate this lawn mower without the discharge guard or an entire approved grass catcher in place. These guards are for your protection and are required by the American National Standards Institute and Consumer Prod- ucts Safety Commission.

CAUTION: Disconnect spark plug wire from spark plug and place wire where it cannot come in contact with plug.

HOW TO SET UP YOUR LAWN MOWER

UNFOLD HANDLE

IMPORTANT: Unfold handle carefully so as not to pinch or damage control cables.

2 POSITION / “ADJUSTABLE” HANDLES

Raise handles until lower handle section locks into place in operating position.


Hardened


washer

Tab


Blade


Debris shield

bolt


Trailing edge


Lock-washer

If it becomes necessary to adjust or re- place the throttle control, see the ADJUST- MENT section of your engine manual.

4

21

Page 4
Image 4
Poulan 961420034 manual Assembly, HOW to SET UP Your Lawn Mower

961420034 specifications

The Poulan 961420034 is a powerful and efficient tool that stands out in the landscape of outdoor equipment. Renowned for its versatility, this model excels in handling a variety of yard tasks, making it a favored choice among homeowners and landscaping professionals alike. This article explores the key features, technologies, and characteristics that define this high-performance outdoor product.

At the heart of the Poulan 961420034 is its robust engine, designed to deliver reliable performance and durability. With a displacement that ensures optimal power output, this engine makes light work of tough cutting jobs. This model is equipped with a powerful two-cycle engine that provides the necessary torque to tackle dense brush and thick grass, enabling users to complete their tasks efficiently.

One of the standout features of the Poulan 961420034 is its ergonomic design. The tool is equipped with an adjustable shoulder strap, which allows for comfortable and easy handling during prolonged use. This design minimizes user fatigue and enhances maneuverability, making it suitable for both small residential gardens and larger commercial landscapes.

The Poulan 961420034 also features advanced cutting technologies that set it apart from competitors. It comes with a dual-line cutting head, which increases the cutting surface and reduces the need for repeated passes. This ensures a cleaner, more efficient cut, saving both time and effort. Additionally, the auto-feed line system automatically dispenses the line as needed, further enhancing the user experience.

In terms of maintenance, the Poulan 961420034 is designed for easy upkeep. Its tool-less access to the air filter and spark plug facilitates quick and hassle-free maintenance. This feature is particularly beneficial for users who prefer a low-maintenance product that will still deliver high performance.

Safety is another priority with the Poulan 961420034. It includes features such as a protective guard that prevents debris from being thrown towards the user, ensuring a safer working environment. The model also has a throttle lock-out feature to prevent accidental starts, making it a thoughtful choice for both seasoned users and beginners.

Overall, the Poulan 961420034 is a well-rounded outdoor tool that combines power, comfort, and safety. Its impressive features cater to a wide range of landscaping needs, making it an indispensable asset for anyone looking to maintain a pristine outdoor space.