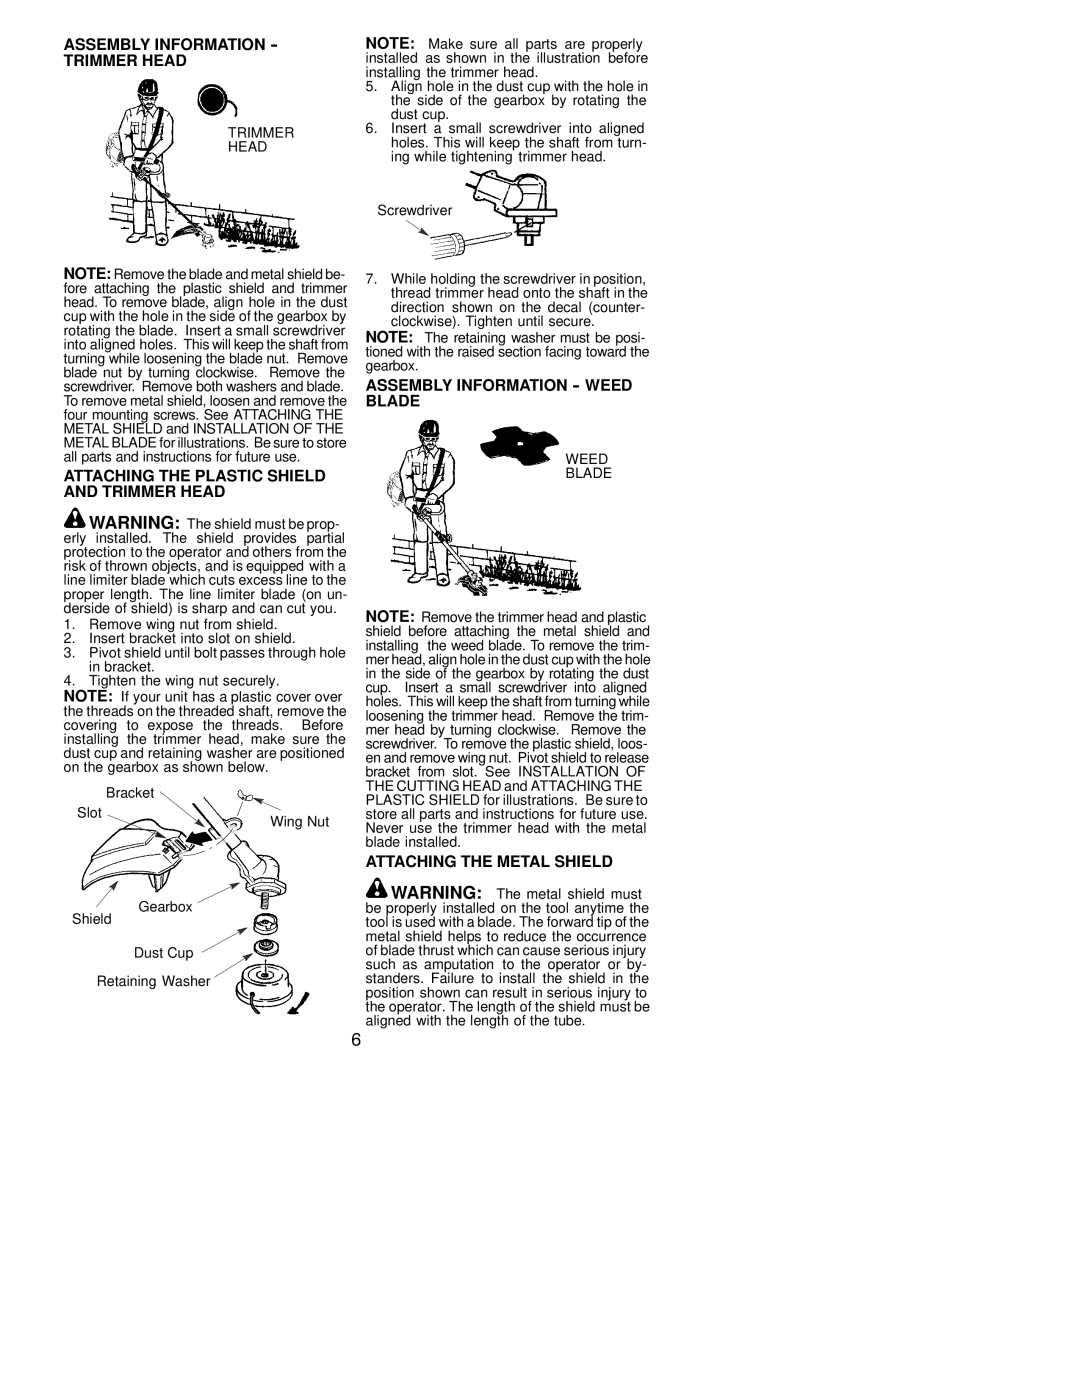
ASSEMBLY INFORMATION - TRIMMER HEAD

TRIMMER

HEAD

NOTE: Make sure all parts are properly installed as shown in the illustration before installing the trimmer head.

5.Align hole in the dust cup with the hole in the side of the gearbox by rotating the dust cup.

6.Insert a small screwdriver into aligned holes. This will keep the shaft from turn- ing while tightening trimmer head.

Screwdriver

NOTE: Remove the blade and metal shield be- fore attaching the plastic shield and trimmer head. To remove blade, align hole in the dust cup with the hole in the side of the gearbox by rotating the blade. Insert a small screwdriver into aligned holes. This will keep the shaft from turning while loosening the blade nut. Remove blade nut by turning clockwise. Remove the screwdriver. Remove both washers and blade. To remove metal shield, loosen and remove the four mounting screws. See ATTACHING THE METAL SHIELD and INSTALLATION OF THE METAL BLADE for illustrations. Be sure to store all parts and instructions for future use.

ATTACHING THE PLASTIC SHIELD AND TRIMMER HEAD

WARNING: The shield must be prop- erly installed. The shield provides partial protection to the operator and others from the risk of thrown objects, and is equipped with a line limiter blade which cuts excess line to the proper length. The line limiter blade (on un- derside of shield) is sharp and can cut you.

1.Remove wing nut from shield.

2.Insert bracket into slot on shield.

3.Pivot shield until bolt passes through hole in bracket.

4.Tighten the wing nut securely.

NOTE: If your unit has a plastic cover over the threads on the threaded shaft, remove the covering to expose the threads. Before installing the trimmer head, make sure the dust cup and retaining washer are positioned on the gearbox as shown below.


Bracket

Slot

Wing Nut


7.While holding the screwdriver in position, thread trimmer head onto the shaft in the direction shown on the decal (counter- clockwise). Tighten until secure.

NOTE: The retaining washer must be posi- tioned with the raised section facing toward the gearbox.

ASSEMBLY INFORMATION - WEED BLADE

WEED

BLADE

NOTE: Remove the trimmer head and plastic shield before attaching the metal shield and installing the weed blade. To remove the trim- mer head, align hole in the dust cup with the hole in the side of the gearbox by rotating the dust cup. Insert a small screwdriver into aligned holes. This will keep the shaft from turning while loosening the trimmer head. Remove the trim- mer head by turning clockwise. Remove the screwdriver. To remove the plastic shield, loos- en and remove wing nut. Pivot shield to release bracket from slot. See INSTALLATION OF THE CUTTING HEAD and ATTACHING THE PLASTIC SHIELD for illustrations. Be sure to store all parts and instructions for future use. Never use the trimmer head with the metal blade installed.

ATTACHING THE METAL SHIELD

Shield

Gearbox

WARNING: The metal shield must be properly installed on the tool anytime the tool is used with a blade. The forward tip of the

Dust Cup

Retaining Washer

metal shield helps to reduce the occurrence of blade thrust which can cause serious injury such as amputation to the operator or by- standers. Failure to install the shield in the position shown can result in serious injury to the operator. The length of the shield must be aligned with the length of the tube.

6

Page 6
Image 6
Poulan S31SNGBC instruction manual Assembly Information Trimmer Head, Attaching the Plastic Shield and Trimmer Head

S31SNGBC specifications

The Poulan S31SNGBC is a robust and efficient chainsaw designed for both casual users and those looking for a reliable tool for various cutting tasks. This model stands out for its blend of power, ease of use, and innovative features that cater to the needs of homeowners and professionals alike.

One of the main features of the Poulan S31SNGBC is its potent 31cc engine. This 2-stroke engine provides ample power to tackle a wide range of cutting jobs, from trimming branches to felling small trees. The engine is designed for optimal performance, ensuring users can complete tasks efficiently without the need for constant refueling or frequent breaks.

The chainsaw is equipped with a 16-inch bar and chain, offering a capable cutting capacity that strikes a balance between maneuverability and cutting power. This size is ideal for handling various applications, making it an excellent choice for DIY enthusiasts and those who require a dependable tool for yard work or light commercial use.

Another significant characteristic of the Poulan S31SNGBC is its Easy Start technology. This feature simplifies the starting process, allowing users to fire up the chainsaw with minimal effort, even after extended periods of inactivity. This is particularly beneficial for less experienced users or those who may struggle with traditional starting mechanisms.

Safety is a primary consideration in the design of the S31SNGBC. It includes a chain brake that halts the chain's movement in the event of kickback, significantly enhancing user safety. Additionally, the chainsaw features anti-vibration technology, which reduces the amount of vibration transferred to the user’s hands, minimizing fatigue during prolonged use.

Maintenance is made easy with the chainsaw’s tool-less chain tensioning system. This design allows users to adjust the chain tension quickly and conveniently, ensuring optimal performance and extending the life of the chain. The clear fuel tank also provides easy visibility of fuel levels, preventing unexpected interruptions during operation.

In summary, the Poulan S31SNGBC is a versatile and user-friendly chainsaw equipped with a powerful engine, a reliable bar and chain, and several innovative features that enhance its usability and safety. This makes it an excellent choice for those looking to efficiently manage their cutting tasks without sacrificing comfort or performance. Whether you're a seasoned professional or a weekend warrior, this chainsaw offers the performance and reliability you need to accomplish your jobs effectively.