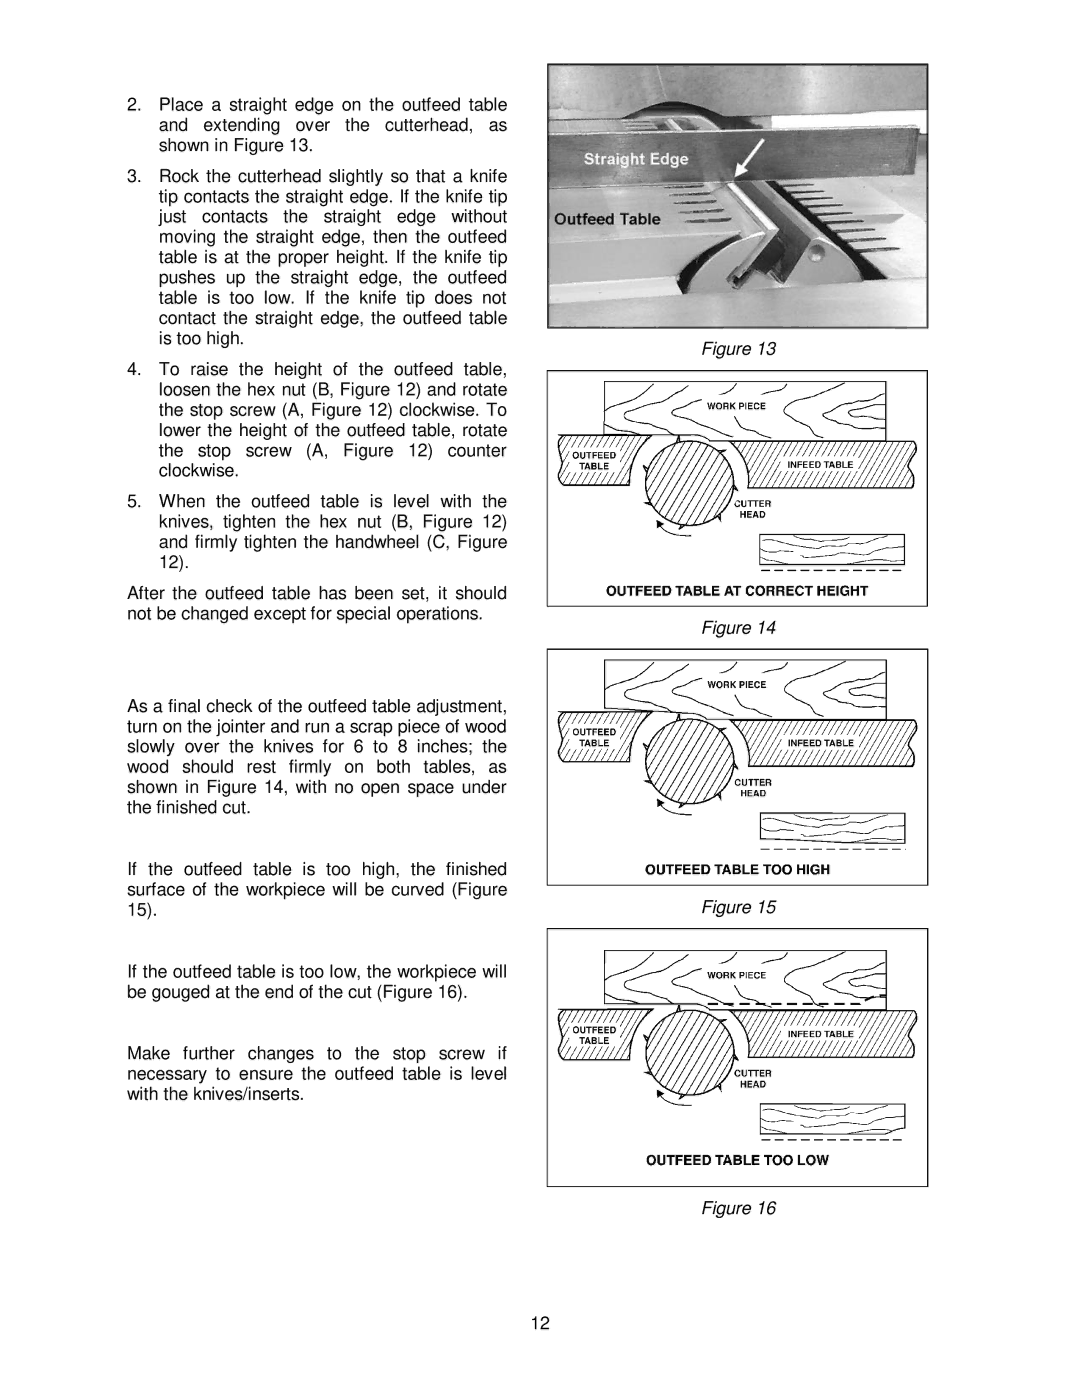
2.Place a straight edge on the outfeed table and extending over the cutterhead, as shown in Figure 13.
3.Rock the cutterhead slightly so that a knife tip contacts the straight edge. If the knife tip just contacts the straight edge without moving the straight edge, then the outfeed table is at the proper height. If the knife tip pushes up the straight edge, the outfeed table is too low. If the knife tip does not contact the straight edge, the outfeed table is too high.
4.To raise the height of the outfeed table, loosen the hex nut (B, Figure 12) and rotate the stop screw (A, Figure 12) clockwise. To lower the height of the outfeed table, rotate the stop screw (A, Figure 12) counter clockwise.
5.When the outfeed table is level with the knives, tighten the hex nut (B, Figure 12) and firmly tighten the handwheel (C, Figure 12).
After the outfeed table has been set, it should not be changed except for special operations.
As a final check of the outfeed table adjustment, turn on the jointer and run a scrap piece of wood slowly over the knives for 6 to 8 inches; the wood should rest firmly on both tables, as shown in Figure 14, with no open space under the finished cut.
If the outfeed table is too high, the finished surface of the workpiece will be curved (Figure 15).
If the outfeed table is too low, the workpiece will be gouged at the end of the cut (Figure 16).
Make further changes to the stop screw if necessary to ensure the outfeed table is level with the knives/inserts.
12
Figure 13
Figure 14
Figure 15
Figure 16