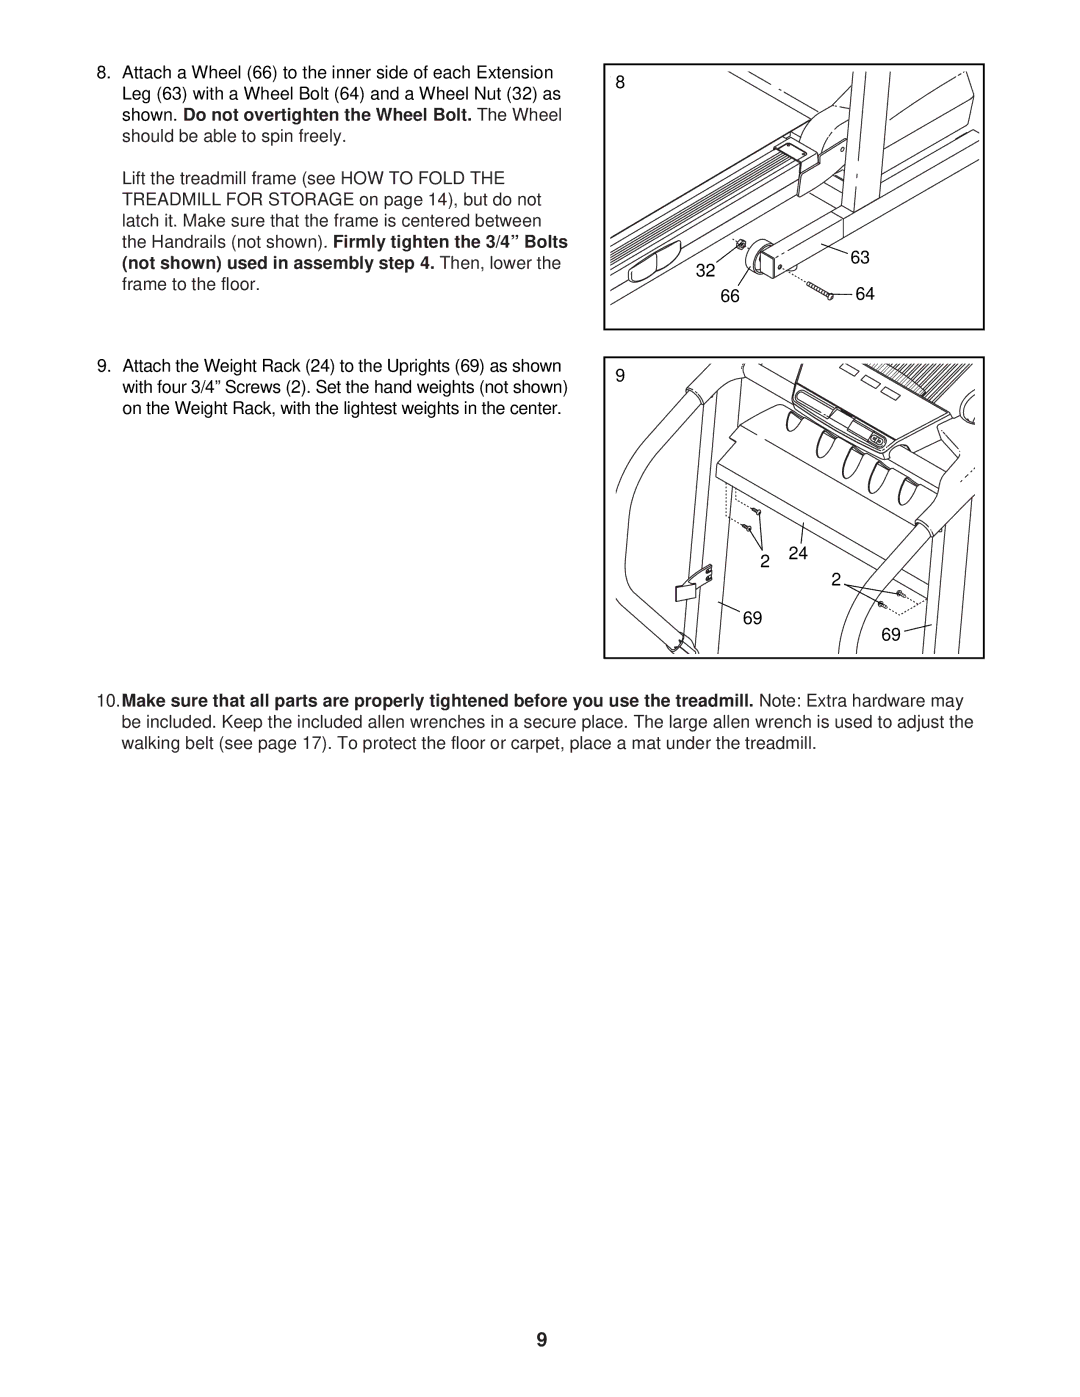
8.Attach a Wheel (66) to the inner side of each Extension Leg (63) with a Wheel Bolt (64) and a Wheel Nut (32) as shown. Do not overtighten the Wheel Bolt. The Wheel should be able to spin freely.
Lift the treadmill frame (see HOW TO FOLD THE TREADMILL FOR STORAGE on page 14), but do not latch it. Make sure that the frame is centered between the Handrails (not shown). Firmly tighten the 3/4” Bolts (not shown) used in assembly step 4. Then, lower the frame to the floor.
9.Attach the Weight Rack (24) to the Uprights (69) as shown with four 3/4” Screws (2). Set the hand weights (not shown) on the Weight Rack, with the lightest weights in the center.
8 |
|
32 | 63 |
| |
66 | 64 |
9 |
|
2 24
2
69
69
10.Make sure that all parts are properly tightened before you use the treadmill. Note: Extra hardware may be included. Keep the included allen wrenches in a secure place. The large allen wrench is used to adjust the walking belt (see page 17). To protect the floor or carpet, place a mat under the treadmill.
9
