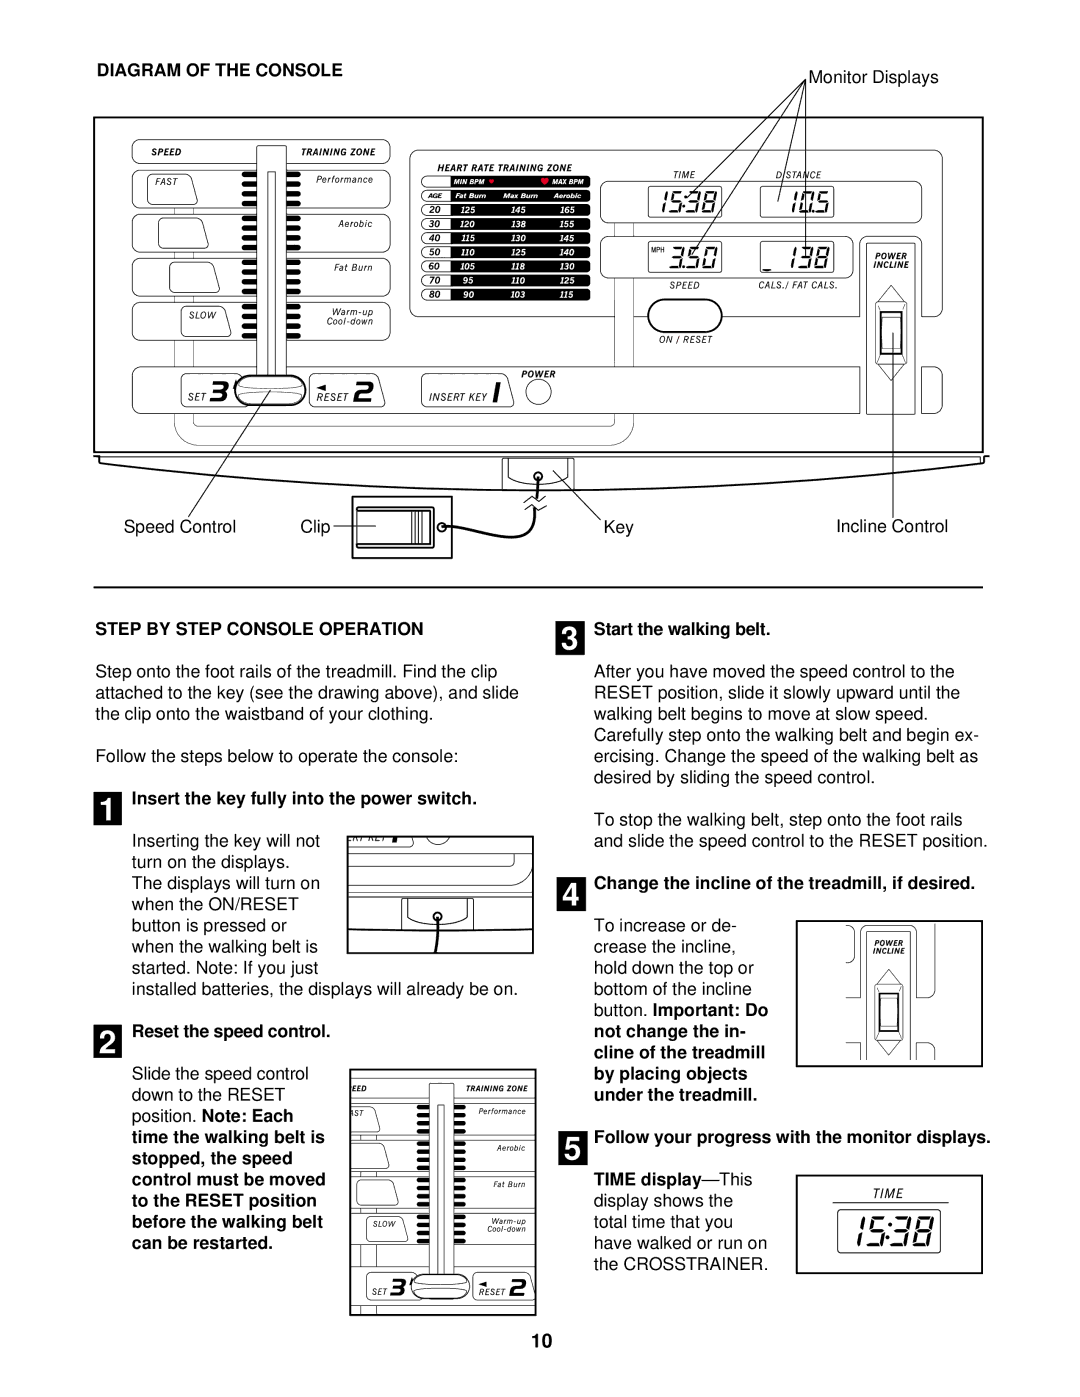
DIAGRAM OF THE CONSOLE | Monitor Displays |
|
Speed Control | Clip | Key | Incline Control |
STEP BY STEP CONSOLE OPERATION | 3 | Start the walking belt. |
Step onto the foot rails of the treadmill. Find the clip attached to the key (see the drawing above), and slide the clip onto the waistband of your clothing.
Follow the steps below to operate the console:
1 | Insert the key fully into the power switch. |
|
| |
| Inserting the key will not |
|
|
|
|
|
| ||
| turn on the displays. |
|
|
|
| The displays will turn on |
|
|
|
|
|
| 4 | |
| when the ON/RESET |
|
| |
| ||||
| button is pressed or |
|
|
|
| when the walking belt is |
|
|
|
| started. Note: If you just |
|
| |
| installed batteries, the displays will already be on. |
|
| |
After you have moved the speed control to the RESET position, slide it slowly upward until the walking belt begins to move at slow speed.
Carefully step onto the walking belt and begin ex- ercising. Change the speed of the walking belt as desired by sliding the speed control.
To stop the walking belt, step onto the foot rails and slide the speed control to the RESET position.
Change the incline of the treadmill, if desired.
To increase or de- crease the incline, hold down the top or bottom of the incline button. Important: Do
2 Reset the speed control.
Slide the speed control down to the RESET position. Note: Each time the walking belt is stopped, the speed control must be moved to the RESET position before the walking belt can be restarted.
5 |
10 |
not change the in- cline of the treadmill by placing objects under the treadmill.
Follow your progress with the monitor displays.
TIME