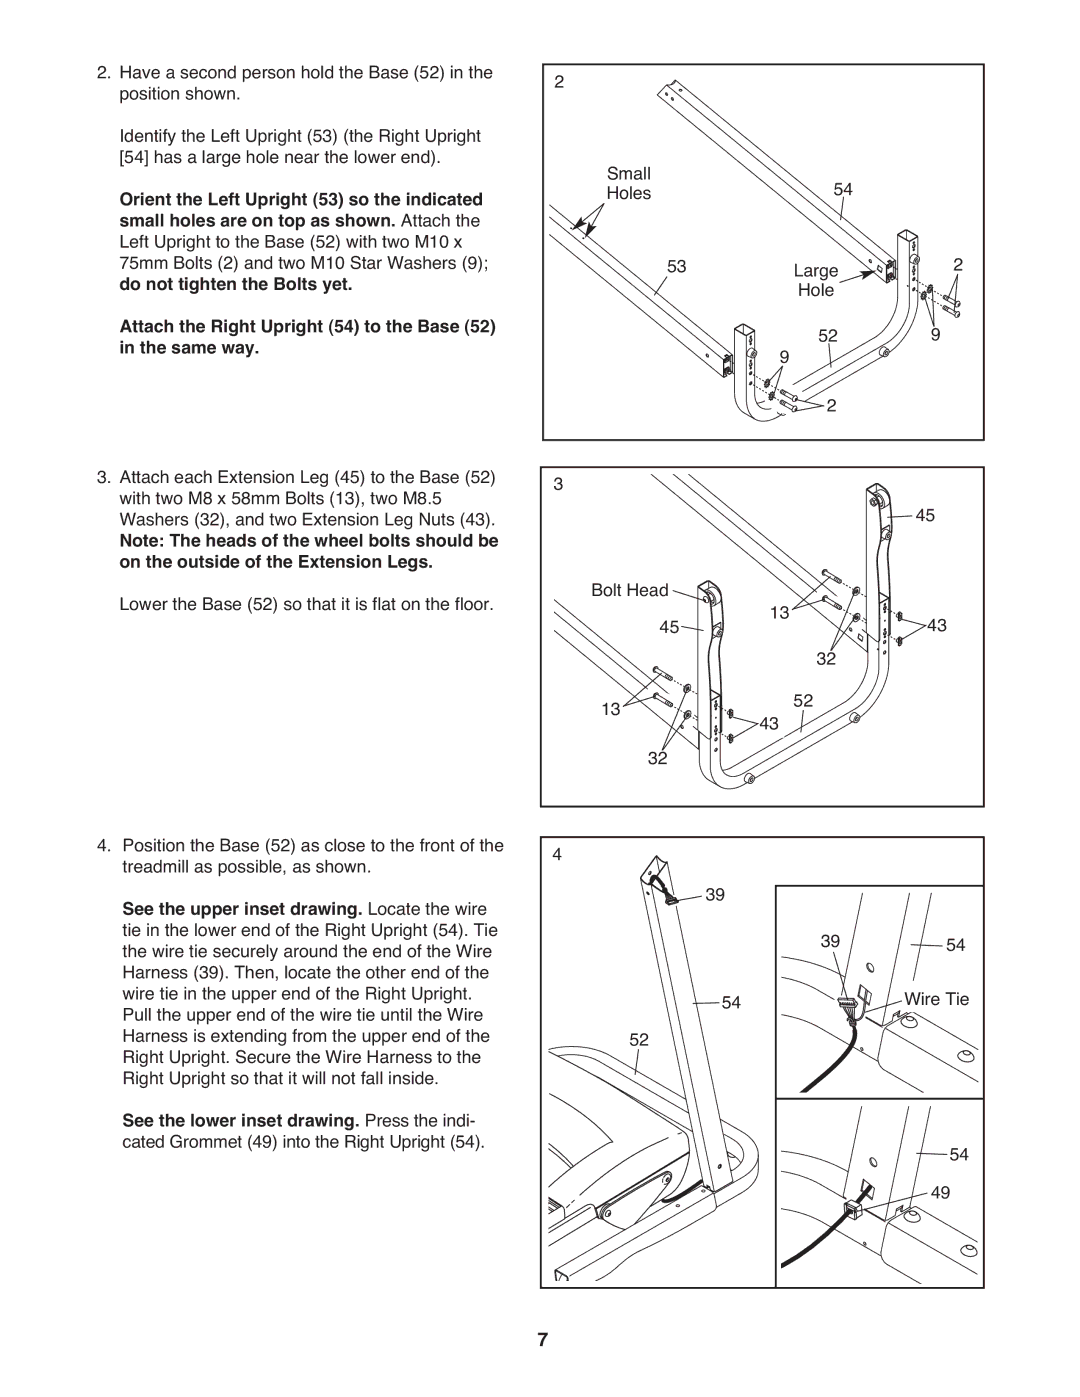
2. Have a second person hold the Base (52) in the | 2 |
|
|
|
position shown. |
|
|
| |
Identify the Left Upright (53) (the Right Upright |
|
|
|
|
[54] has a large hole near the lower end). | Small |
| 54 |
|
Orient the Left Upright (53) so the indicated |
|
| ||
Holes |
|
| ||
small holes are on top as shown. Attach the |
|
|
|
|
Left Upright to the Base (52) with two M10 x | 53 |
| Large | 2 |
75mm Bolts (2) and two M10 Star Washers (9); |
| |||
do not tighten the Bolts yet. |
|
| Hole |
|
Attach the Right Upright (54) to the Base (52) |
| 9 | 52 | 9 |
in the same way. |
| |||
|
|
| 2 |
|
3. Attach each Extension Leg (45) to the Base (52) | 3 |
|
|
|
with two M8 x 58mm Bolts (13), two M8.5 |
|
| 45 | |
Washers (32), and two Extension Leg Nuts (43). |
|
|
| |
Note: The heads of the wheel bolts should be |
|
|
|
|
on the outside of the Extension Legs. | Bolt Head |
|
|
|
Lower the Base (52) so that it is flat on the floor. | 13 |
| 43 | |
45 | 32 | |||
|
|
|
| |
| 13 | 43 | 52 |
|
| 32 |
|
|
|
4. Position the Base (52) as close to the front of the | 4 |
|
|
|
treadmill as possible, as shown. | 39 |
|
| |
See the upper inset drawing. Locate the wire |
|
|
| |
tie in the lower end of the Right Upright (54). Tie |
|
| 39 | 54 |
the wire tie securely around the end of the Wire |
|
| ||
Harness (39). Then, locate the other end of the |
|
|
|
|
wire tie in the upper end of the Right Upright. |
| 54 |
| Wire Tie |
Pull the upper end of the wire tie until the Wire |
|
| ||
Harness is extending from the upper end of the | 52 |
|
|
|
Right Upright. Secure the Wire Harness to the |
|
|
| |
Right Upright so that it will not fall inside. |
|
|
|
|
See the lower inset drawing. Press the indi- |
|
|
|
|
cated Grommet (49) into the Right Upright (54). |
|
|
| 4954 |
|
|
|
| |
| 7 |
|
|
|