COMPUTER INPUT

SELECTING INPUT SOURCE


DIRECT OPERATION

INPUT 1/2 button


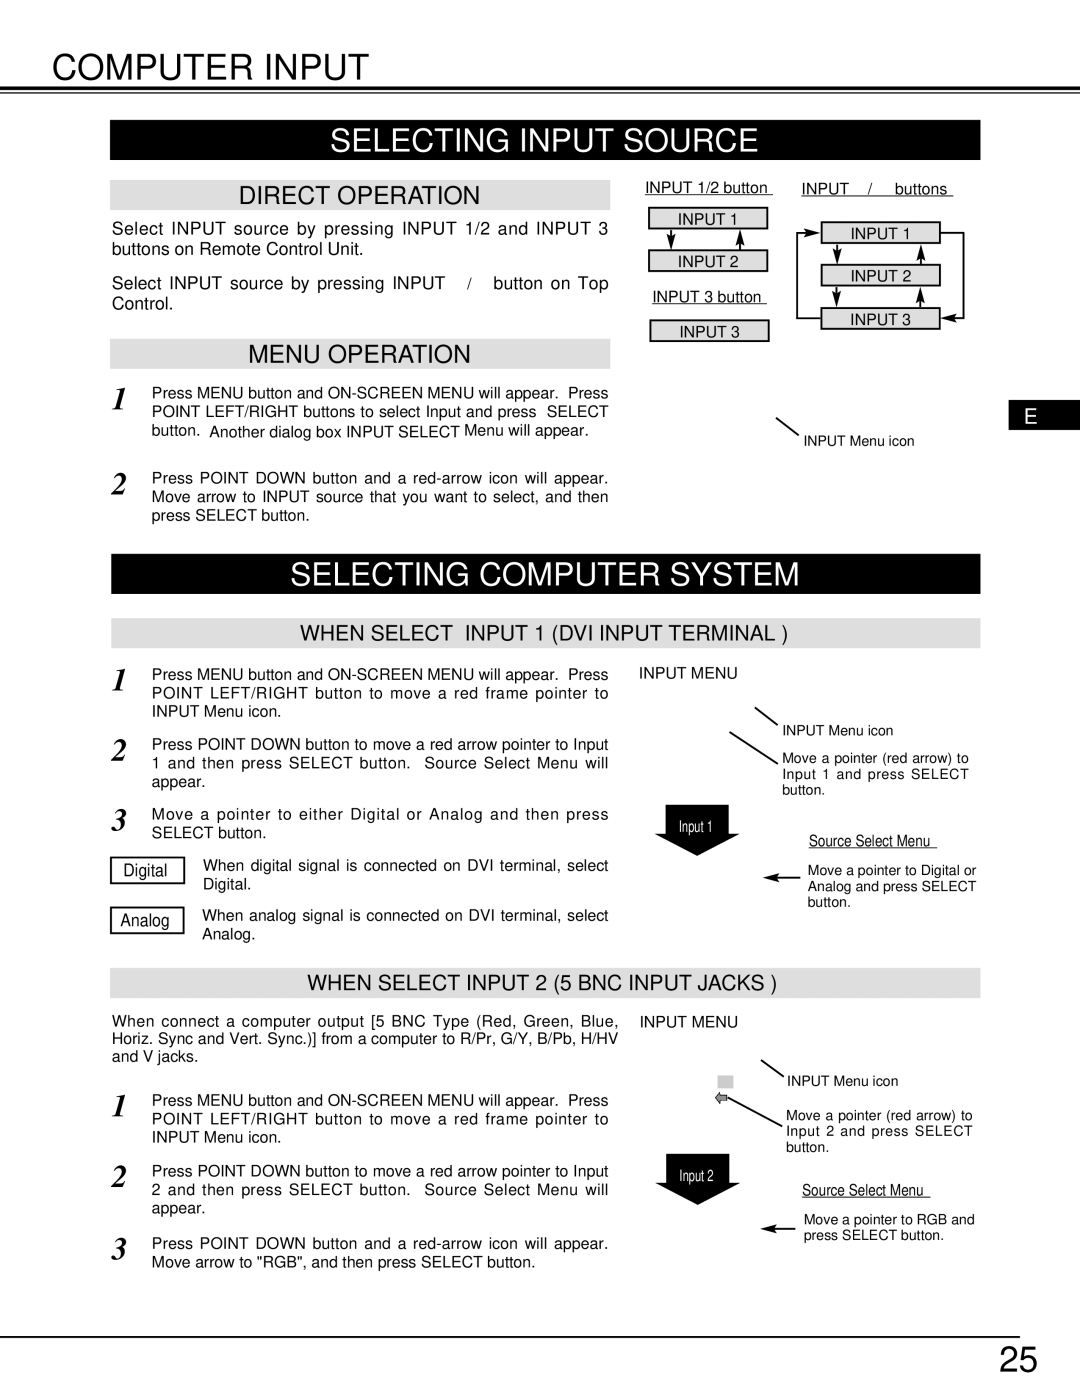
Select INPUT source by pressing INPUT 1/2 and INPUT 3


INPUT 1


buttons on Remote Control Unit.


INPUT 2


Select INPUT source by pressing INPUT /button on Top


INPUT 3 button

Control.


INPUT 3


MENU OPERATION


1

Press MENU button and ON-SCREEN MENU will appear. Press


POINT LEFT/RIGHT buttons to select Input and press SELECT


button. Another dialog box INPUT SELECT Menu will appear.


2

Press POINT DOWN button and a red-arrow icon will appear.


Move arrow to INPUT source that you want to select, and then


press SELECT button.

INPUT /buttons

INPUT 1

INPUT 2

INPUT 3

E

INPUT Menu icon

SELECTING COMPUTER SYSTEM

WHEN SELECT INPUT 1 (DVI INPUT TERMINAL )

1

Press MENU button and ON-SCREEN MENU will appear. Press

POINT LEFT/RIGHT button to move a red frame pointer to


INPUT Menu icon.

2

Press POINT DOWN button to move a red arrow pointer to Input

1 and then press SELECT button. Source Select Menu will


appear.

3

Move a pointer to either Digital or Analog and then press

SELECT button.


When digital signal is connected on DVI terminal, select

Digital


Digital.


When analog signal is connected on DVI terminal, select

Analog


Analog.


INPUT MENU

INPUT Menu icon

Move a pointer (red arrow) to Input 1 and press SELECT button.

Input 1

Source Select Menu

Move a pointer to Digital or Analog and press SELECT button.

WHEN SELECT INPUT 2 (5 BNC INPUT JACKS )

When connect a computer output [5 BNC Type (Red, Green, Blue, Horiz. Sync and Vert. Sync.)] from a computer to R/Pr, G/Y, B/Pb, H/HV and V jacks.

1

Press MENU button and ON-SCREEN MENU will appear. Press

POINT LEFT/RIGHT button to move a red frame pointer to


INPUT Menu icon.

2

Press POINT DOWN button to move a red arrow pointer to Input

2 and then press SELECT button. Source Select Menu will


appear.

3

Press POINT DOWN button and a red-arrow icon will appear.

Move arrow to "RGB", and then press SELECT button.

INPUT MENU

INPUT Menu icon

Move a pointer (red arrow) to Input 2 and press SELECT button.

Input 2

Source Select Menu

Move a pointer to RGB and press SELECT button.

25

Page 25
Image 25
Proxima ASA Pro AV 9550 manual Computer Input, Selecting Input Source, Selecting Computer System, Input Menu

Pro AV 9550 specifications

Proxima ASA Pro AV 9550 is a high-performance projector tailored for a variety of professional environments, including corporate, educational, and entertainment settings. With its exceptional image quality and versatile features, the Pro AV 9550 stands out as an ideal solution for presentations, meetings, and home cinema experiences.

One of the main features of the Proxima ASA Pro AV 9550 is its impressive brightness level. With a luminous output of up to 5,500 ANSI lumens, it ensures clear and vibrant images even in well-lit rooms. This level of brightness is crucial for maintaining visual quality in large venues or spaces with ambient light, making the Pro AV 9550 a viable option for conference rooms and classrooms.

The projector utilizes advanced DLP technology, which offers remarkable color accuracy and image stability. DLP (Digital Light Processing) is known for its reliability and longevity, providing sharp images without the risk of color degradation over time. The Pro AV 9550 also features a high native resolution of 1920x1080 (Full HD), ensuring that presentations and videos are displayed with outstanding clarity.

In terms of connectivity, the Pro AV 9550 is equipped with a comprehensive range of ports, including HDMI, VGA, and USB, making it compatible with various devices such as laptops, Blu-ray players, and media streaming devices. This versatility allows users to connect effortlessly and switch between devices during presentations. Additionally, built-in wireless capabilities enable convenient screen sharing and content streaming, further enhancing its usability in collaborative environments.

The projector is designed with user-friendliness in mind. It comes with an intuitive interface and remote control, making it easy for users to navigate settings without requiring extensive technical knowledge. Moreover, the Pro AV 9550 boasts a compact and lightweight design, allowing for easy portability between different locations.

For enhanced durability, the Pro AV 9550 features a long-lasting lamp life of up to 15,000 hours in Eco Mode, reducing the frequency of lamp replacements and maintenance costs. Overall, the Proxima ASA Pro AV 9550 combines advanced technology and practical features, making it a top choice for professionals seeking high-quality projection solutions in a range of settings. Whether for educational purposes, corporate presentations, or home entertainment, the Pro AV 9550 delivers exceptional performance and reliability.