Manuals
/
PYLE Audio
/
Home Audio
/
Stereo System
PYLE Audio
PDSP850
owner manual
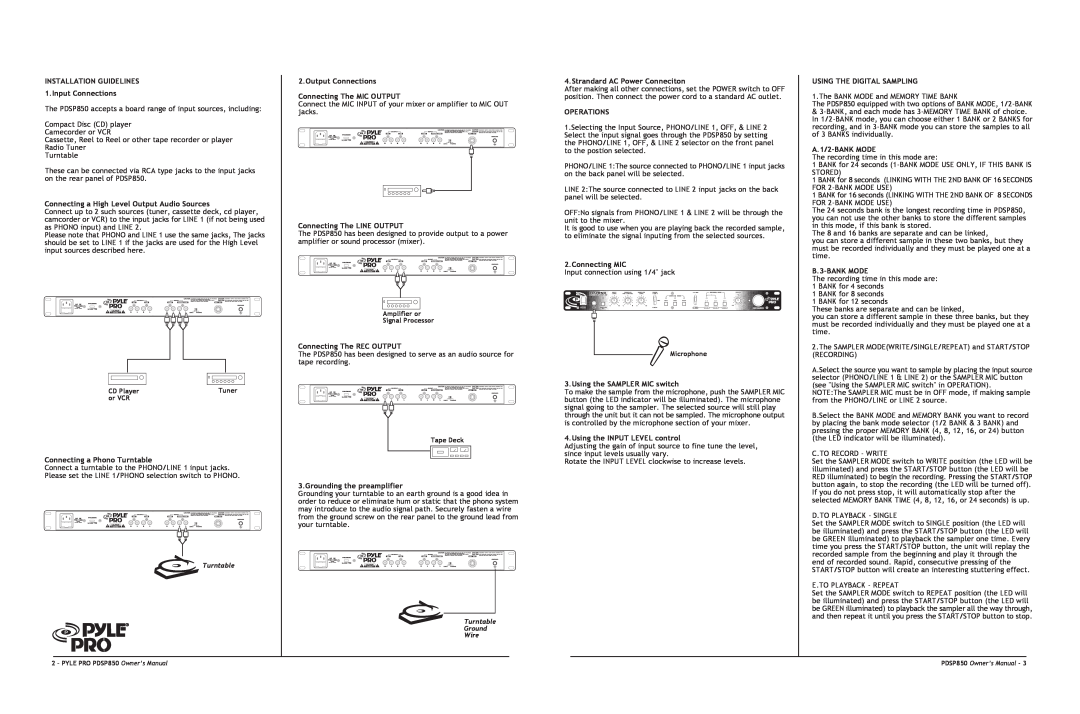
INSTALLATION GUIDELINES 1.Input Connections
Models:
PDSP850
1
3
4
4
Download
4 pages
39.7 Kb
1
2
3
4
Specification
Warranty
Features And Controls
Page 3
Image 3
Page 2
Page 4
Page 3
Image 3
Page 2
Page 4
Contents
Address
Date of Purchase
Model No
City, State ZIP
FEATURES AND CONTROLS
INSTALLATION GUIDELINES 1.Input Connections
Street
Here Stamp Place
PDSP850 Specifications
Audio, Inc
Top
Page
Image
Contents