Manuals
/
PYLE Audio
/
TV and Video
/
TV Mount
PYLE Audio
PSWLE55
manual
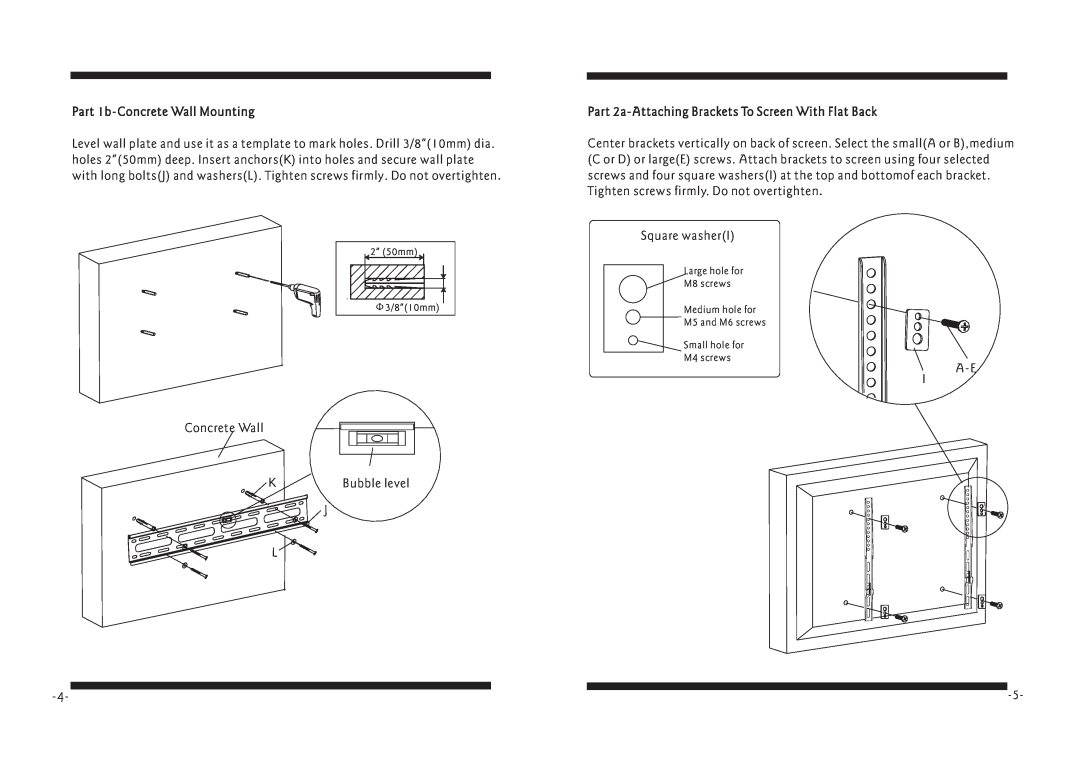
Part 1b-Concrete Wall Mounting
Models:
PSWLE55
1
4
4
Download
4 pages
38.48 Kb
1
2
3
4
Install
Page 4
Image 4
Page 3
Page 4
Page 4
Image 4
Page 3
Page 4
Contents
Item No.PSWLE55
INSTALLATION GUIDE
Thank you for choosing our product
Hardware Kit
Part 3-Mounting the flat panel screen
Part 2b-Attaching brackets to screen with recessed back
Part 1a-Wood Stud Mounting
Part 1b-Concrete Wall Mounting
Part 2a-Attaching Brackets To Screen With Flat Back
Top
Page
Image
Contents