Part 5 – Accessing the DVR menus
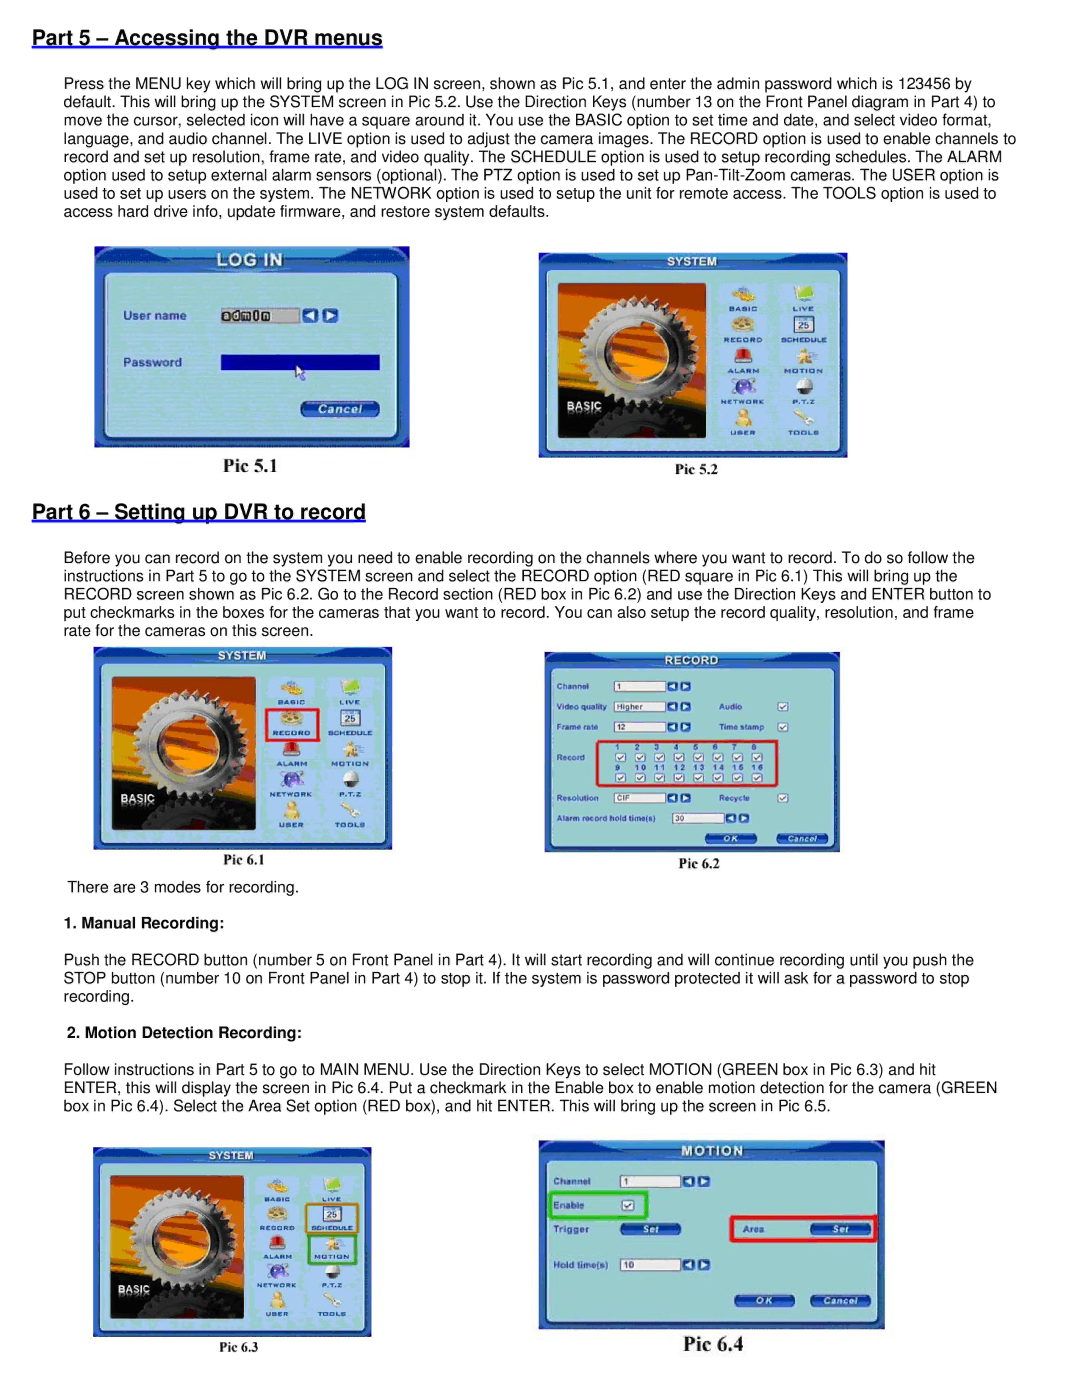
Press the MENU key which will bring up the LOG IN screen, shown as Pic 5.1, and enter the admin password which is 123456 by default. This will bring up the SYSTEM screen in Pic 5.2. Use the Direction Keys (number 13 on the Front Panel diagram in Part 4) to move the cursor, selected icon will have a square around it. You use the BASIC option to set time and date, and select video format, language, and audio channel. The LIVE option is used to adjust the camera images. The RECORD option is used to enable channels to record and set up resolution, frame rate, and video quality. The SCHEDULE option is used to setup recording schedules. The ALARM option used to setup external alarm sensors (optional). The PTZ option is used to set up
Part 6 – Setting up DVR to record
Before you can record on the system you need to enable recording on the channels where you want to record. To do so follow the instructions in Part 5 to go to the SYSTEM screen and select the RECORD option (RED square in Pic 6.1) This will bring up the RECORD screen shown as Pic 6.2. Go to the Record section (RED box in Pic 6.2) and use the Direction Keys and ENTER button to put checkmarks in the boxes for the cameras that you want to record. You can also setup the record quality, resolution, and frame rate for the cameras on this screen.
There are 3 modes for recording.
1. Manual Recording:
Push the RECORD button (number 5 on Front Panel in Part 4). It will start recording and will continue recording until you push the STOP button (number 10 on Front Panel in Part 4) to stop it. If the system is password protected it will ask for a password to stop recording.
2. Motion Detection Recording:
Follow instructions in Part 5 to go to MAIN MENU. Use the Direction Keys to select MOTION (GREEN box in Pic 6.3) and hit ENTER, this will display the screen in Pic 6.4. Put a checkmark in the Enable box to enable motion detection for the camera (GREEN box in Pic 6.4). Select the Area Set option (RED box), and hit ENTER. This will bring up the screen in Pic 6.5.
