21-869.fm Page 4 Wednesday, October 13, 1999 11:50 AM
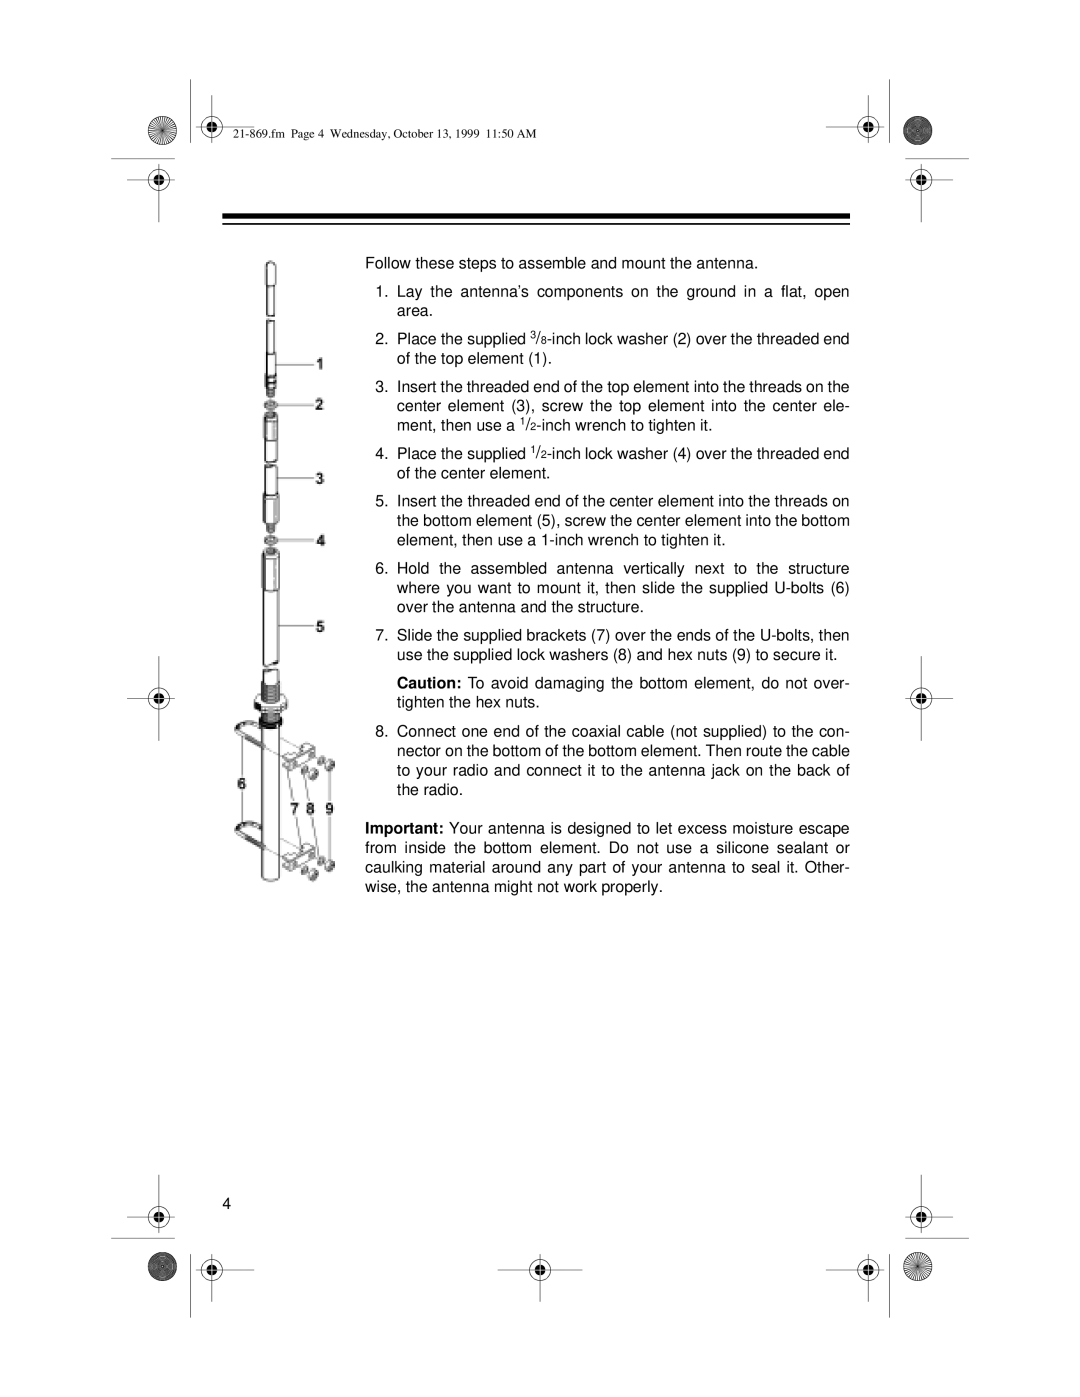
Follow these steps to assemble and mount the antenna.
1.Lay the antenna’s components on the ground in a flat, open area.
2.Place the supplied
3.Insert the threaded end of the top element into the threads on the center element (3), screw the top element into the center ele- ment, then use a
4.Place the supplied
5.Insert the threaded end of the center element into the threads on the bottom element (5), screw the center element into the bottom element, then use a
6.Hold the assembled antenna vertically next to the structure where you want to mount it, then slide the supplied
7.Slide the supplied brackets (7) over the ends of the
Caution: To avoid damaging the bottom element, do not over- tighten the hex nuts.
8.Connect one end of the coaxial cable (not supplied) to the con- nector on the bottom of the bottom element. Then route the cable to your radio and connect it to the antenna jack on the back of the radio.
Important: Your antenna is designed to let excess moisture escape from inside the bottom element. Do not use a silicone sealant or caulking material around any part of your antenna to seal it. Other- wise, the antenna might not work properly.
4