All-Hazards Desktop Weather Alert Radio
| Quick Start Guide | ||
|
|
|
|
|
|
|
|
|
|
|
|
Step 1: Power your radio
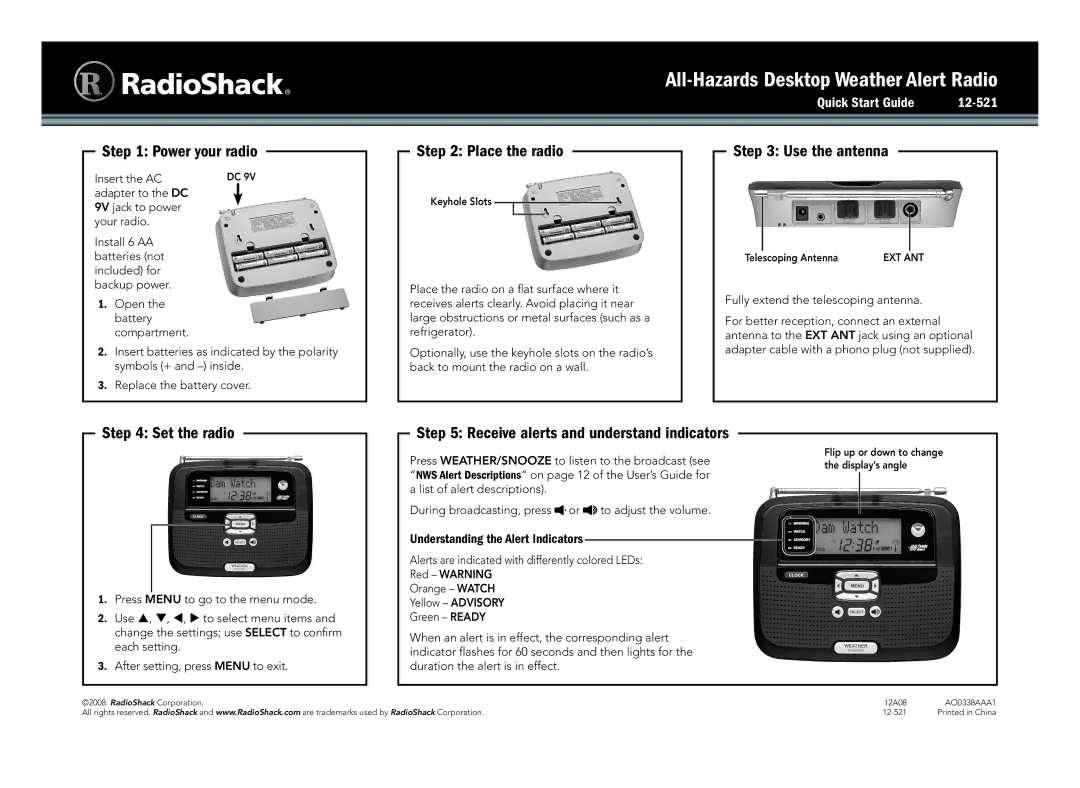
Insert the AC | DC 9V | |
adapter to the DC |
|
|
9V jack to power |
|
|
your radio. |
|
|
Install 6 AA |
|
|
batteries (not |
|
|
included) for |
|
|
backup power. |
|
|
1.Open the battery compartment.
2.Insert batteries as indicated by the polarity symbols (+ and
3.Replace the battery cover.
Step 2: Place the radio
Keyhole Slots
Place the radio on a flat surface where it receives alerts clearly. Avoid placing it near large obstructions or metal surfaces (such as a refrigerator).
Optionally, use the keyhole slots on the radio’s back to mount the radio on a wall.
Step 3: Use the antenna
Telescoping Antenna | EXT ANT |
Fully extend the telescoping antenna.
For better reception, connect an external antenna to the EXT ANT jack using an optional adapter cable with a phono plug (not supplied).
Step 4: Set the radio
1.Press MENU to go to the menu mode.
2.Use , , , to select menu items and change the settings; use SELECT to confirm each setting.
3.After setting, press MENU to exit.
Step 5: Receive alerts and understand indicators
Press WEATHER/SNOOZE to listen to the broadcast (see “NWS Alert Descriptions“ on page 12 of the User’s Guide for a list of alert descriptions).
During broadcasting, press ![]() or
or ![]() to adjust the volume.
to adjust the volume.
Understanding the Alert Indicators
Alerts are indicated with differently colored LEDs: Red – WARNING
Orange – WATCH
Yellow – ADVISORY Green – READY
When an alert is in effect, the corresponding alert indicator flashes for 60 seconds and then lights for the duration the alert is in effect.
Flip up or down to change the display’s angle
©2008. RadioShack Corporation. | 12A08 | AO0338AAA1 |
All rights reserved. RadioShack and www.RadioShack.com are trademarks used by RadioShack Corporation. | Printed in China |
