
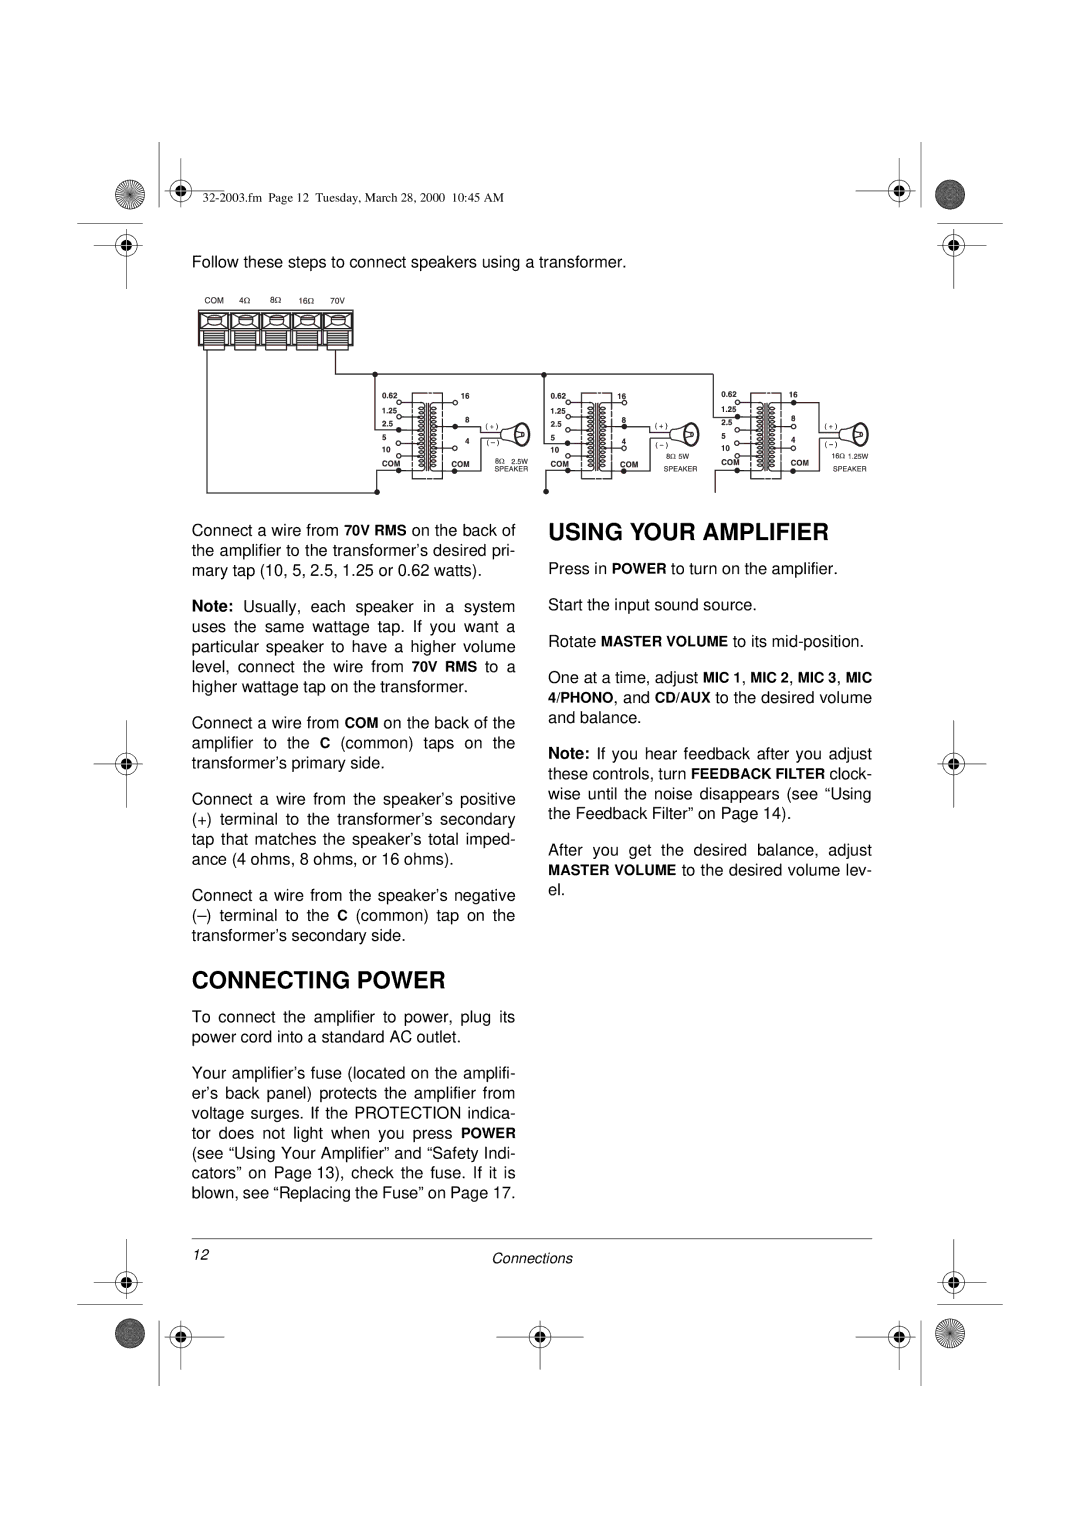
MPA-125 specifications
The Radio Shack MPA-125 is a versatile and powerful amplifier that was designed to meet the demands of audio enthusiasts and professionals alike. Renowned for its robust performance and reliability, the MPA-125 has garnered a reputation as a dependable choice for a variety of sound applications, from home audio systems to live sound reinforcement.One of the standout features of the MPA-125 is its impressive power output. With a rating of 125 watts per channel at 8 ohms, this amplifier ensures that audio signals are delivered with clarity and precision, making it suitable for driving a wide range of speakers. The 2-channel design allows for stereo applications, providing a rich and immersive listening experience. Additionally, the MPA-125 can operate at a low impedance, ensuring compatibility with various speaker configurations.
The MPA-125 is equipped with several advanced technologies that enhance its performance. The built-in thermal protection circuit safeguards the amplifier from overheating, allowing it to operate efficiently even during extended use. The amplifier also features a soft clipping circuit, which prevents distortion during peak output levels, ensuring that audio quality remains consistent and clear at high volumes.
User-friendly design is another hallmark of the MPA-125. The front panel includes easy-to-use volume controls, indicator lights, and speaker output terminals. The amplifier is designed for straightforward integration into existing audio setups, making it accessible for users of all experience levels. The balanced XLR inputs provide a secure and noise-free connection, ideal for professional audio applications.
Constructed with high-quality components, the MPA-125 is built to last, ensuring longevity and sustained performance over time. Its compact form factor makes it easy to incorporate into various environments, from home theaters to portable sound systems.
Overall, the Radio Shack MPA-125 is a reliable and powerful amplifier that brings out the best in audio equipment. Its combination of solid performance, user-friendly features, and advanced technologies makes it an excellent choice for anyone looking to elevate their audio experience, whether for casual listening or professional use.