3. INSTALLATION
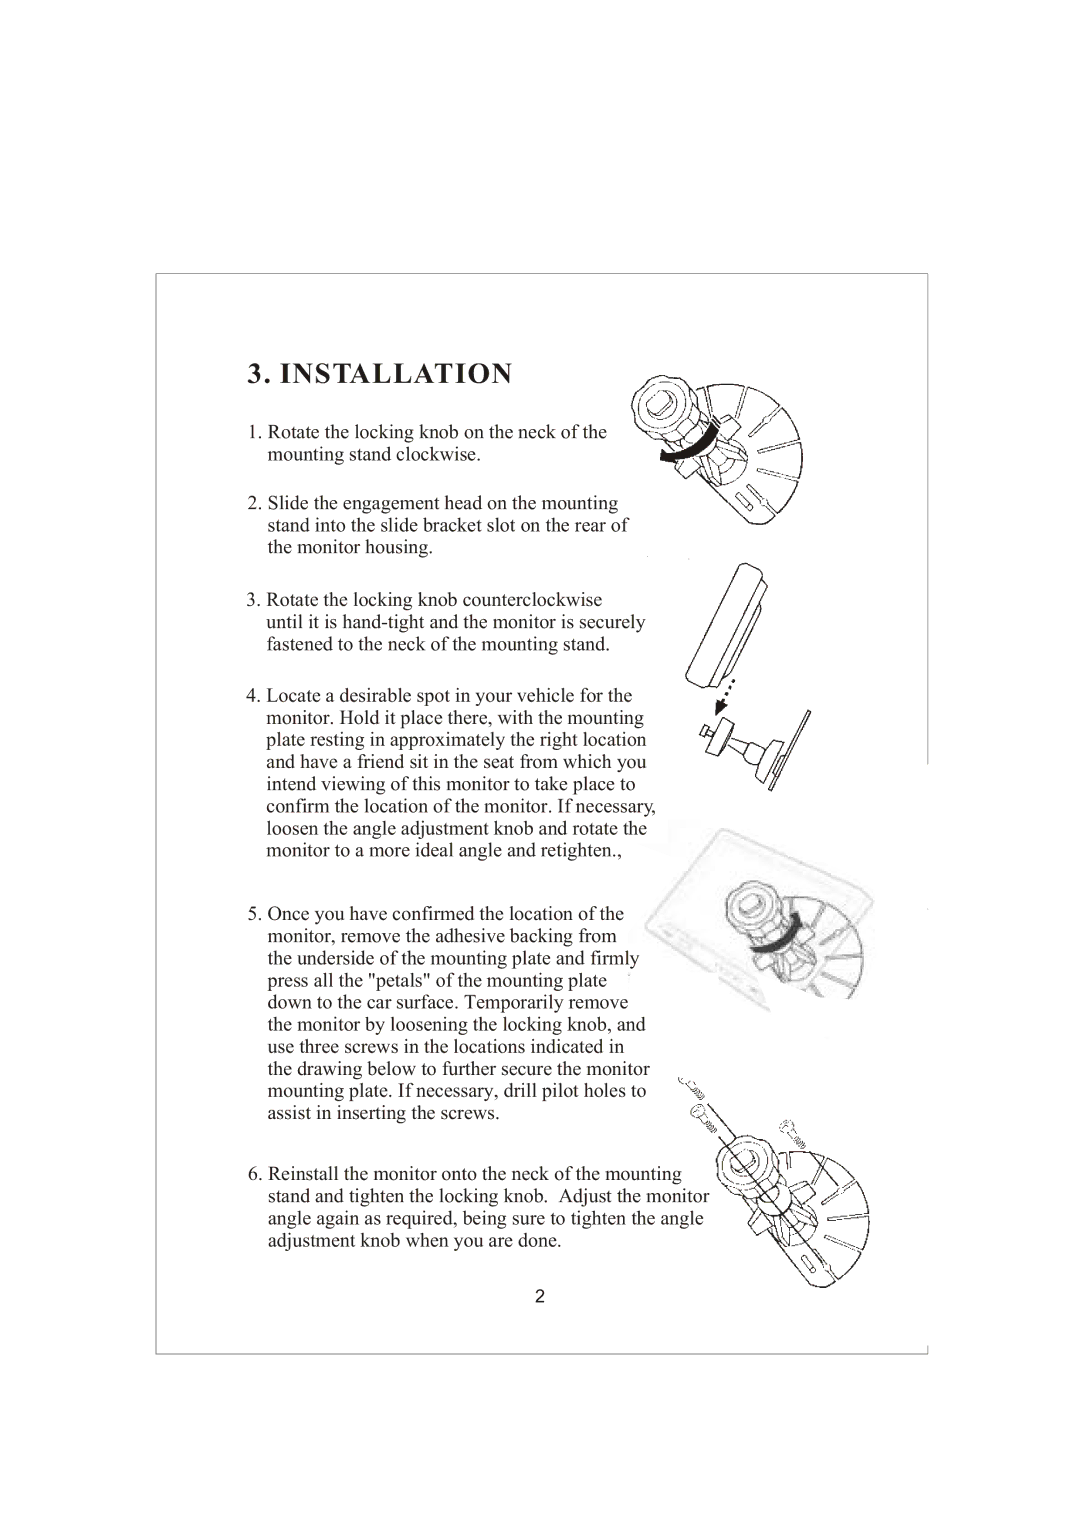
1.Rotate the locking knob on the neck of the mounting stand clockwise.
2.Slide the engagement head on the mounting stand into the slide bracket slot on the rear of the monitor housing.
3.Rotate the locking knob counterclockwise until it is
4.Locate a desirable spot in your vehicle for the monitor. Hold it place there, with the mounting plate resting in approximately the right location and have a friend sit in the seat from which you intend viewing of this monitor to take place to confirm the location of the monitor. If necessary, loosen the angle adjustment knob and rotate the monitor to a more ideal angle and retighten.,
5.Once you have confirmed the location of the monitor, remove the adhesive backing from the underside of the mounting plate and firmly press all the "petals" of the mounting plate down to the car surface. Temporarily remove the monitor by loosening the locking knob, and use three screws in the locations indicated in the drawing below to further secure the monitor mounting plate. If necessary, drill pilot holes to assist in inserting the screws.
6.Reinstall the monitor onto the neck of the mounting stand and tighten the locking knob. Adjust the monitor angle again as required, being sure to tighten the angle adjustment knob when you are done.
2