Manuals
/
RCA
/
Home Audio
/
CD Player
RCA
RP-7900A
user service
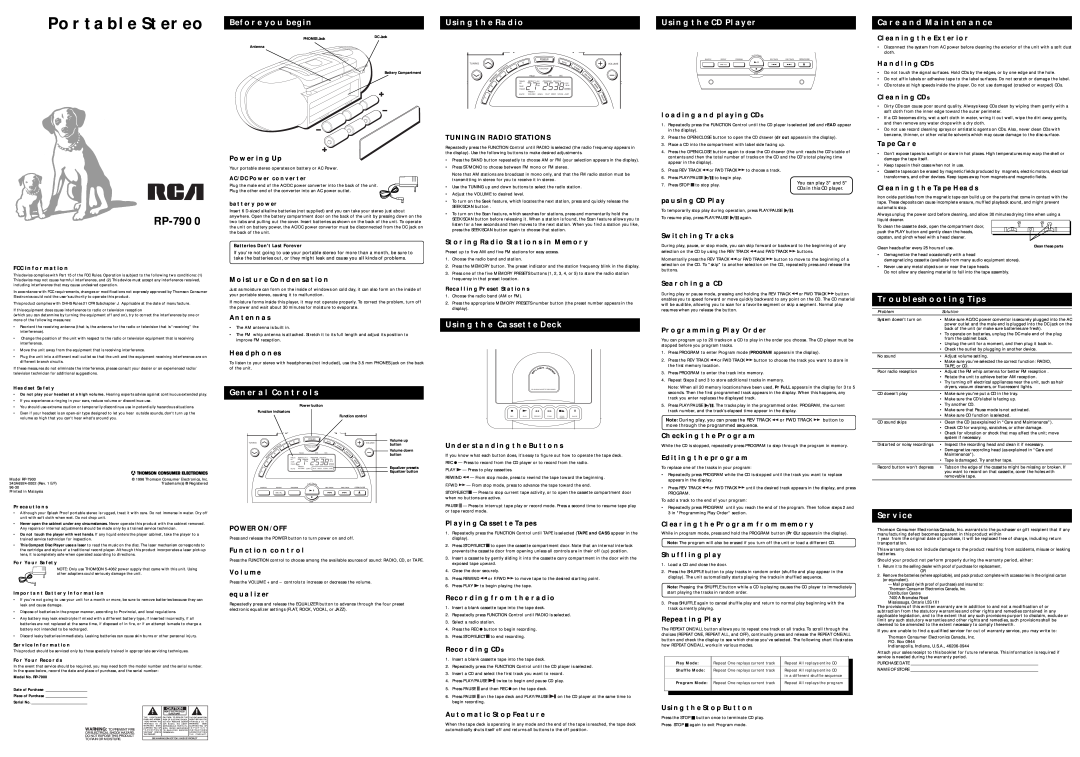
Portable Stereo, Before You Begin, General Controls, Using The Radio
Models:
RP-7900A
1
1
1
Download
1 pages
8.6 Kb
1
Page 1
Image 1
Page 1
Page 1
Page 1
Image 1
Page 1
Page 1
Contents
USING THE CASSETTE DECK
USING THE RADIO
USING THE CD PLAYER
CARE AND MAINTENANCE
Top
Page
Image
Contents