Cleaning & Maintenance
To assure smooth, efficient perfor- mance, it is important to clean your shaver. The
The shaver is a washable shaver, the
Daily
Brush inside the head assembly after each use:
1. Turn the shaver off.
2.Grip the head
assembly by the three ridges and pull it off the shaver.
3. Use the cleaning brush to sweep out the internal part of the head assembly and the hair pocket area, where 3 shaver spindles are located.
4. Replace head assembly.
10
Weekly
Clean under the cutter assembly at least once a week:
1.Turn the shaver off.
2.Open the head assembly as above.
3.Unscrew the center screw knob
to remove the cutter retainer assembly.
4.Use the cleaning brush to sweep the dust and hairs from under the cutters.
5.Replace head assembly.
Lubricate
Remington® Shaver Saver® Lubricant
Cleaning Cautions
■The construction of this shaver is for dry operation only. It is not waterproof. Never put the shaver in part or completely into water.
■Never clean the shaver or replace the cutters while it is plugged into an electrical outlet.
■Do not use an aggressive cleansing agent as this may destroy the shaver coatings.
■Do not clean or remove the head assembly while the shaver is
running or plugged in, as it may cause damage to the unit's heads or cutters.
■Replace worn or damaged parts with Remington® replacement parts only.
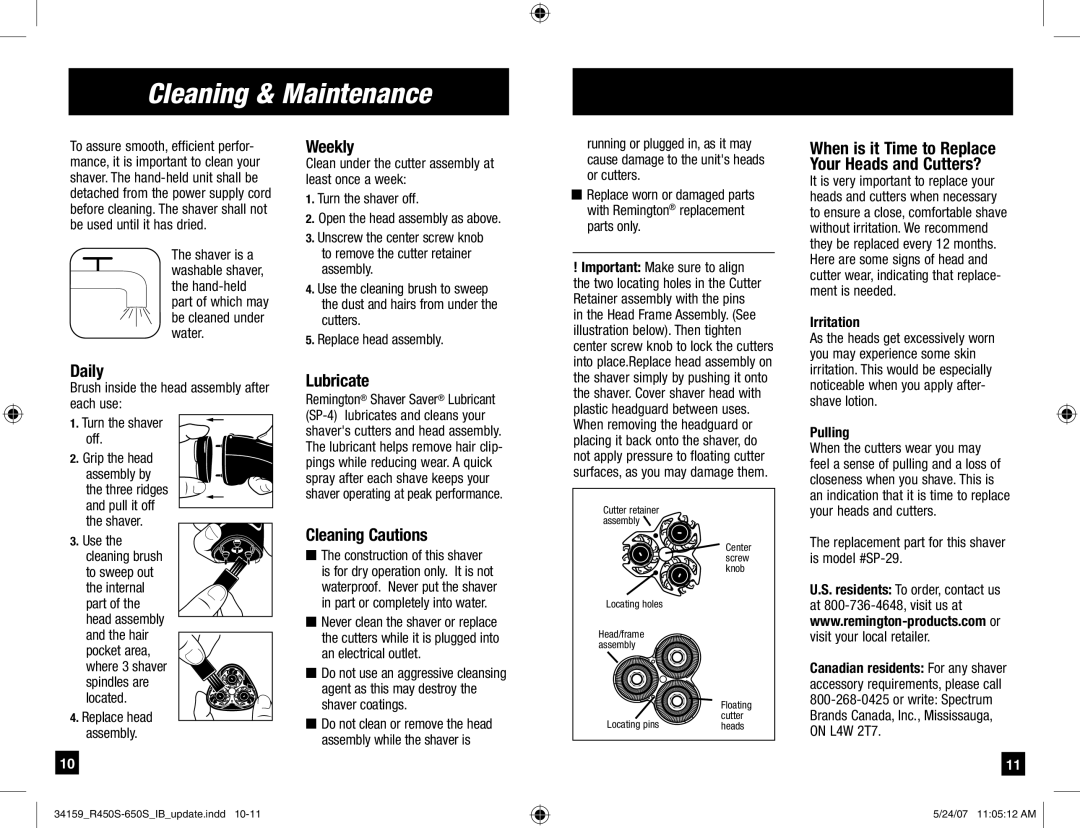
!Important: Make sure to align the two locating holes in the Cutter Retainer assembly with the pins in the Head Frame Assembly. (See illustration below). Then tighten center screw knob to lock the cutters into place.Replace head assembly on the shaver simply by pushing it onto the shaver. Cover shaver head with plastic headguard between uses. When removing the headguard or placing it back onto the shaver, do not apply pressure to floating cutter surfaces, as you may damage them.
Cutter retainer |
|
assembly |
|
| Center |
| screw |
| knob |
Locating holes |
|
Head/frame |
|
assembly |
|
| Floating |
Locating pins | cutter |
heads |
When is it Time to Replace Your Heads and Cutters?
It is very important to replace your heads and cutters when necessary to ensure a close, comfortable shave without irritation. We recommend they be replaced every 12 months. Here are some signs of head and cutter wear, indicating that replace- ment is needed.
Irritation
As the heads get excessively worn you may experience some skin irritation. This would be especially noticeable when you apply after- shave lotion.
Pulling
When the cutters wear you may feel a sense of pulling and a loss of closeness when you shave. This is an indication that it is time to replace your heads and cutters.
The replacement part for this shaver is model #SP-29.
U.S. residents: To order, contact us at
Canadian residents: For any shaver accessory requirements, please call
11
5/24/07 11:05:12 AM