Getting Used To Your Shaver
MicroFlex® Extra features more blades than any other rotary for an extra close,extra comfortable,extra fast shave - Guaranteed!
As with every shaver, your shaver will improve over time. So allow about three weeks to develop an effective shaving style
and for your skin to adjust to the new shaver. The adaptation period may take a little longer if your skin is sensitive,if you are switching from a different way of shaving,or if you alternate between shaving methods.
Turn on the Shaver
Push up the on/off button while pushing in its locking bar. (Locking bar on
Mustache Trimming
Hold shaver heads at the desired trim line for a quick,easy, professional trim. Trim the upper edge of your moustache with the
Pop Up the Trimmer
Hold the shaver as shown,and push up the trimmer button to pop it up for use. To conserve energy, we recommend using the trimmer only when needed for trimming.When you’re done,push the
trimmer button downward to lock it in the off position.
Trim Sideburns
Touch the cutting edge of the trimmer to your sideburn for a neat,clean line.
More Quality Shaving Products
For a smoother, more
Tips For Use
•Clean your shaver frequently.
•Always keep the protective headquard on the shaver, and keep the trimmer in the off position when the shaver is not in use.
•Before using,make sure that the cutter head assembly is in locked position.
•Wait at least 15 minutes after getting up before shaving.
•Thoroughly cleanse and dry your skin prior to shaving.
Operation Instructions
The MicroFlex® Extra shaver needs no adjustments to the heads or cutters before you shave.The floating heads will automatically adjust to the contours of your face.It is not necessary to apply pressure while shaving; just let the shaver glide lightly on your skin.This gentle touch makes shaving easier and helps avoid possible skin irritation.
Cleaning Your Shaver
TO ASSURE SMOOTH,EFFICIENT PERFORMANCE,IT IS IMPORTANT TO CLEAN YOUR SHAVER.
Simply pull the head assembly out from the shaver by placing fingers on rib areas of head assembly. Using the shaver brush, clean the internal part of the head assembly and the hair pocket area, where 3 shaver spindles are located.
Clean under the cutter assembly at least once a week. Open the shaver head and unscrew the center screw knob to remove the cutter retainer assembly. Then simply brush out the hairs and dust. After
cleaning, replace the cutter assembly.
When is it time to replace your heads and cutters?
It is very important to replace your heads and cutters when necessary to insure a close, comfortable shave without irritation. We recommend they be replaced every 12 months. Here are some signs of head and cutter wear, indicating that replacement is needed.
Irritation
As the heads get excessively worn you may experience some skin irritation. This would be especially noticeable when you apply
Pulling
When the cutters wear you may feel a sense of pulling and a loss of closeness when you shave. This is an indication that it is time to replace your heads and cutters.
The replacement for this shaver is model
Canadian residents: for any shaver accessory requirements, please call (800)
or write: Remington Products (Canada) Inc., P.O. Box 601, Postal Station
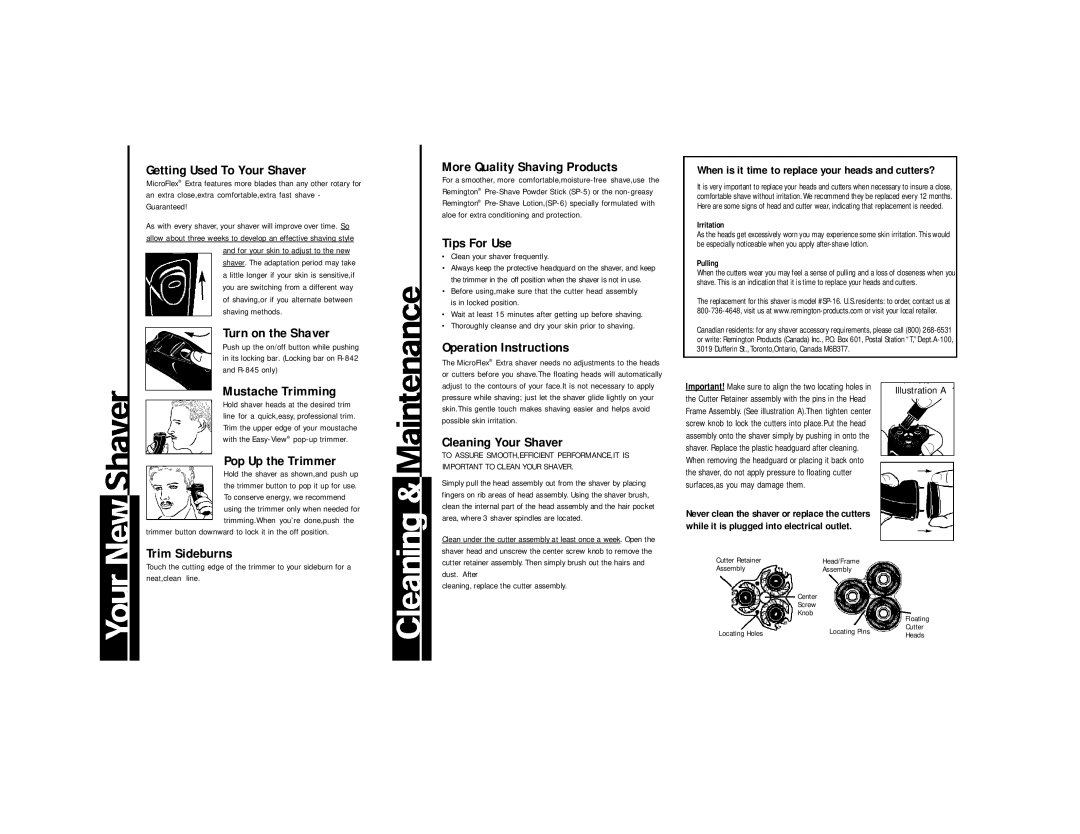
Important! Make sure to align the two locating holes in
Illustration A
the Cutter Retainer assembly with the pins in the Head Frame Assembly. (See illustration A).Then tighten center screw knob to lock the cutters into place.Put the head assembly onto the shaver simply by pushing in onto the shaver. Replace the plastic headguard after cleaning. When removing the headguard or placing it back onto the shaver, do not apply pressure to floating cutter surfaces,as you may damage them.
Never clean the shaver or replace the cutters
while it is plugged into electrical outlet.
Cutter Retainer | Head/Frame |
Assembly | Assembly |
| Center |
| Screw |
| Knob |
|
| Floating |
Locating Holes | Locating Pins | Cutter |
Heads |
