How to Use
Charging
Before using your shaver for the first time, put it on charge for 24 hours.
Preparing the System |
| |
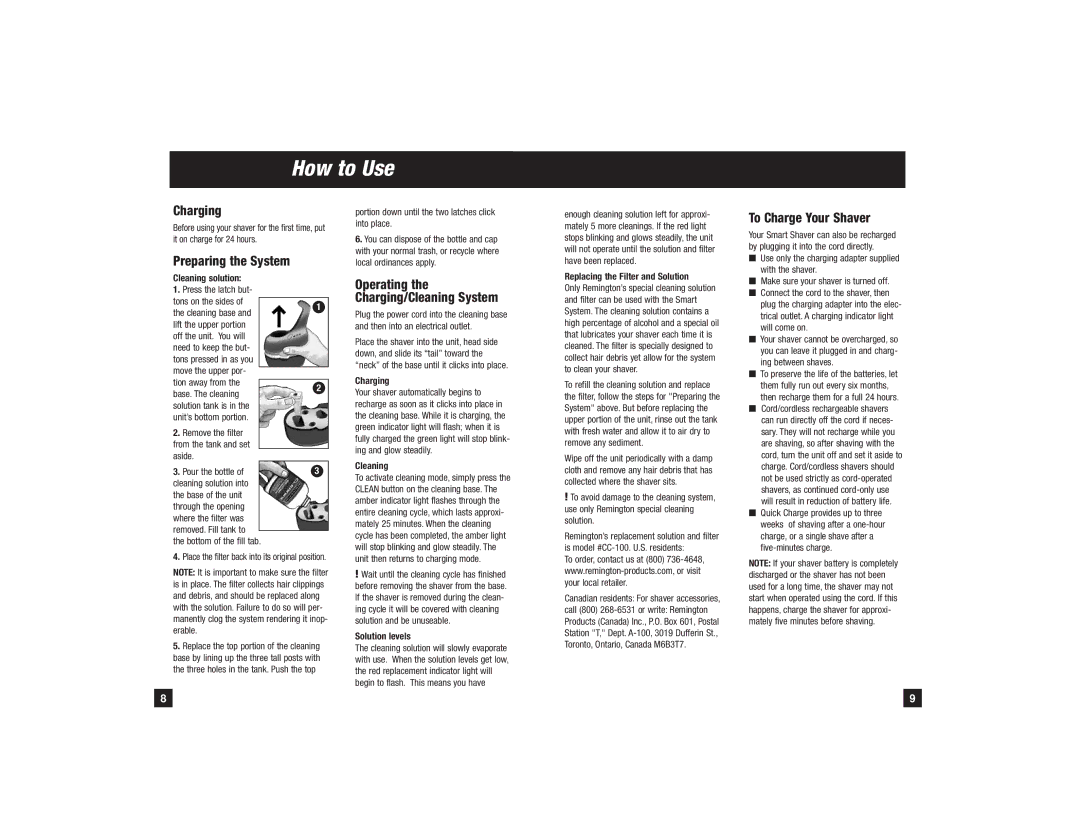
Cleaning solution: |
| |
1. Press the latch but- |
| |
tons on the sides of |
|
|
| 1 | |
the cleaning base and |
| |
|
| |
lift the upper portion |
|
|
off the unit. You will |
|
|
need to keep the but- |
|
|
tons pressed in as you |
|
|
move the upper por- |
|
|
|
| |
tion away from the |
|
|
| 2 | |
base. The cleaning |
| |
|
| |
solution tank is in the |
|
|
unit’s bottom portion. |
|
|
2. Remove the filter |
|
|
from the tank and set |
|
|
aside. |
| |
3. Pour the bottle of |
| 3 |
cleaning solution into |
|
|
the base of the unit |
|
|
through the opening |
|
|
where the filter was |
|
|
removed. Fill tank to |
|
|
|
| |
the bottom of the fill tab. |
| |
4.Place the filter back into its original position.
NOTE: It is important to make sure the filter is in place. The filter collects hair clippings and debris, and should be replaced along with the solution. Failure to do so will per- manently clog the system rendering it inop- erable.
5.Replace the top portion of the cleaning base by lining up the three tall posts with the three holes in the tank. Push the top
portion down until the two latches click into place.
6.You can dispose of the bottle and cap with your normal trash, or recycle where local ordinances apply.
Operating the Charging/Cleaning System
Plug the power cord into the cleaning base and then into an electrical outlet.
Place the shaver into the unit, head side down, and slide its “tail” toward the “neck” of the base until it clicks into place.
Charging
Your shaver automatically begins to recharge as soon as it clicks into place in the cleaning base. While it is charging, the green indicator light will flash; when it is fully charged the green light will stop blink- ing and glow steadily.
Cleaning
To activate cleaning mode, simply press the CLEAN button on the cleaning base. The amber indicator light flashes through the entire cleaning cycle, which lasts approxi- mately 25 minutes. When the cleaning cycle has been completed, the amber light will stop blinking and glow steadily. The unit then returns to charging mode.
!Wait until the cleaning cycle has finished before removing the shaver from the base. If the shaver is removed during the clean- ing cycle it will be covered with cleaning solution and be unuseable.
Solution levels
The cleaning solution will slowly evaporate with use. When the solution levels get low, the red replacement indicator light will begin to flash. This means you have
enough cleaning solution left for approxi- mately 5 more cleanings. If the red light stops blinking and glows steadily, the unit will not operate until the solution and filter have been replaced.
Replacing the Filter and Solution
Only Remington’s special cleaning solution and filter can be used with the Smart System. The cleaning solution contains a high percentage of alcohol and a special oil that lubricates your shaver each time it is cleaned. The filter is specially designed to collect hair debris yet allow for the system to clean your shaver.
To refill the cleaning solution and replace the filter, follow the steps for "Preparing the System" above. But before replacing the upper portion of the unit, rinse out the tank with fresh water and allow it to air dry to remove any sediment.
Wipe off the unit periodically with a damp cloth and remove any hair debris that has collected where the shaver sits.
!To avoid damage to the cleaning system, use only Remington special cleaning solution.
Remington’s replacement solution and filter is model
To order, contact us at (800)
Canadian residents: For shaver accessories,
call (800)
To Charge Your Shaver
Your Smart Shaver can also be recharged by plugging it into the cord directly.
■Use only the charging adapter supplied with the shaver.
■Make sure your shaver is turned off.
■Connect the cord to the shaver, then plug the charging adapter into the elec- trical outlet. A charging indicator light will come on.
■Your shaver cannot be overcharged, so you can leave it plugged in and charg- ing between shaves.
■To preserve the life of the batteries, let them fully run out every six months, then recharge them for a full 24 hours.
■Cord/cordless rechargeable shavers can run directly off the cord if neces- sary. They will not recharge while you are shaving, so after shaving with the cord, turn the unit off and set it aside to charge. Cord/cordless shavers should not be used strictly as
■Quick Charge provides up to three weeks of shaving after a
NOTE: If your shaver battery is completely discharged or the shaver has not been used for a long time, the shaver may not start when operated using the cord. If this happens, charge the shaver for approxi- mately five minutes before shaving.
8 |
| 9 |
|
|
|