Instructions For Assembly Of Shotgun
![]() WARNING
WARNING
Before you begin to assemble the shotgun, you MUST (1) look down the barrel from the breech end toward the muzzle end to make sure there is no ammunition in the chambers or obstruction in the barrels, and (2) make sure the safety is in the “safe” position.
Your shotgun was shipped with the barrel assembly (barrel and fore end) detached from the receiver assembly. To assemble the shotgun, follow these instructions:
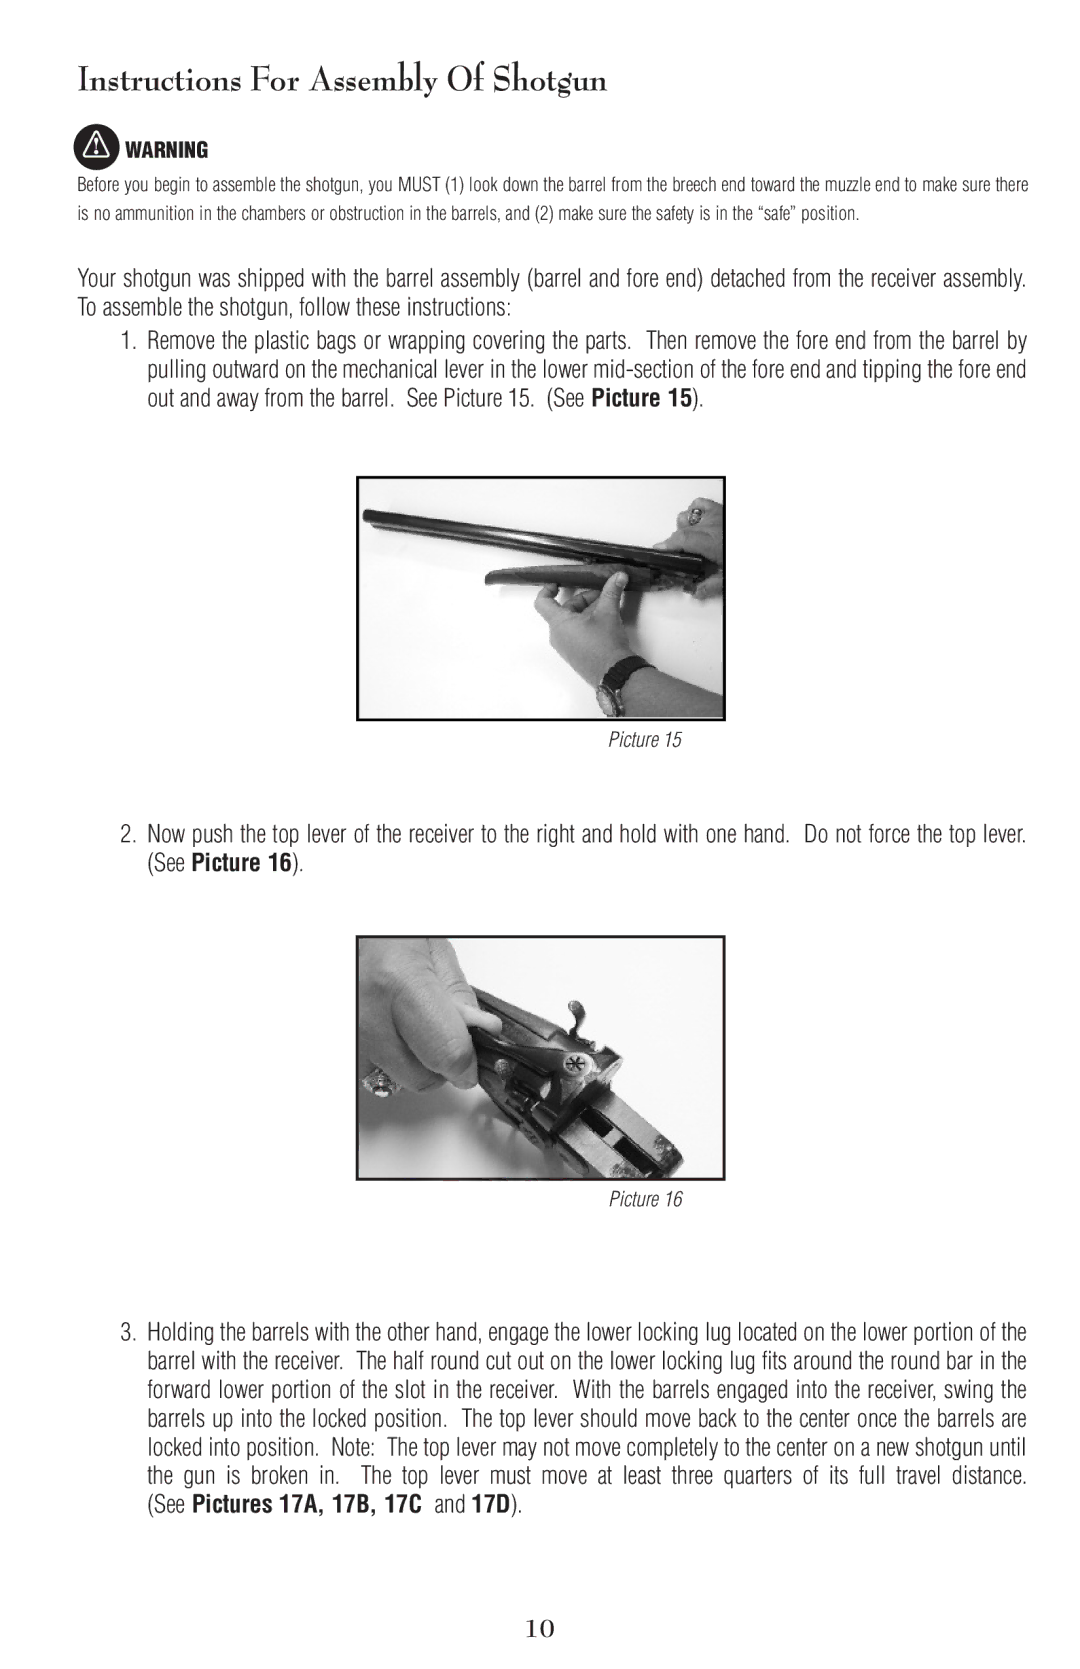
1.Remove the plastic bags or wrapping covering the parts. Then remove the fore end from the barrel by pulling outward on the mechanical lever in the lower
Picture 15
2.Now push the top lever of the receiver to the right and hold with one hand. Do not force the top lever. (See Picture 16).
Picture 16
3.Holding the barrels with the other hand, engage the lower locking lug located on the lower portion of the barrel with the receiver. The half round cut out on the lower locking lug fits around the round bar in the forward lower portion of the slot in the receiver. With the barrels engaged into the receiver, swing the barrels up into the locked position. The top lever should move back to the center once the barrels are locked into position. Note: The top lever may not move completely to the center on a new shotgun until the gun is broken in. The top lever must move at least three quarters of its full travel distance. (See Pictures 17A, 17B, 17C and 17D).
10