Rhino Mounts 148 Shear Bolt Driveline Installation, A-FRAME INSTALLATION Standard Hitch, Assembly

Models: 148

1 178
Download 178 pages 2.88 Kb
Page 95
Image 95
SHEAR BOLT DRIVELINE INSTALLATION

ASSEMBLY

SHEAR BOLT DRIVELINE INSTALLATION

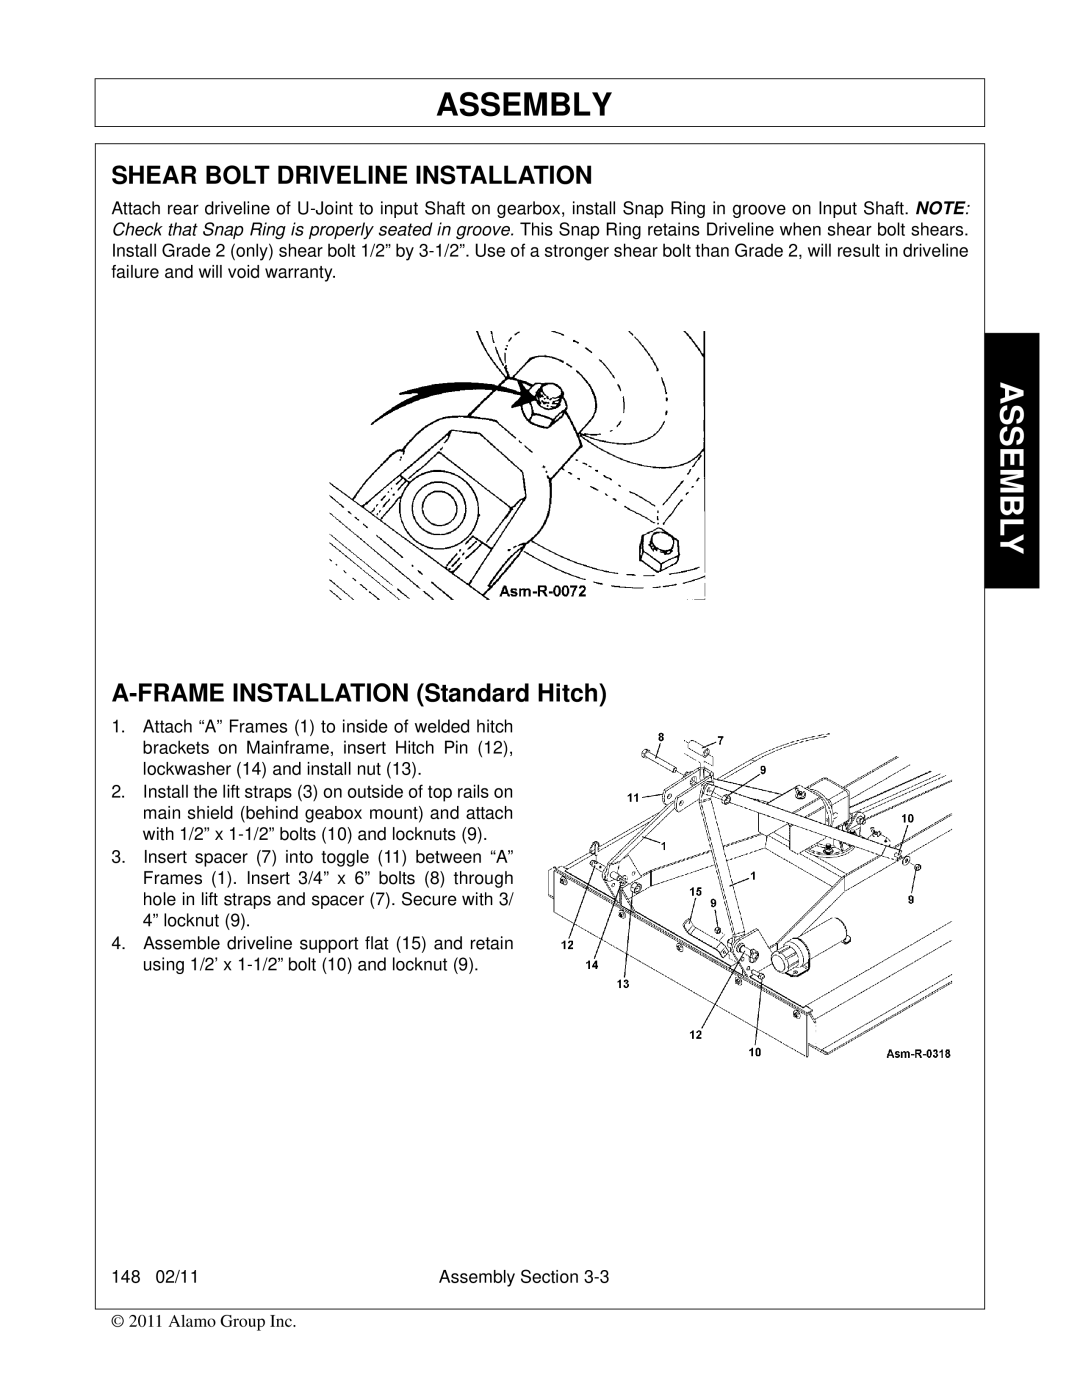
Attach rear driveline of U-Joint to input Shaft on gearbox, install Snap Ring in groove on Input Shaft. NOTE: Check that Snap Ring is properly seated in groove. This Snap Ring retains Driveline when shear bolt shears. Install Grade 2 (only) shear bolt 1/2” by 3-1/2”. Use of a stronger shear bolt than Grade 2, will result in driveline failure and will void warranty.

A-FRAME INSTALLATION (Standard Hitch)

1.Attach “A” Frames (1) to inside of welded hitch brackets on Mainframe, insert Hitch Pin (12), lockwasher (14) and install nut (13).

2.Install the lift straps (3) on outside of top rails on main shield (behind geabox mount) and attach with 1/2” x 1-1/2” bolts (10) and locknuts (9).

3.Insert spacer (7) into toggle (11) between “A” Frames (1). Insert 3/4” x 6” bolts (8) through hole in lift straps and spacer (7). Secure with 3/ 4” locknut (9).

4.Assemble driveline support flat (15) and retain using 1/2’ x 1-1/2” bolt (10) and locknut (9).

148 02/11

Assembly Section 3-3

© 2011 Alamo Group Inc.

ASSEMBLY

Page 95
Image 95
Rhino Mounts 148 manual Shear Bolt Driveline Installation, A-FRAME INSTALLATION Standard Hitch, Assembly