614 Dry Cut Saw
•Raise the
Description, Specifications and Standard Equipment
Description
The RIDGID 614 Dry Cut Saw is designed to cut ferrous and
•Gas pipe, lining tube, electrical pipe and conduit and PVC pipe.
•Steel angle, channel and bar
•Aluminum frame, curtain rail and a variety of interi- or decoration material
A
Specifications
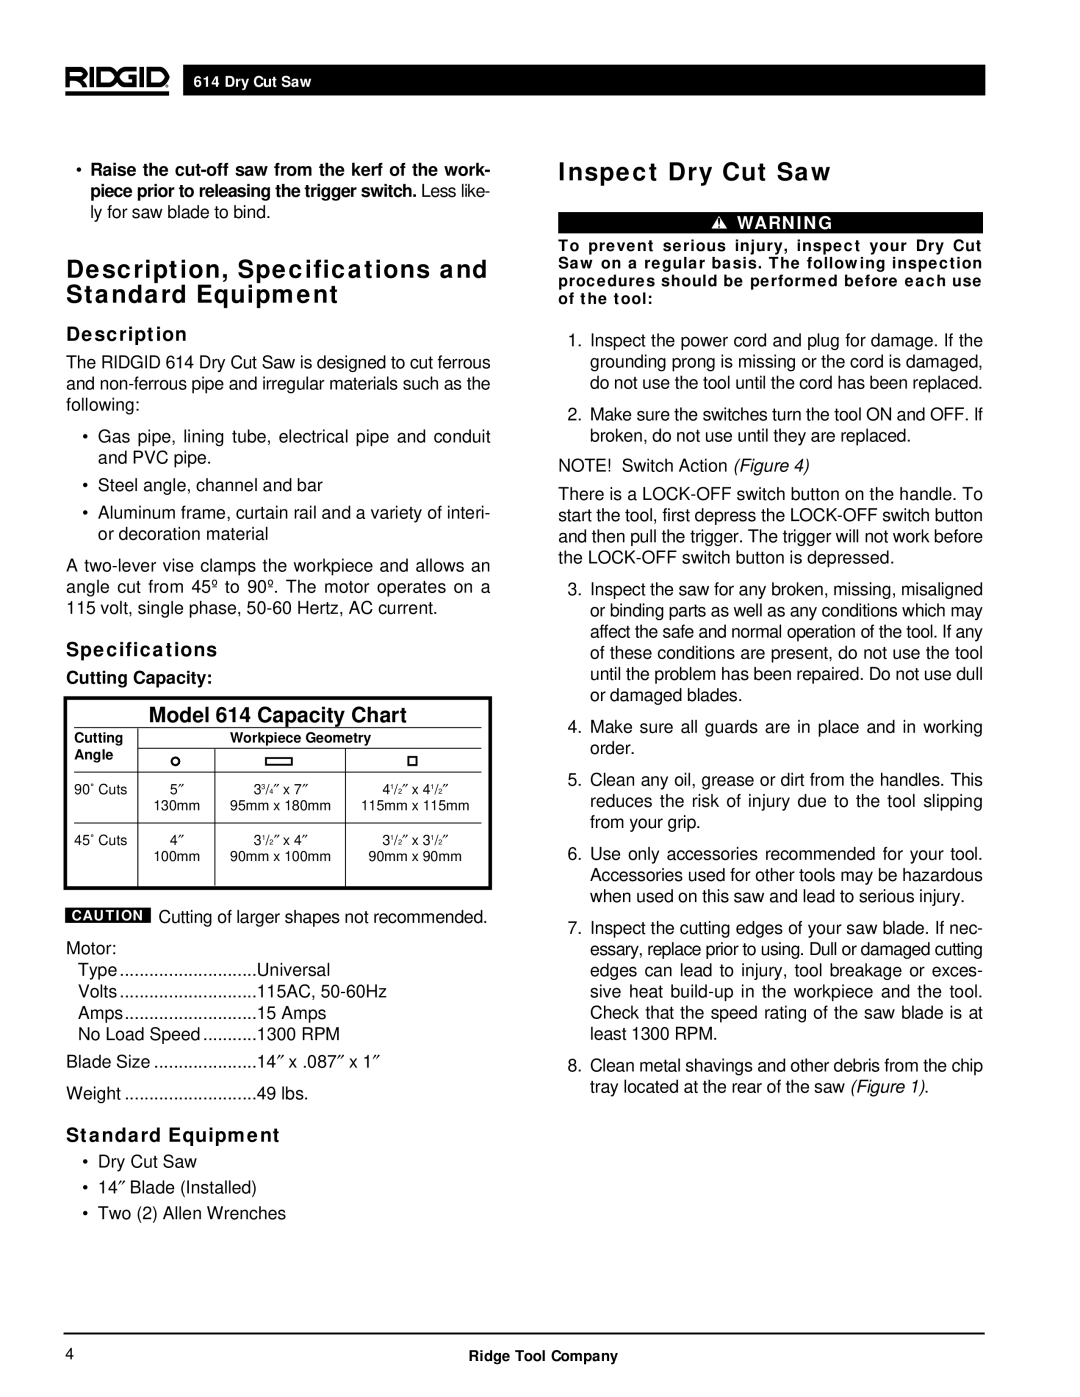
Cutting Capacity:
Model 614 Capacity Chart
| Cutting |
| Workpiece Geometry |
|
| |||||
| Angle |
|
|
|
|
|
|
|
|
|
|
|
|
|
|
|
|
|
|
|
|
| 90˚ Cuts | 5″ | 33/4″ x 7″ | 41/2″ | x 41/2″ |
| ||||
|
| 130mm | 95mm x 180mm | 115mm x 115mm |
| |||||
|
|
|
|
|
|
|
|
|
|
|
| 45˚ Cuts | 4″ | 31/2″ x 4″ | 31/2″ | x 31/2″ |
| ||||
|
| 100mm | 90mm x 100mm | 90mm x 90mm |
| |||||
|
|
|
|
|
|
|
|
|
|
|
CAUTION Cutting of larger shapes not recommended.
Motor: |
|
Type | Universal |
Volts | 115AC, |
Amps | 15 Amps |
No Load Speed | 1300 RPM |
Blade Size | 14″ x .087″ x 1″ |
Weight | 49 lbs. |
Standard Equipment
•Dry Cut Saw
•14″ Blade (Installed)
•Two (2) Allen Wrenches
Inspect Dry Cut Saw
![]() WARNING
WARNING
To prevent serious injury, inspect your Dry Cut Saw on a regular basis. The following inspection procedures should be performed before each use of the tool:
1.Inspect the power cord and plug for damage. If the grounding prong is missing or the cord is damaged, do not use the tool until the cord has been replaced.
2.Make sure the switches turn the tool ON and OFF. If broken, do not use until they are replaced.
NOTE! Switch Action (Figure 4)
There is a
3.Inspect the saw for any broken, missing, misaligned or binding parts as well as any conditions which may affect the safe and normal operation of the tool. If any of these conditions are present, do not use the tool until the problem has been repaired. Do not use dull or damaged blades.
4.Make sure all guards are in place and in working order.
5.Clean any oil, grease or dirt from the handles. This reduces the risk of injury due to the tool slipping from your grip.
6.Use only accessories recommended for your tool. Accessories used for other tools may be hazardous when used on this saw and lead to serious injury.
7.Inspect the cutting edges of your saw blade. If nec- essary, replace prior to using. Dull or damaged cutting edges can lead to injury, tool breakage or exces- sive heat
8.Clean metal shavings and other debris from the chip tray located at the rear of the saw (Figure 1).
4 | Ridge Tool Company |
