OPERATION
SETTING THE AIR PRESSURE
The amount of air pressure required will depend on the size of the nail and the workpiece material.
Begin testing the depth of drive by driving a test nail into the same type of workpiece material used for the actual job.
Drive a test nail with the air pressure set at
It may be possible to achieve the desired depth with air pressure adjustments alone. If finer adjustments are needed, use the drive depth adjustment on the tool.
DRIVE DEPTH ADJUSTMENT
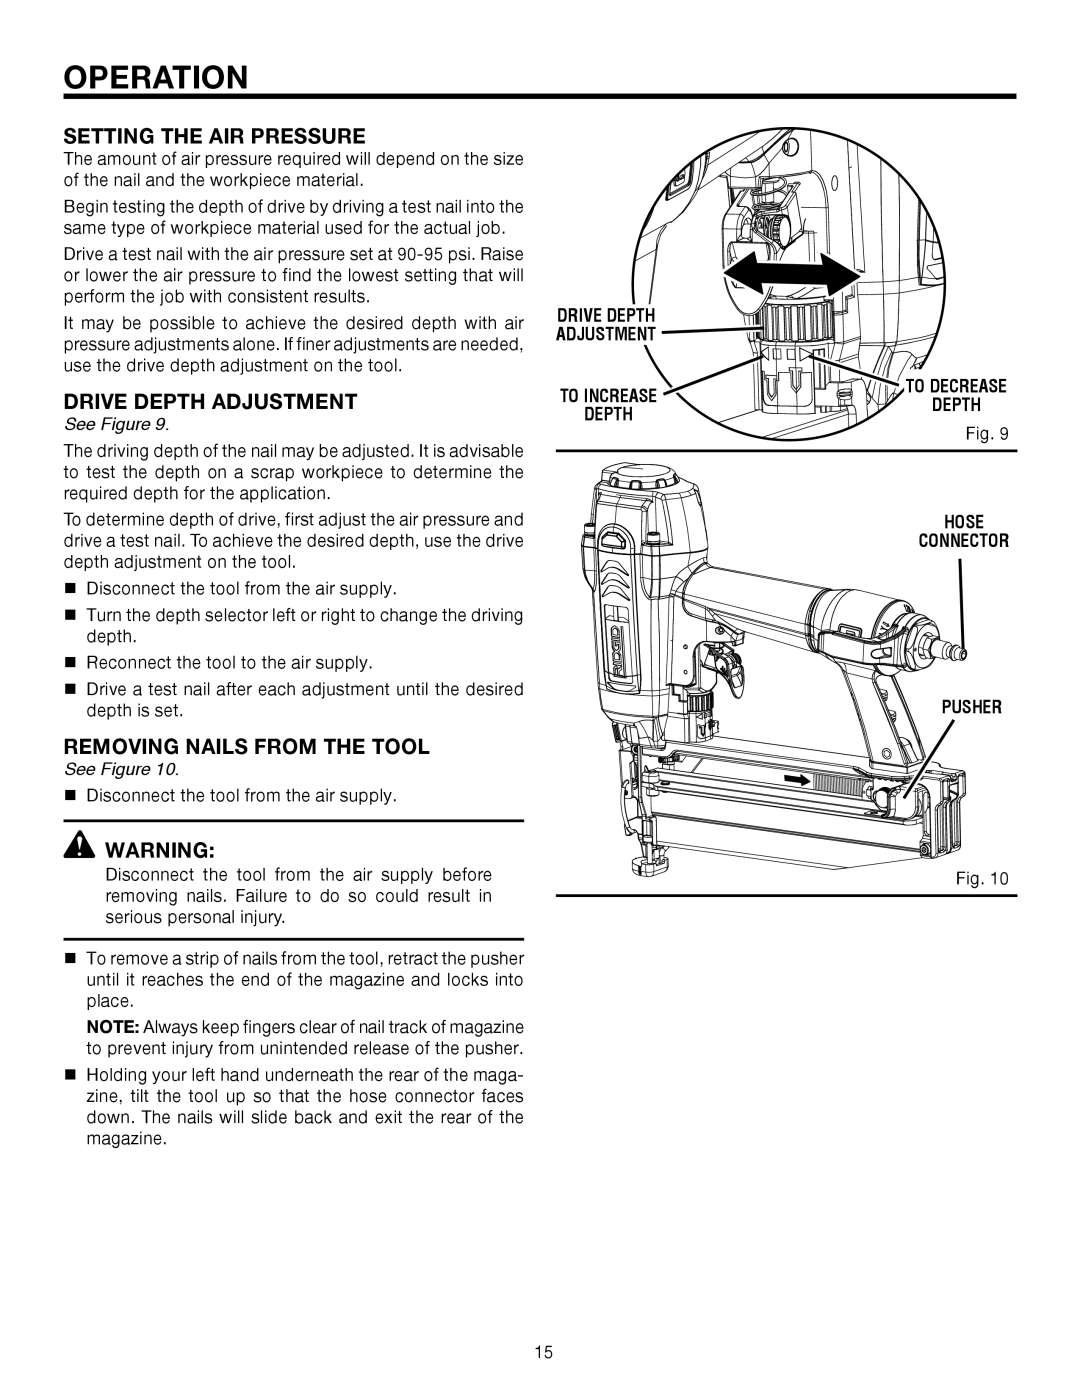
See Figure 9.
The driving depth of the nail may be adjusted. It is advisable to test the depth on a scrap workpiece to determine the required depth for the application.
To determine depth of drive, first adjust the air pressure and drive a test nail. To achieve the desired depth, use the drive depth adjustment on the tool.
nDisconnect the tool from the air supply.
nTurn the depth selector left or right to change the driving depth.
nReconnect the tool to the air supply.
nDrive a test nail after each adjustment until the desired depth is set.
REMOVING NAILS FROM THE TOOL
See Figure 10.
nDisconnect the tool from the air supply.
![]() WARNING:
WARNING:
Disconnect the tool from the air supply before removing nails. Failure to do so could result in serious personal injury.
nTo� remove a strip of nails from the tool, retract the pusher until it reaches the end of the magazine and locks into place.
NOTE: Always keep fingers clear of nail track of magazine to prevent injury from unintended release of the pusher.
nHolding your left hand underneath the rear of the maga- zine, tilt the tool up so that the hose connector faces down. The nails will slide back and exit the rear of the magazine.
DRIVE DEPTH
ADJUSTMENT ![]()
![]()
![]()
![]()
![]()
![]()
![]()
![]()
![]()
![]()
TO INCREASE | TO DECREASE | |
DEPTH | ||
DEPTH | ||
Fig. 9 | ||
|
HOSE
CONNECTOR
PUSHER
Fig. 10
15
