R82007 specifications
The RIDGID R82007 is a versatile and durable cordless drill that has been designed to meet the demands of both professionals and DIY enthusiasts. This powerful tool is equipped with a range of features and technologies that enhance its performance, making it an excellent addition to any toolkit.One of the standout features of the RIDGID R82007 is its robust motor. The drill offers a high torque output, allowing users to tackle a wide variety of tasks with ease. Whether you are drilling into wood, metal, or masonry, this tool delivers the power required for efficient work. Additionally, the R82007 boasts a variable speed control that enables users to adjust the speed of the drill according to the material they are working on. This flexibility is crucial for achieving precise results and minimizing damage to the workpiece.
Another impressive characteristic of the RIDGID R82007 is its ergonomic design. The drill is designed with user comfort in mind, featuring a rubberized grip that reduces fatigue during prolonged use. The lightweight construction further adds to its ease of handling, making it ideal for both overhead and tight-space applications.
The R82007 also incorporates advanced battery technology. It utilizes a powerful lithium-ion battery that ensures prolonged runtime and quick recharging. Users can experience less downtime, as the efficient battery management system prevents overheating and over-discharging, thereby extending the life of the battery.
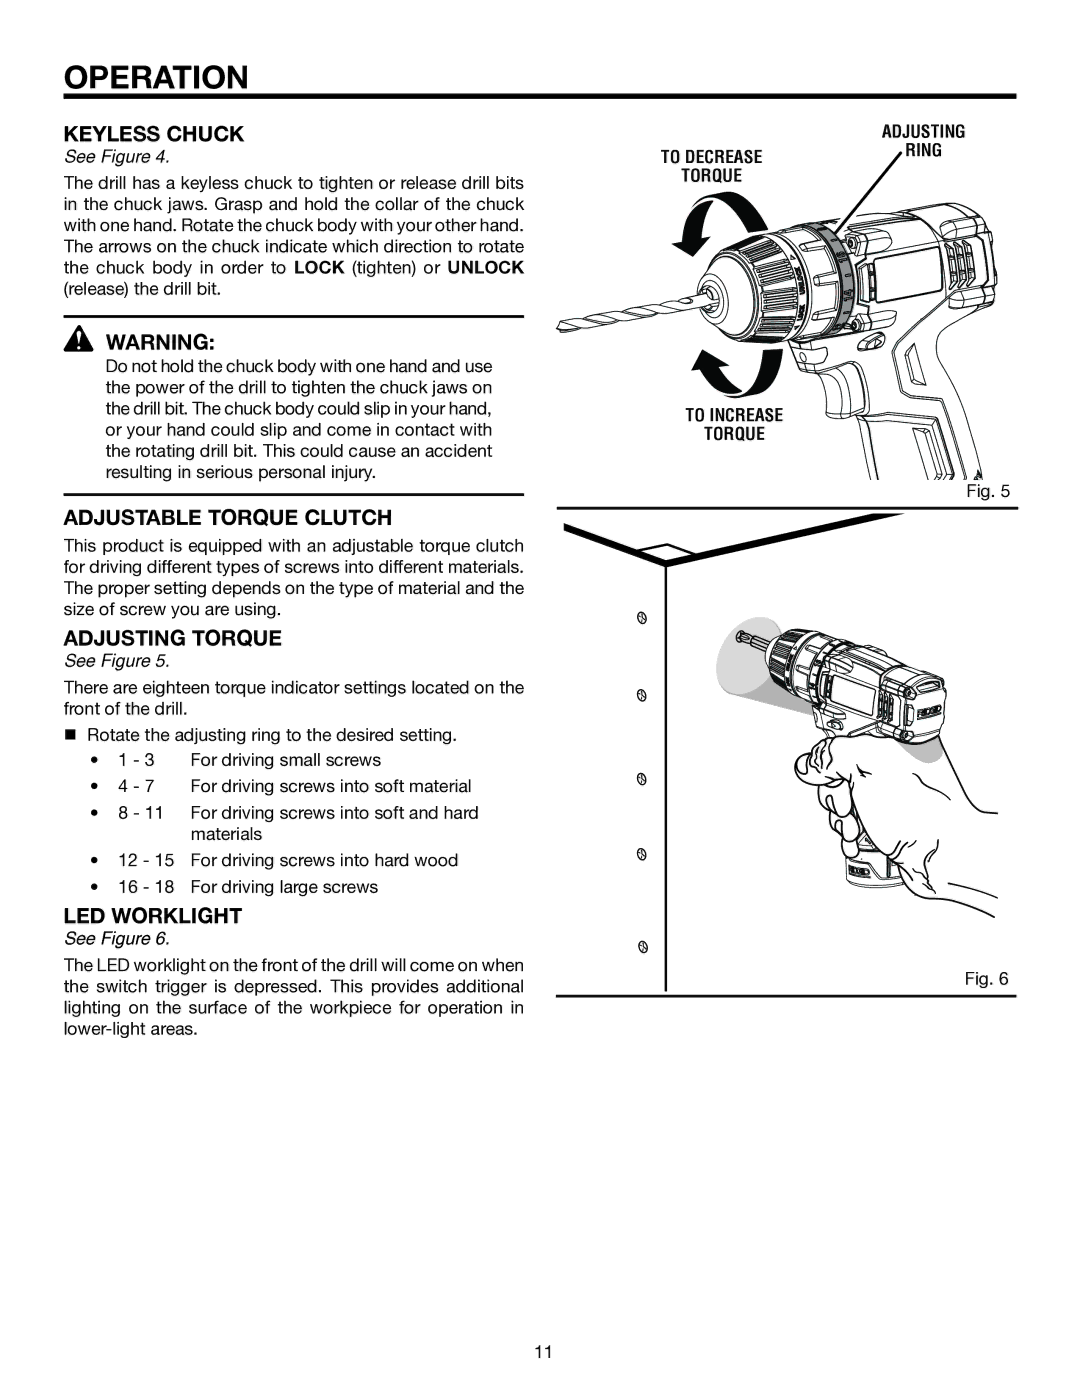
In terms of convenience, the RIDGID R82007 is equipped with an LED work light that illuminates dark work areas, allowing users to work efficiently even in low-light conditions. This feature enhances visibility and safety, making it easier to see the work surface and drill bit alignment.
Moreover, the drill comes with a compatible bit holder and an adjustable clutch, which allows users to switch between different applications efficiently. The clutch settings help prevent overdriving and stripping screws, ensuring that the task is completed with precision.
In summary, the RIDGID R82007 cordless drill offers a combination of power, comfort, and efficiency. With its robust motor, ergonomic design, advanced battery technology, and added convenience features, it stands out as a reliable tool for anyone looking to take on drilling tasks, whether professional or personal. It exemplifies RIDGID's commitment to quality and innovation in the tool industry.