RIDGID R888 manual Assembly, Unpacking, Packing List, INSTALLING/REMOVING the Dust BAG

Models: R888

1 26
Download 26 pages 24.39 Kb
Page 10
Image 10

ASSEMBLY

UNPACKING

This product has been shipped completely assembled.

Carefully remove the tool and any accessories from the box. Make sure that all items listed in the packing list are included.

Inspect the tool carefully to make sure no breakage or damage occurred during shipping.

Do not discard the packing material until you have care- fully inspected and satisfactorily operated the tool.

If any parts are damaged or missing, please call 1-866-539-1710 for assistance.

PACKING LIST

18V/24V Hand Planer

Edge Guide/Rabbet Guide

Blade Wrench

Dust Bag

Operator’s Manual

WARNING:

If any parts are damaged or missing do not operate this tool until the parts are replaced. Failure to heed this warning could result in serious personal injury.

WARNING:

Do not attempt to modify this tool or create accessories not recommended for use with this tool. Any such alteration or modification is misuse and could result in a hazardous condition leading to possible serious personal injury.

WARNING:

To prevent accidental starting that could cause serious personal injury, always remove the battery

pack from the tool when assembling parts.

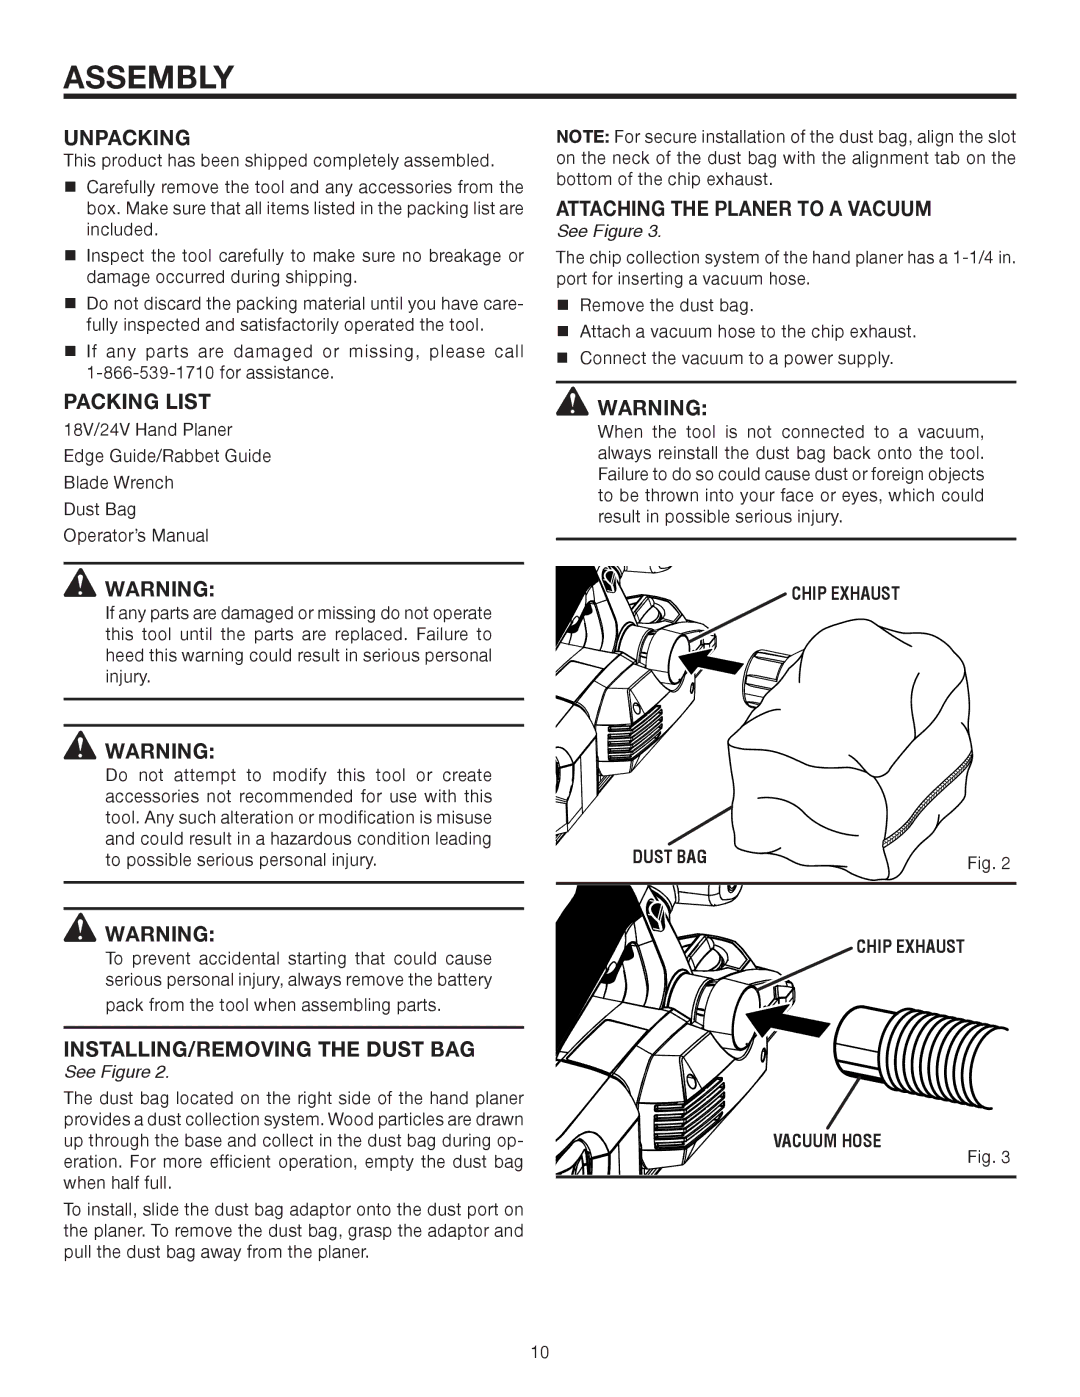
INSTALLING/REMOVING THE DUST BAG

See Figure 2.

The dust bag located on the right side of the hand planer provides a dust collection system. Wood particles are drawn up through the base and collect in the dust bag during op- eration. For more efficient operation, empty the dust bag when half full.

To install, slide the dust bag adaptor onto the dust port on the planer. To remove the dust bag, grasp the adaptor and pull the dust bag away from the planer.

NOTE: For secure installation of the dust bag, align the slot on the neck of the dust bag with the alignment tab on the bottom of the chip exhaust.

ATTACHING THE PLANER TO A VACUUM

See Figure 3.

The chip collection system of the hand planer has a 1-1/4 in. port for inserting a vacuum hose.

Remove the dust bag.

Attach a vacuum hose to the chip exhaust.

Connect the vacuum to a power supply.

WARNING:

When the tool is not connected to a vacuum, always reinstall the dust bag back onto the tool. Failure to do so could cause dust or foreign objects to be thrown into your face or eyes, which could result in possible serious injury.

CHIP EXHAUST

DUST BAG

Fig. 2


CHIP EXHAUST

VACUUM HOSE

Fig. 3

10

Page 10
Image 10
RIDGID R888 manual Assembly, Unpacking, Packing List, INSTALLING/REMOVING the Dust BAG, Attaching the Planer to a Vacuum

R888 specifications

The RIDGID R888 is a powerful tool that continues to cement its reputation among professionals and DIY enthusiasts alike. This advanced cordless impact wrench is designed to tackle a wide array of applications, making it a standout choice for both construction and home improvement projects.

One of the key features of the RIDGID R888 is its robust 18V motor, which delivers an impressive torque output. With a torque rating of up to 600 ft-lbs of nut-busting torque, this tool can handle loosening and fastening tasks that require significant force, such as working with heavy machinery or automotive bolts. The ability to deliver high torque in a compact design makes the R888 versatile for various tasks.

The R888 also incorporates advanced brushless motor technology. This not only enhances the tool's efficiency but also extends its overall lifespan compared to traditional brushed motors. The brushless design provides smoother operation, reducing friction and heat buildup. As a result, the tool operates cooler, which is a crucial factor during extended use.

Another standout characteristic of the RIDGID R888 is its ergonomic design. Equipped with a comfortable grip and a lightweight construction, this impact wrench minimizes user fatigue, allowing for longer periods of operation without discomfort. The tool also features an integrated LED light, improving visibility in dark or confined spaces, which is particularly beneficial when working under vehicles or in poorly lit areas.

Moreover, the R888 includes a 3-speed setting and a snug-fit ½ inch anvil, providing versatility for different tasks. The ability to adjust speed allows users to select the appropriate power for a range of jobs, from delicate assembly tasks to heavy-duty applications. Each speed setting is easy to switch, allowing seamless transitions as needed.

Lastly, the RIDGID R888 is backed by the manufacturer’s lifetime service agreement, which includes free parts and service for the life of the tool, underscoring RIDGID’s commitment to quality and customer satisfaction.

In summary, the RIDGID R888 combines powerful performance, innovative technology, and user-friendly design. Its features and characteristics make it an invaluable addition for anyone looking to increase productivity and efficiency in their work.