
770rEB specifications
The Ryobi 770rEB is a powerful and versatile brushcutter designed for both homeowners and professionals seeking an efficient tool to manage heavy vegetation and tough landscaping tasks. This model combines advanced technology with practicality to deliver impressive performance in various gardening applications.At the heart of the Ryobi 770rEB is its robust 770W engine, which provides ample power for tackling dense undergrowth, thick grass, and challenging weeds. Its ergonomic design, coupled with a lightweight construction, ensures user comfort during extended periods of operation. The balance and handling of this brushcutter make it easy to maneuver, reducing fatigue and increasing productivity.
One of the standout features of the Ryobi 770rEB is its Easy Start technology. This innovation allows for a simplified starting process, so users can get to work without the frustration often associated with traditional pull-start engines. Additionally, the engine is designed with reduced vibrations, which minimizes strain on the operator’s hands and arms, enhancing overall comfort and control.
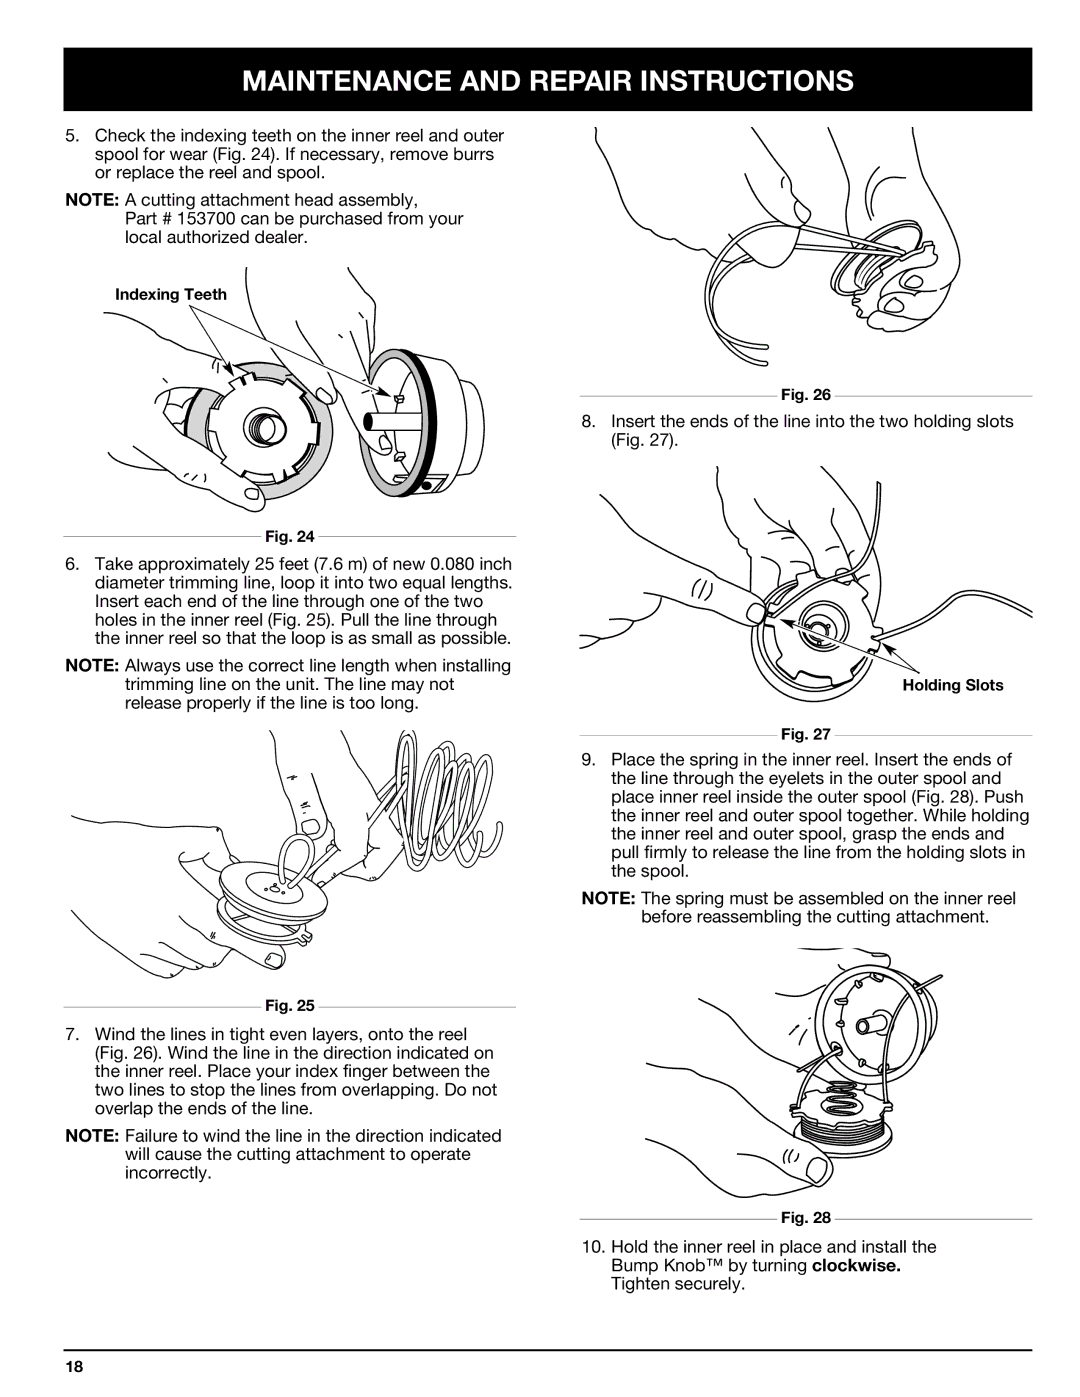
The cutting performance of the Ryobi 770rEB is further enhanced by its dual-line bump feed head, which allows for quick and easy line replacement. Users can effortlessly advance the cutting line simply by tapping the head on the ground, making it a user-friendly solution for maintaining a neat and tidy landscape. The 25.4cc 2-stroke engine offers high efficiency while keeping emissions low, adhering to environmental standards.
Moreover, the Ryobi 770rEB comes equipped with several cutting attachments, including blades for heavier brush and trees, providing adaptability for a variety of tasks. The inclusion of a shoulder harness enhances stability and adds comfort, allowing the user to distribute weight evenly during operation.
Building on durability, the Ryobi 770rEB features a sturdy construction that can withstand the trials of regular use. Its adaptable design ensures it meets the needs of various landscaping tasks, from trimming grass around flower beds to clearing overgrown areas.
In summary, the Ryobi 770rEB brushcutter stands out due to its powerful engine, ergonomic features, Easy Start technology, and versatility in handling different cutting tasks. Whether for home use or professional landscaping, it proves to be an essential tool for maintaining efficient and effective outdoor spaces.