OPERATION
REMOVING BITS
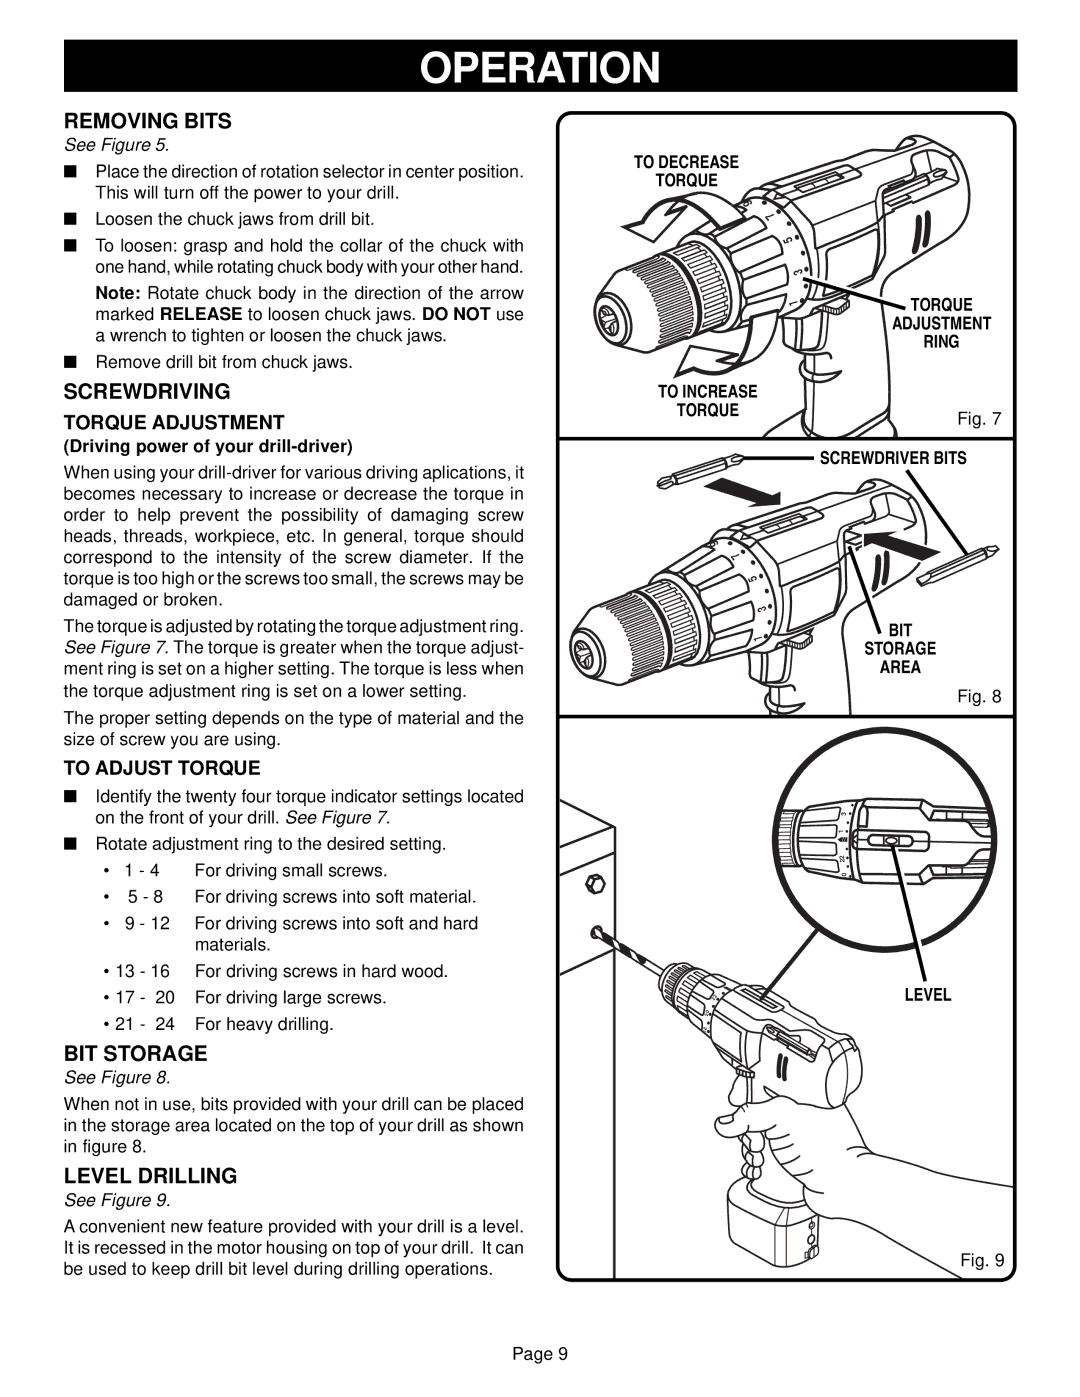
See Figure 5.
■Place the direction of rotation selector in center position. This will turn off the power to your drill.
■Loosen the chuck jaws from drill bit.
■To loosen: grasp and hold the collar of the chuck with one hand, while rotating chuck body with your other hand.
Note: Rotate chuck body in the direction of the arrow marked RELEASE to loosen chuck jaws. DO NOT use a wrench to tighten or loosen the chuck jaws.
■Remove drill bit from chuck jaws.
TO DECREASE
TORQUE
9 7
5
3![]()
![]() 1
1 ![]()
TORQUE
ADJUSTMENT
RING
SCREWDRIVING
TORQUE ADJUSTMENT
(Driving power of your
TO INCREASE |
|
TORQUE | Fig. 7 |
| |
| SCREWDRIVER BITS |
When using your
The torque is adjusted by rotating the torque adjustment ring. See Figure 7. The torque is greater when the torque adjust- ment ring is set on a higher setting. The torque is less when the torque adjustment ring is set on a lower setting.
The proper setting depends on the type of material and the size of screw you are using.
TO ADJUST TORQUE
■ Identify the twenty four torque indicator settings located | |||
on the front of your drill. See Figure 7. | |||
■ Rotate adjustment ring to the desired setting. | |||
• | 1 - 4 | For driving small screws. | |
• | 5 - 8 | For driving screws into soft material. | |
• | 9 | - 12 | For driving screws into soft and hard |
|
|
| materials. |
• 13 | - 16 | For driving screws in hard wood. | |
9 7
5
3![]()
![]() 1
1 ![]()
BIT
STORAGE
AREA
Fig. 8
3
1 ![]()
22 ![]() 10
10 ![]()
• 17 - | 20 | For driving large screws. |
• 21 - | 24 | For heavy drilling. |
BIT STORAGE
See Figure 8.
When not in use, bits provided with your drill can be placed in the storage area located on the top of your drill as shown in figure 8.
LEVEL DRILLING
See Figure 9.
A convenient new feature provided with your drill is a level. It is recessed in the motor housing on top of your drill. It can be used to keep drill bit level during drilling operations.
2 | LEVEL |
2 |
|
20 ![]()
18 ![]()
Fig. 9
Page 9