MAINTENANCE
REPLACING THE GUARD
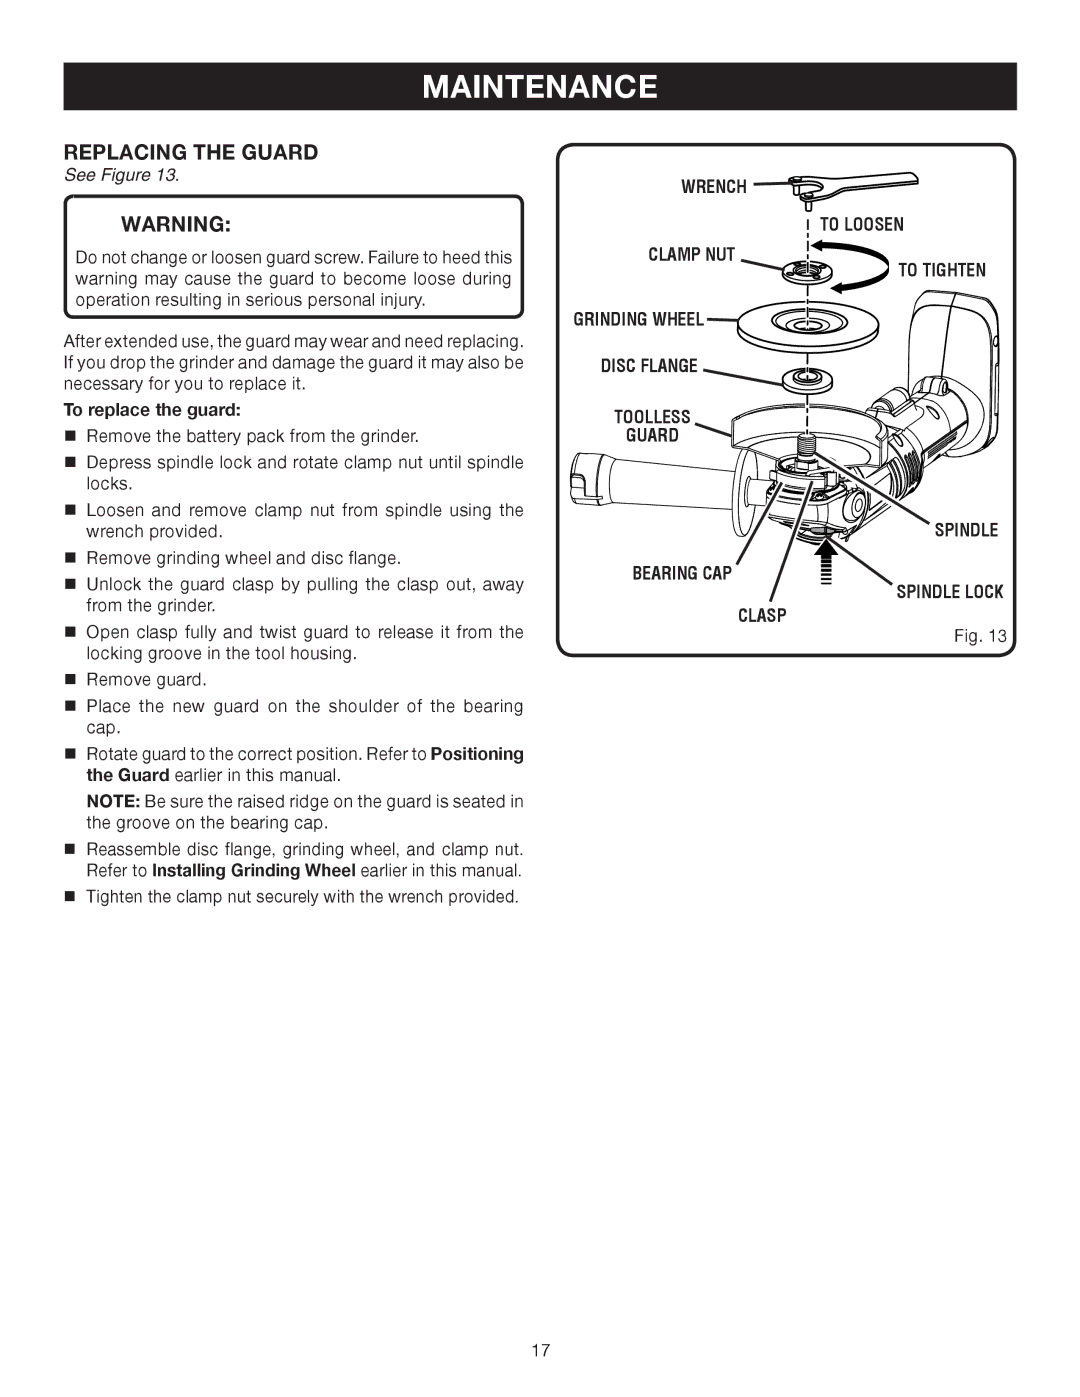
See Figure 13.
WARNING:
WRENCH ![]()
![]() TO LOOSEN
TO LOOSEN
Do not change or loosen guard screw. Failure to heed this warning may cause the guard to become loose during operation resulting in serious personal injury.
After extended use, the guard may wear and need replacing. If you drop the grinder and damage the guard it may also be necessary for you to replace it.
CLAMP NUT
GRINDING WHEEL
DISC FLANGE
TO TIGHTEN
To replace the guard:
Remove the battery pack from the grinder.
� Depress spindle lock and rotate clamp nut until spindle locks.
Loosen and remove clamp nut from spindle using the wrench provided.
Remove grinding wheel and disc flange.
�Unlock the guard clasp by pulling the clasp out, away from the grinder.
�Open clasp fully and twist guard to release it from the locking groove in the tool housing.
�Remove guard.
Place the new guard on the shoulder of the bearing cap.
Rotate guard to the correct position. Refer to Positioning the Guard earlier in this manual.
NOTE: Be sure the raised ridge on the guard is seated in the groove on the bearing cap.
Reassemble disc flange, grinding wheel, and clamp nut. Refer to Installing Grinding Wheel earlier in this manual.
Tighten the clamp nut securely with the wrench provided.
TOOLLESS ![]()
![]()
![]()
![]()
![]()
![]()
![]()
![]()
![]()
![]()
![]()
![]()
![]()
![]()
![]()
![]() GUARD
GUARD ![]()
![]()
![]()
![]()
![]()
![]()
![]()
![]()
![]()
![]()
![]()
![]()
![]()
![]()
SPINDLE
BEARING CAP
SPINDLE LOCK
CLASP
Fig. 13
17