OPERATION
INSTALLING BATTERY PACK
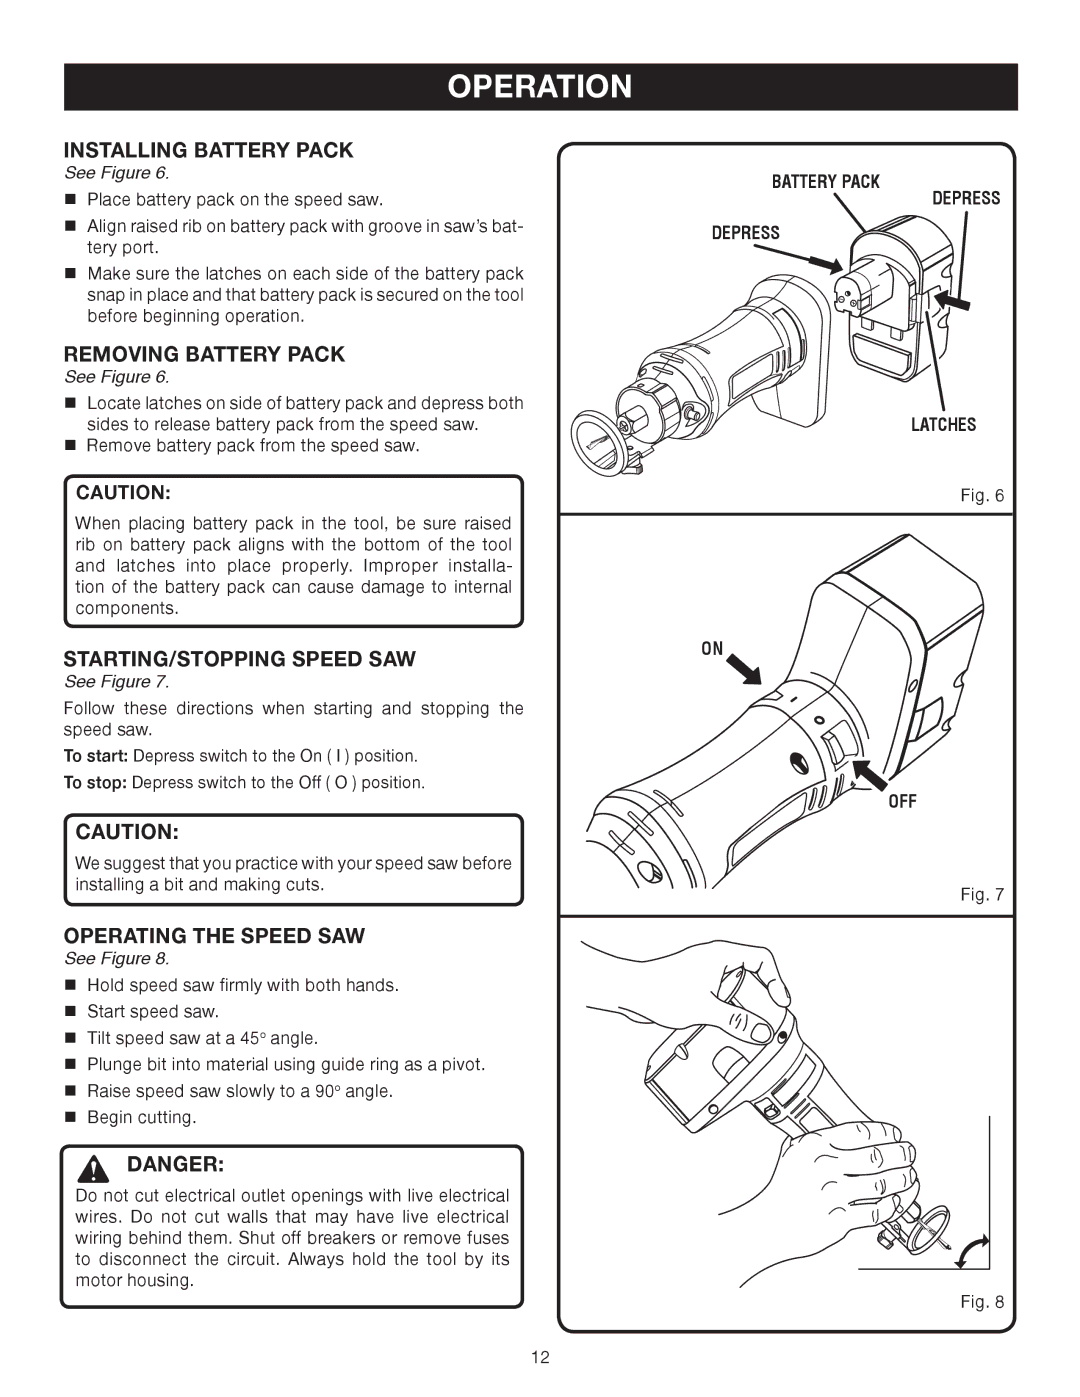
See Figure 6.
nPlace battery pack on the speed saw.
nAlign raised rib on battery pack with groove in saw’s bat- tery port.
nMake sure the latches on each side of the battery pack snap in place and that battery pack is secured on the tool before beginning operation.
REMOVING BATTERY PACK
See Figure 6.
BATTERY PACK
DEPRESS
DEPRESS
nLocate latches on side of battery pack and depress both sides to release battery pack from the speed saw.
nRemove battery pack from the speed saw.
CAUTION:
When placing battery pack in the tool, be sure raised rib on battery pack aligns with the bottom of the tool and latches into place properly. Improper installa- tion of the battery pack can cause damage to internal components.
STARTING/STOPPING SPEED SAW
See Figure 7.
Follow these directions when starting and stopping the speed saw.
To start: Depress switch to the On ( I ) position.
To stop: Depress switch to the Off ( O ) position.
CAUTION:
We suggest that you practice with your speed saw before installing a bit and making cuts.
OPERATING THE SPEED SAW
See Figure 8.
nHold speed saw firmly with both hands.
nStart speed saw.
nTilt speed saw at a 45o angle.
nPlunge bit into material using guide ring as a pivot.
nRaise speed saw slowly to a 90o angle.
nBegin cutting.
DANGER:
Do not cut electrical outlet openings with live electrical wires. Do not cut walls that may have live electrical wiring behind them. Shut off breakers or remove fuses to disconnect the circuit. Always hold the tool by its motor housing.
LATCHES
Fig. 6
ON
OFF
Fig. 7
Fig. 8
12
