
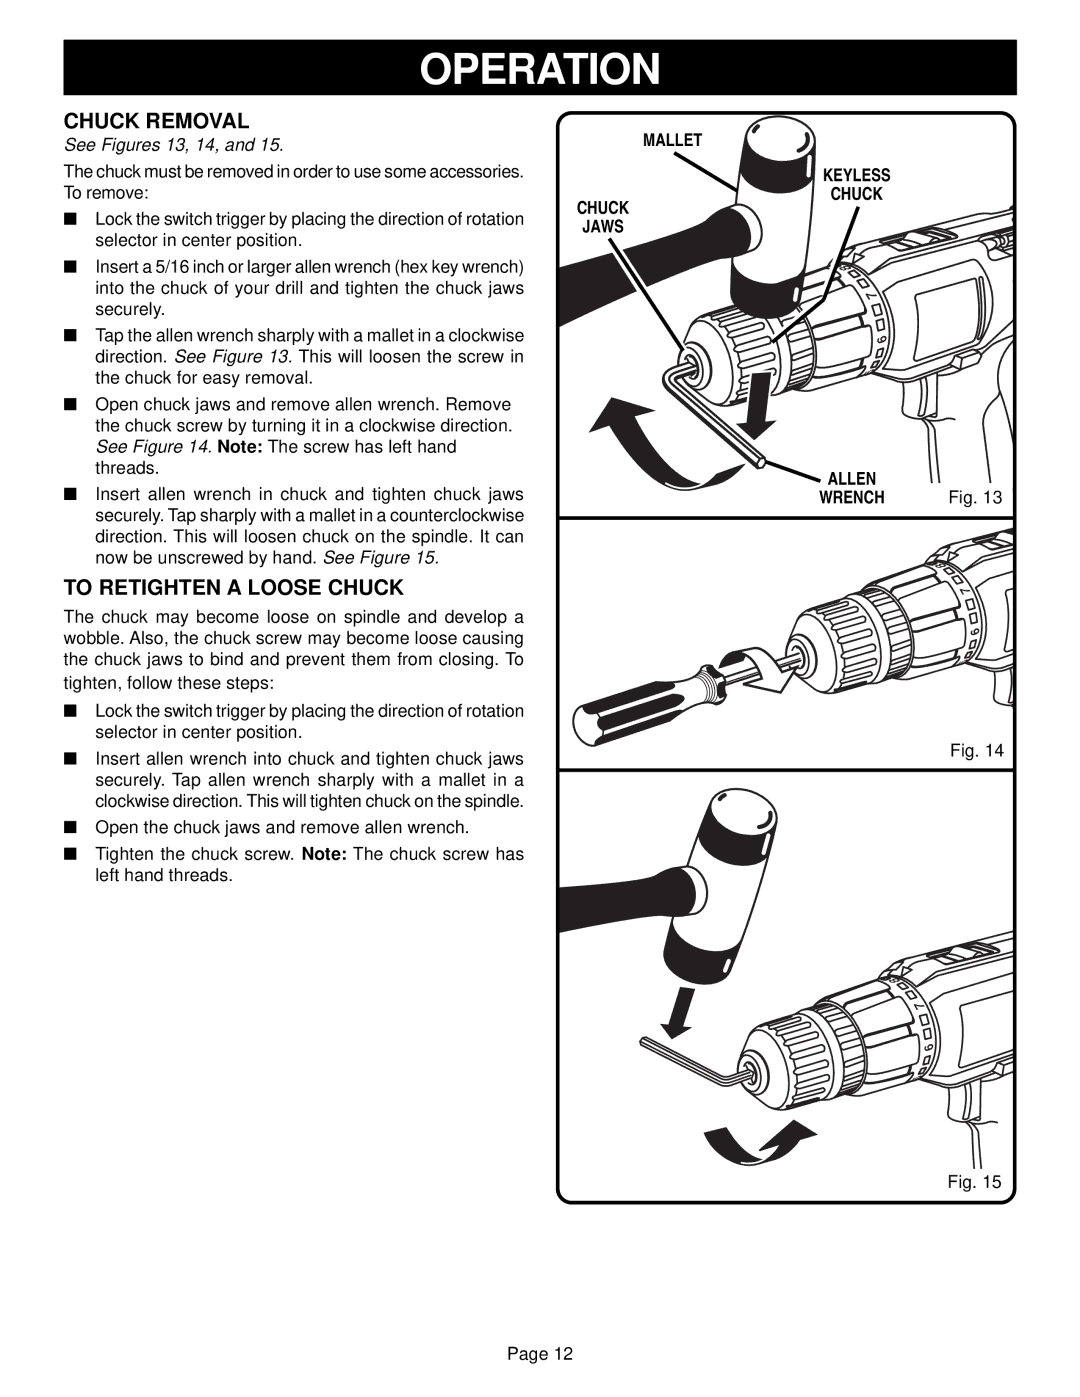
R10510, R10520, R10530 specifications
Ryobi is a renowned brand in the power tool industry, known for its commitment to innovation and quality. Among its diverse range of products, the Ryobi R10530, R10520, and R10510 models stand out for their performance, reliability, and user-friendly features.The Ryobi R10530 is a versatile tool that excels in a variety of applications. This model is equipped with a powerful motor, delivering impressive performance for both heavy-duty and lighter tasks. One of its key features is the innovative 5-speed control system which allows users to adjust the speed according to task requirements, ensuring optimal precision and efficiency. The R10530 also boasts an ergonomic design, making it comfortable to handle during prolonged use. Additionally, the onboard LED lights enhance visibility, allowing for accurate work even in poorly lit areas.
The Ryobi R10520, on the other hand, focuses on portability and convenience. It is equipped with a compact and lightweight design, making it easy to transport and store. Despite its smaller size, the R10520 does not compromise on power, featuring a robust motor that provides sufficient torque for various applications. One of the standout technologies in this model is the advanced cooling system, preventing overheating during intensive operations, thereby extending the tool’s lifespan. The R10520 also includes a quick-release chuck, enabling fast and easy accessory changes.
Lastly, the Ryobi R10510 is tailored for those seeking a reliable and affordable option without sacrificing quality. This model is characterized by its simplicity and ease of use, making it a great choice for beginners. It features a single-speed motor, suitable for everyday tasks such as drilling and fastening. The R10510 is designed with durability in mind, incorporating high-quality materials that withstand wear and tear. Its compact design also provides great maneuverability, making it an excellent addition to any DIY enthusiast’s toolkit.
In summary, the Ryobi R10530, R10520, and R10510 each bring unique features and technologies to the table. Whether it’s the multi-speed versatility of the R10530, the portable convenience of the R10520, or the straightforward reliability of the R10510, Ryobi offers a suitable option for various users and requirements. With a focus on quality and user experience, these models continue to uphold Ryobi’s reputation as a trusted name in power tools.