OPERATION
TO RIP CUT
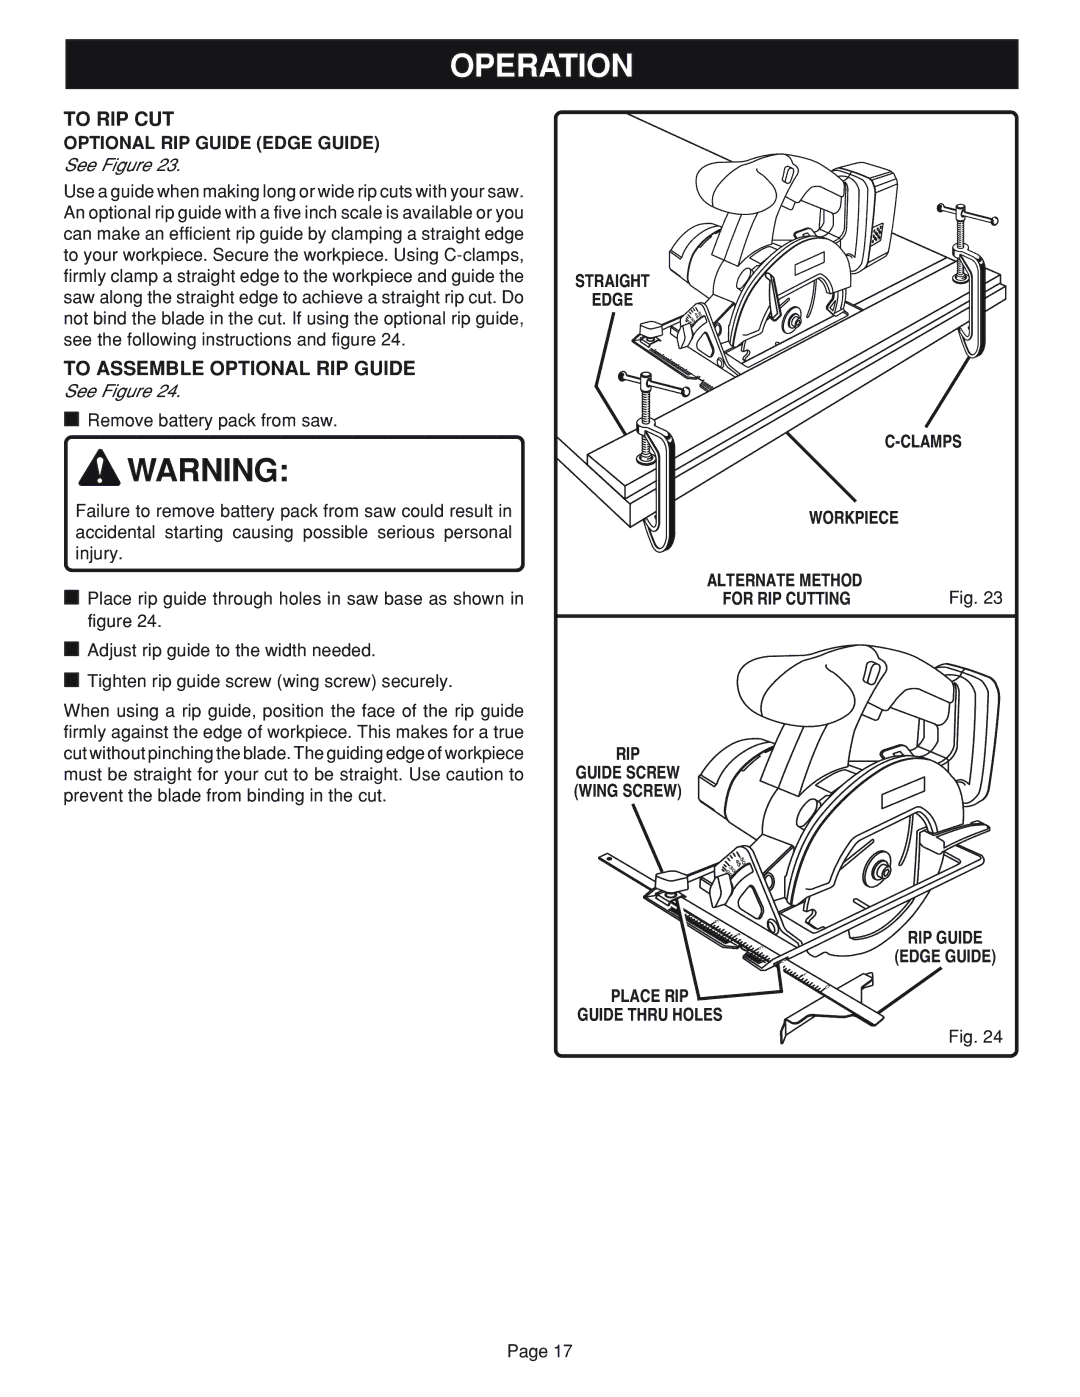
OPTIONAL RIP GUIDE (EDGE GUIDE)
See Figure 23.
Use a guide when making long or wide rip cuts with your saw. An optional rip guide with a five inch scale is available or you can make an efficient rip guide by clamping a straight edge to your workpiece. Secure the workpiece. Using
TO ASSEMBLE OPTIONAL RIP GUIDE
See Figure 24.
■Remove battery pack from saw.
![]() WARNING:
WARNING:
Failure to remove battery pack from saw could result in accidental starting causing possible serious personal injury.
■Place rip guide through holes in saw base as shown in figure 24.
■Adjust rip guide to the width needed.
■Tighten rip guide screw (wing screw) securely.
When using a rip guide, position the face of the rip guide firmly against the edge of workpiece. This makes for a true cut without pinching the blade. The guiding edge of workpiece must be straight for your cut to be straight. Use caution to prevent the blade from binding in the cut.
STRAIGHT
EDGE
50 45
30 22
WORKPIECE |
|
ALTERNATE METHOD | Fig. 23 |
FOR RIP CUTTING | |
RIP
GUIDE SCREW (WING SCREW)
50 |
|
45 |
|
30 |
|
22 |
|
5 | RIP GUIDE |
4 | |
3 | (EDGE GUIDE) |
2 | |
| 1 |
| 0 |
PLACE RIP ![]()
GUIDE THRU HOLES
Fig. 24
Page 17