Drain hose installation
1.If necessary, connect the
2.If you use the extension drain hose, insulate the inside of the extension drain hose with a shield.
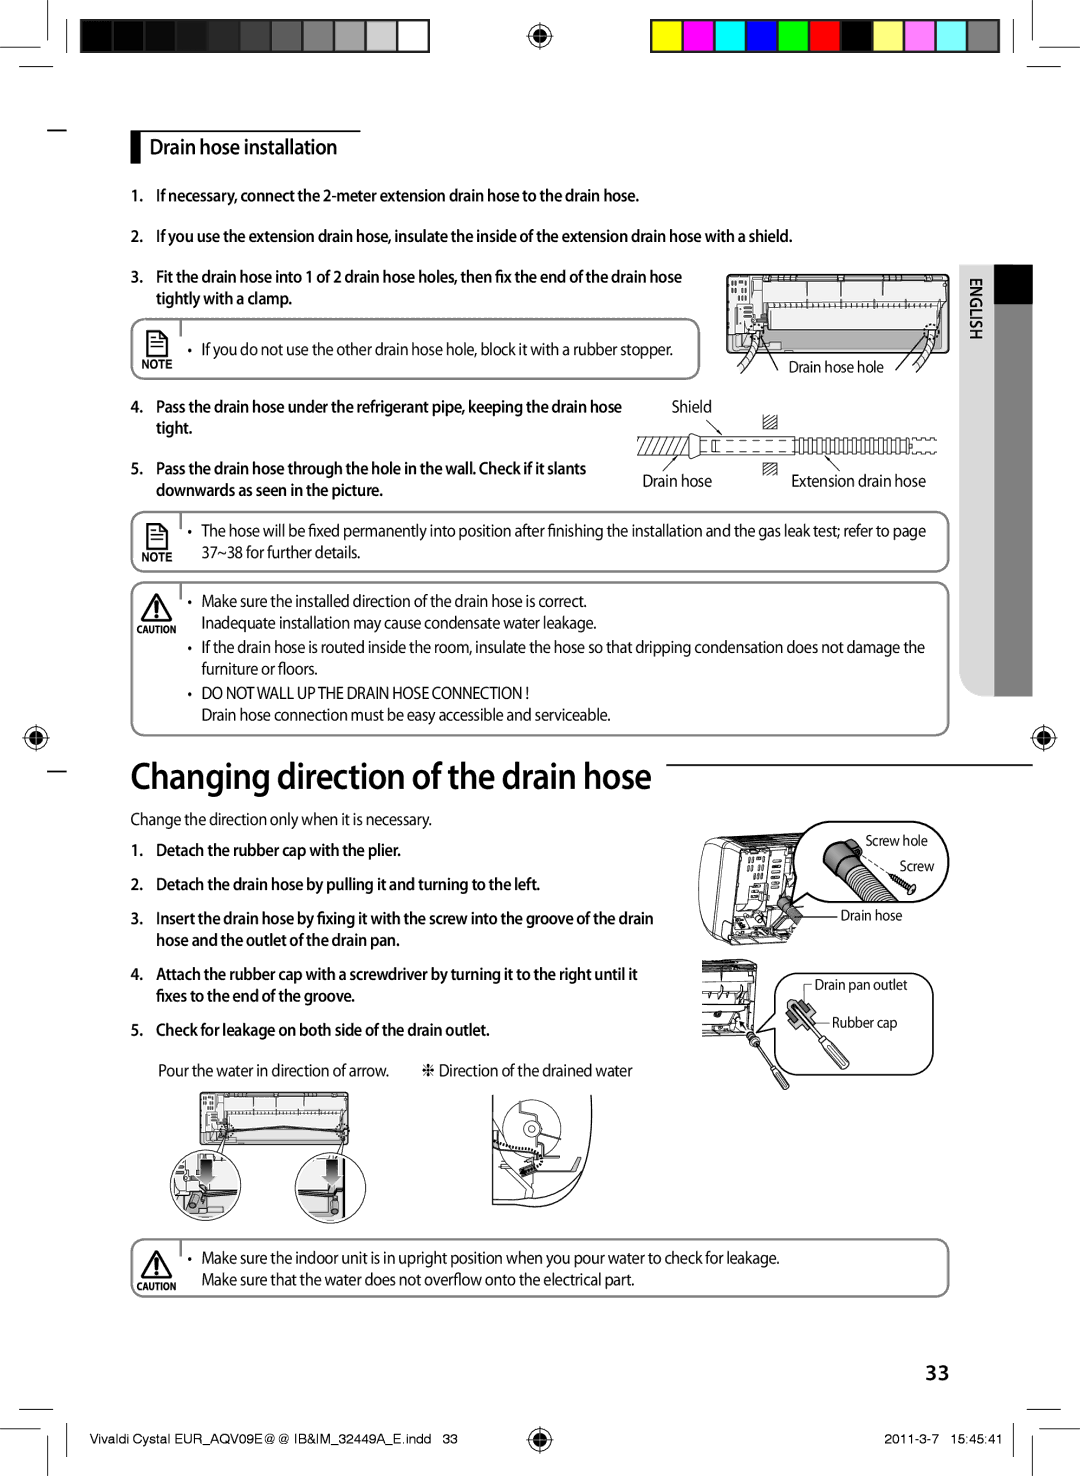
3. Fit the drain hose into 1 of 2 drain hose holes, then fix the end of the drain hose tightly with a clamp.
• If you do not use the other drain hose hole, block it with a rubber stopper.
4. | Pass the drain hose under the refrigerant pipe, keeping the drain hose | Shield | |||
| tight. |
|
|
| |
5. | Pass the drain hose through the hole in the wall. Check if it slants |
|
|
| |
Drain hose | |||||
| downwards as seen in the picture. | ||||
|
|
|
| ||
Drain hose hole
Extension drain hose
ENGLISH![]()
• The hose will be fixed permanently into position after finishing the installation and the gas leak test; refer to page
37~38 for further details.
•Make sure the installed direction of the drain hose is correct.
Inadequate installation may cause condensate water leakage.
•If the drain hose is routed inside the room, insulate the hose so that dripping condensation does not damage the furniture or floors.
•DO NOT WALL UP THE DRAIN HOSE CONNECTION !
Drain hose connection must be easy accessible and serviceable.
Changing direction of the drain hose
Change the direction only when it is necessary.
1.Detach the rubber cap with the plier.
2.Detach the drain hose by pulling it and turning to the left.
3.Insert the drain hose by fixing it with the screw into the groove of the drain hose and the outlet of the drain pan.
Screw hole |
Screw |
Drain hose |
4. | Attach the rubber cap with a screwdriver by turning it to the right until it | Drain pan outlet | |
| fixes to the end of the groove. |
| |
|
|
| |
5. | Check for leakage on both side of the drain outlet. | Rubber cap | |
| |||
| Pour the water in direction of arrow. | Direction of the drained water |
|
•Make sure the indoor unit is in upright position when you pour water to check for leakage.
Make sure that the water does not overflow onto the electrical part.
33