3.Atsižvelgdami į savo tinklo ryšį, lange paspauskite „Local Area Connection“ arba „Wireless Network Connection“.

4.Kortelėje „Support“ paspauskite mygtuką „Details“. Rodomi Tinklo nustatymai.

PASTABA

Skirtingose Windows operacinės sistemos versijose gali būti skirtinga informacija.

Norėdami į grotuvą įvesti tinklo nustatymus, atlikite šiuos veiksmus:

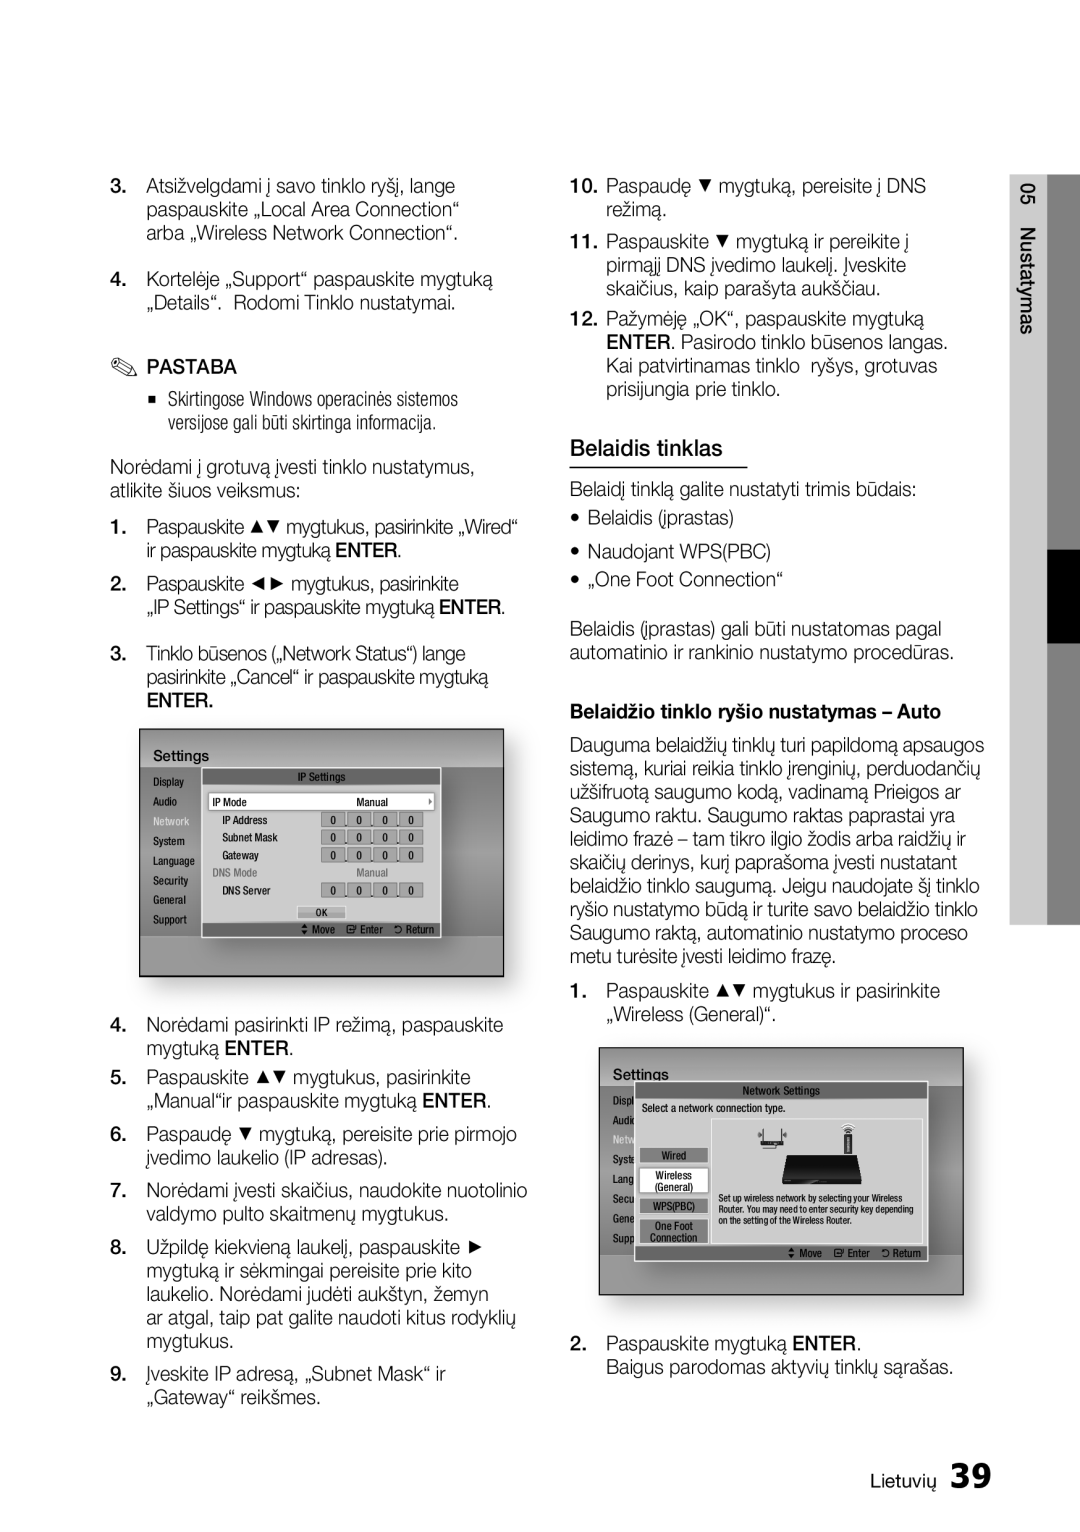
1.Paspauskite ▲▼ mygtukus, pasirinkite „Wired“ ir paspauskite mygtuką ENTER.

2.Paspauskite ◄► mygtukus, pasirinkite

„IP Settings“ ir paspauskite mygtuką ENTER.

3.Tinklo būsenos („Network Status“) lange pasirinkite „Cancel“ ir paspauskite mygtuką

ENTER.

Settings

Display


IP Settings


Audio

IP Mode


Manual


Networkk

IP Address


0

.

0


0

0


System

Subnet Mask


0

.

0


0

0


Language

Gateway


0

.

0


0

0


Security

DNS Mode


Manual


General

DNS Server


0

.

0


0

0


OK


Support


> Move

" Enter


' Return

4. Norėdami pasirinkti IP režimą, paspauskite mygtuką ENTER.

5. Paspauskite ▲▼ mygtukus, pasirinkite „Manual“ir paspauskite mygtuką ENTER.

6. Paspaudę ▼ mygtuką, pereisite prie pirmojo įvedimo laukelio (IP adresas).

7. Norėdami įvesti skaičius, naudokite nuotolinio valdymo pulto skaitmenų mygtukus.

8. Užpildę kiekvieną laukelį, paspauskite ► mygtuką ir sėkmingai pereisite prie kito laukelio. Norėdami judėti aukštyn, žemyn ar atgal, taip pat galite naudoti kitus rodyklių mygtukus.

9. Įveskite IP adresą, „Subnet Mask“ ir „Gateway“ reikšmes.

10.

Paspaudę ▼ mygtuką, pereisite į DNS

05


režimą.

12.

Nustatymas

Pažymėję „OK“, paspauskite mygtuką

11.

Paspauskite ▼ mygtuką ir pereikite į


pirmąjį DNS įvedimo laukelį. Įveskite skaičius, kaip parašyta aukščiau.

ENTER. Pasirodo tinklo būsenos langas. Kai patvirtinamas tinklo ryšys, grotuvas prisijungia prie tinklo.

Belaidis tinklas

Belaidį tinklą galite nustatyti trimis būdais:

Belaidis (įprastas)

Naudojant WPS(PBC)

„One Foot Connection“

Belaidis (įprastas) gali būti nustatomas pagal automatinio ir rankinio nustatymo procedūras.

Belaidžio tinklo ryšio nustatymas – Auto

Dauguma belaidžių tinklų turi papildomą apsaugos sistemą, kuriai reikia tinklo įrenginių, perduodančių užšifruotą saugumo kodą, vadinamą Prieigos ar Saugumo raktu. Saugumo raktas paprastai yra leidimo frazė – tam tikro ilgio žodis arba raidžių ir skaičių derinys, kurį paprašoma įvesti nustatant belaidžio tinklo saugumą. Jeigu naudojate šį tinklo ryšio nustatymo būdą ir turite savo belaidžio tinklo Saugumo raktą, automatinio nustatymo proceso metu turėsite įvesti leidimo frazę.

1.Paspauskite ▲▼ mygtukus ir pasirinkite „Wireless (General)“.

Settings

Network Settings

DisplaySelect a network connection type.

Audio

Neetwtwork

System

Wired


Language Wireless


(General)

Security

WPS(PBC)

Set up wireless network by selecting your Wireless

General

Router. You may need to enter security key depending

One Foot

on the setting of the Wireless Router.


Support Connection

> Move " Enter ' Return

2. Paspauskite mygtuką ENTER.

Baigus parodomas aktyvių tinklų sąrašas.

Lietuvių 39

Page 39
Image 39
Samsung BD-D7500/EN manual Belaidis tinklas, Norėdami pasirinkti IP režimą, paspauskite mygtuką Enter

BD-D7500/EN specifications

The Samsung BD-D7500 series is a sophisticated range of Blu-ray players that combines cutting-edge technology with an impressive array of features. This series includes model variants such as BD-D7500B/ZF, BD-D7500E/ZF, BD-D7500/ZF, BD-D7500/XN, and BD-D7500/EN, all engineered to deliver an exceptional home entertainment experience.

At the heart of the BD-D7500 series is its 3D Blu-ray playback capability, allowing users to enjoy an immersive viewing experience with compatible 3D content. The advanced picture processing enhances video quality, ensuring that images are crisp, vibrant, and true to life. This series also supports Full HD 1080p playback, providing clarity and detail in high-definition content.

One of the standout features of the BD-D7500 series is its Smart Hub functionality, which opens up a world of entertainment beyond physical media. Users can access popular streaming services such as Netflix, YouTube, and Hulu directly from their Blu-ray player. The user-friendly interface allows seamless navigation through apps and content, making it easy to find your favorite shows and movies.

Additionally, the BD-D7500 series boasts built-in Wi-Fi connectivity, enabling effortless access to the internet without the need for additional cables or adapters. This feature complements its Smart Hub capabilities, allowing for firmware updates and content streaming with minimal hassle. For those who appreciate a more wired connection, Ethernet support is also included.

The Samsung BD-D7500 players support a variety of audio formats, including Dolby TrueHD and DTS-HD Master Audio, ensuring that users enjoy high-fidelity sound that complements their video experience. With 7.1 channel audio output, this series fully supports a surround sound setup, creating an engaging and cinematic atmosphere.

Furthermore, the sleek design of the BD-D7500 series is an aesthetic addition to any home theater setup. Its compact and stylish form factor fits well into various entertainment setups without compromising on performance.

In conclusion, the Samsung BD-D7500B/ZF, BD-D7500E/ZF, BD-D7500/ZF, BD-D7500/XN, and BD-D7500/EN models represent a significant step forward in Blu-ray technology. With features like 3D playback, Smart Hub access, Wi-Fi connectivity, and superior audio performance, these players cater to the demands of modern home entertainment enthusiasts, ensuring that they are well-equipped to enjoy high-quality multimedia content.