6

Aprite la cartella per visualizzare i file.

7

Copiate i file dal computer alla scheda di memoria.

8

Una volta terminato, selezionate Disattiva.

Per scollegare il dispositivo dal computer, fate clic sull'icona del dispositivo USB nella barra delle applicazioni di Windows e fate clic sull'opzione per rimuovere in modo sicuro il dispositivo di archiviazione di massa. Quindi rimuovete il cavo dati dal computer. Altrimenti potreste perdere i dati salvati sulla scheda di memoria o danneggiare la scheda stessa.

Wi-Fi

Imparate come utilizzare le funzionalità di rete wireless del dispositivo che consentono di attivare e collegarsi a qualsiasi rete Wi-Fi compatibile con gli standard IEEE 802.11 b/g/n.

Potete collegarvi a Internet o ad altri dispositivi di rete ovunque sia disponibile un punto di accesso o hotspot wireless.

Il dispositivo usa una frequenza non armonizzata e può essere utilizzato in tutti i paesi europei. La rete Wi-Fi può essere utilizzata senza restrizioni al chiuso nell'UE, ma non può essere usata all'aperto in Francia.

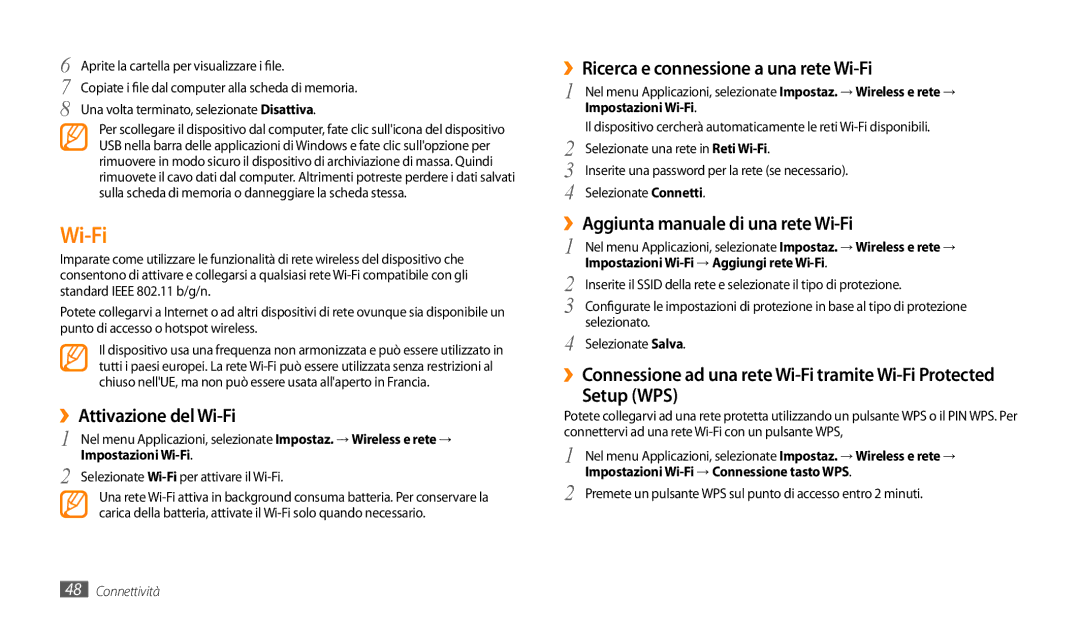
››Attivazione del Wi-Fi

1

Nel menu Applicazioni, selezionate Impostaz. Wireless e rete

Impostazioni Wi-Fi.

2

Selezionate Wi-Fiper attivare il Wi-Fi.

Una rete Wi-Fi attiva in background consuma batteria. Per conservare la carica della batteria, attivate il Wi-Fi solo quando necessario.

››Ricerca e connessione a una rete Wi-Fi

1

Nel menu Applicazioni, selezionate Impostaz. Wireless e rete

Impostazioni Wi-Fi.

2

Il dispositivo cercherà automaticamente le reti Wi-Fi disponibili.

Selezionate una rete in Reti Wi-Fi.

3

Inserite una password per la rete (se necessario).

4

Selezionate Connetti.

››Aggiunta manuale di una rete Wi-Fi

1

Nel menu Applicazioni, selezionate Impostaz. Wireless e rete

Impostazioni Wi-Fi Aggiungi rete Wi-Fi.

2

Inserite il SSID della rete e selezionate il tipo di protezione.

3

Configurate le impostazioni di protezione in base al tipo di protezione

4

selezionato.

Selezionate Salva.

››Connessione ad una rete Wi-Fi tramite Wi-Fi Protected

Setup (WPS)

Potete collegarvi ad una rete protetta utilizzando un pulsante WPS o il PIN WPS. Per connettervi ad una rete Wi-Fi con un pulsante WPS,

1 Nel menu Applicazioni, selezionate Impostaz. Wireless e rete Impostazioni Wi-FiConnessione tasto WPS.

2 Premete un pulsante WPS sul punto di accesso entro 2 minuti.

48Connettività

Page 48
Image 48
Samsung GT-P1000CWDOMN, GT-P1000MSATIM manual ››Attivazione del Wi-Fi, ››Ricerca e connessione a una rete Wi-Fi

GT-P1000CWAHUI, GT-P1000CWAFWB, GT-P1000CWDOMN, GT-P1000CWACOS, GT-P1000CWAVOM specifications

The Samsung GT-P1000, commonly known as the Galaxy Tab, marked a significant milestone in the evolution of mobile computing when it was released. This tablet was part of Samsung's pioneering efforts to create a versatile device that combined the best features of smartphones and laptops, catering to a growing market for portable entertainment and productivity solutions.

One of the main features of the GT-P1000 is its sleek and lightweight design, which makes it extremely portable. Weighing just over 380 grams, the Galaxy Tab can easily be carried in a bag or held in one hand, allowing users to enjoy media consumption, browsing, and communication on the go. The device boasts a 7-inch TFT capacitive touchscreen display with a resolution of 1024 x 600 pixels, providing vibrant colors and decent viewing angles for enjoying videos, games, and ebooks.

Powering the GT-P1000 is a 1 GHz ARM Cortex-A8 processor, coupled with 512 MB of RAM, which ensures smooth performance for a variety of applications. This tablet runs on Android 2.2 Froyo, allowing users to access the Google Play Store and download a wide array of apps tailored for various purposes, including productivity tools, games, and social media platforms.

In terms of connectivity, the Galaxy Tab offers multiple options, including Wi-Fi and optional 3G support, facilitating seamless internet access whether at home or on the move. The integration of Bluetooth technology also enables quick file transfers and connections with other devices, such as headphones or speakers.

The tablet features a front-facing camera for video calls and a rear camera for capturing moments on the go, though the megapixel counts are modest by today’s standards. Storage options include 16GB, 32GB, and the possibility of expansion via a microSD card slot, allowing users to manage their media library effectively.

Battery life is another strong point of the GT-P1000, with a 4000 mAh Lithium-ion battery providing ample usage time for daily tasks, entertainment, and browsing. Overall, the Samsung GT-P1000 laid the groundwork for future tablets, integrating essential features that balanced performance, portability, and connectivity in a user-friendly device.