
HT-DB600 specifications
The Samsung HT-DB600 is a sophisticated home theater system designed to elevate your audio and visual experience. This system encapsulates Samsung's commitment to high-quality technology and innovative capabilities, making it an ideal choice for both casual viewers and avid movie enthusiasts.At the heart of the HT-DB600 is its sleek design and user-friendly interface. This home theater system integrates seamlessly into any living space, with a modern aesthetic that complements contemporary decor. The compact size of its components allows for easy installation and arrangement, making it a practical option for those limited on space.
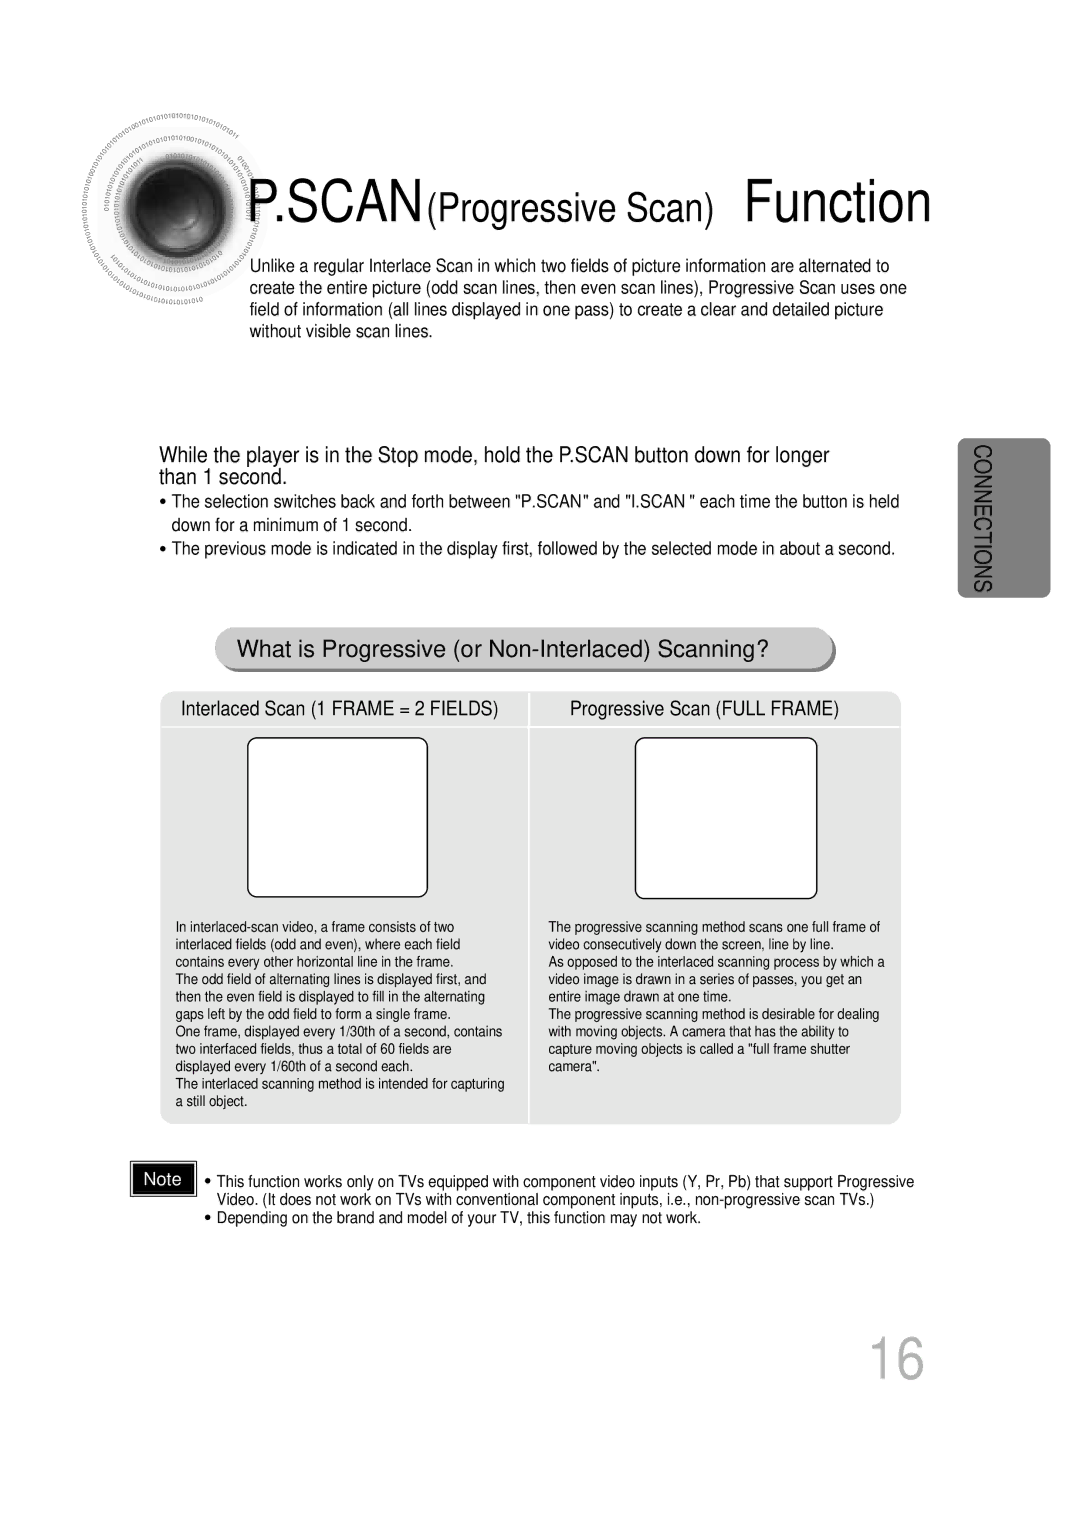
One of the standout features of the HT-DB600 is its advanced surround sound technology. It utilizes a 5.1 channel audio configuration, which includes five speakers and a powerful subwoofer. This setup creates an immersive audio environment that brings movies, music, and games to life. The system supports various audio formats, including Dolby Digital, ensuring high-fidelity sound that enhances the overall viewing experience.
Furthermore, the HT-DB600 comes equipped with a built-in DVD player, allowing users to enjoy their favorite films without the need for additional hardware. This player supports a wide array of disc formats, including DVD-RW, so you can play a vast library of content. Additionally, the system features upscaling technology that enhances standard-definition video to near high-definition quality, providing a superior visual experience on your HDTV.
Connectivity options are another highlight of the Samsung HT-DB600. It includes multiple HDMI inputs, allowing users to connect various devices, such as gaming consoles, Blu-ray players, and streaming devices. This versatility makes it easy to switch between different sources of entertainment. In addition, the system features USB ports for direct playback of multimedia files, further broadening your entertainment options.
The Samsung HT-DB600 also prioritizes user convenience, with features like remote control operation and clear on-screen menus. Its setup process is straightforward, ensuring that users can get started with minimal hassle. This system caters to a range of audio and video needs, making it an excellent addition to any home entertainment setup.
In conclusion, the Samsung HT-DB600 home theater system combines sleek design with remarkable audio and video technologies. With its surround sound capabilities, built-in DVD player, versatile connectivity, and user-friendly features, the HT-DB600 is a compelling choice for anyone looking to enhance their home entertainment experience.