Reset function
ENG
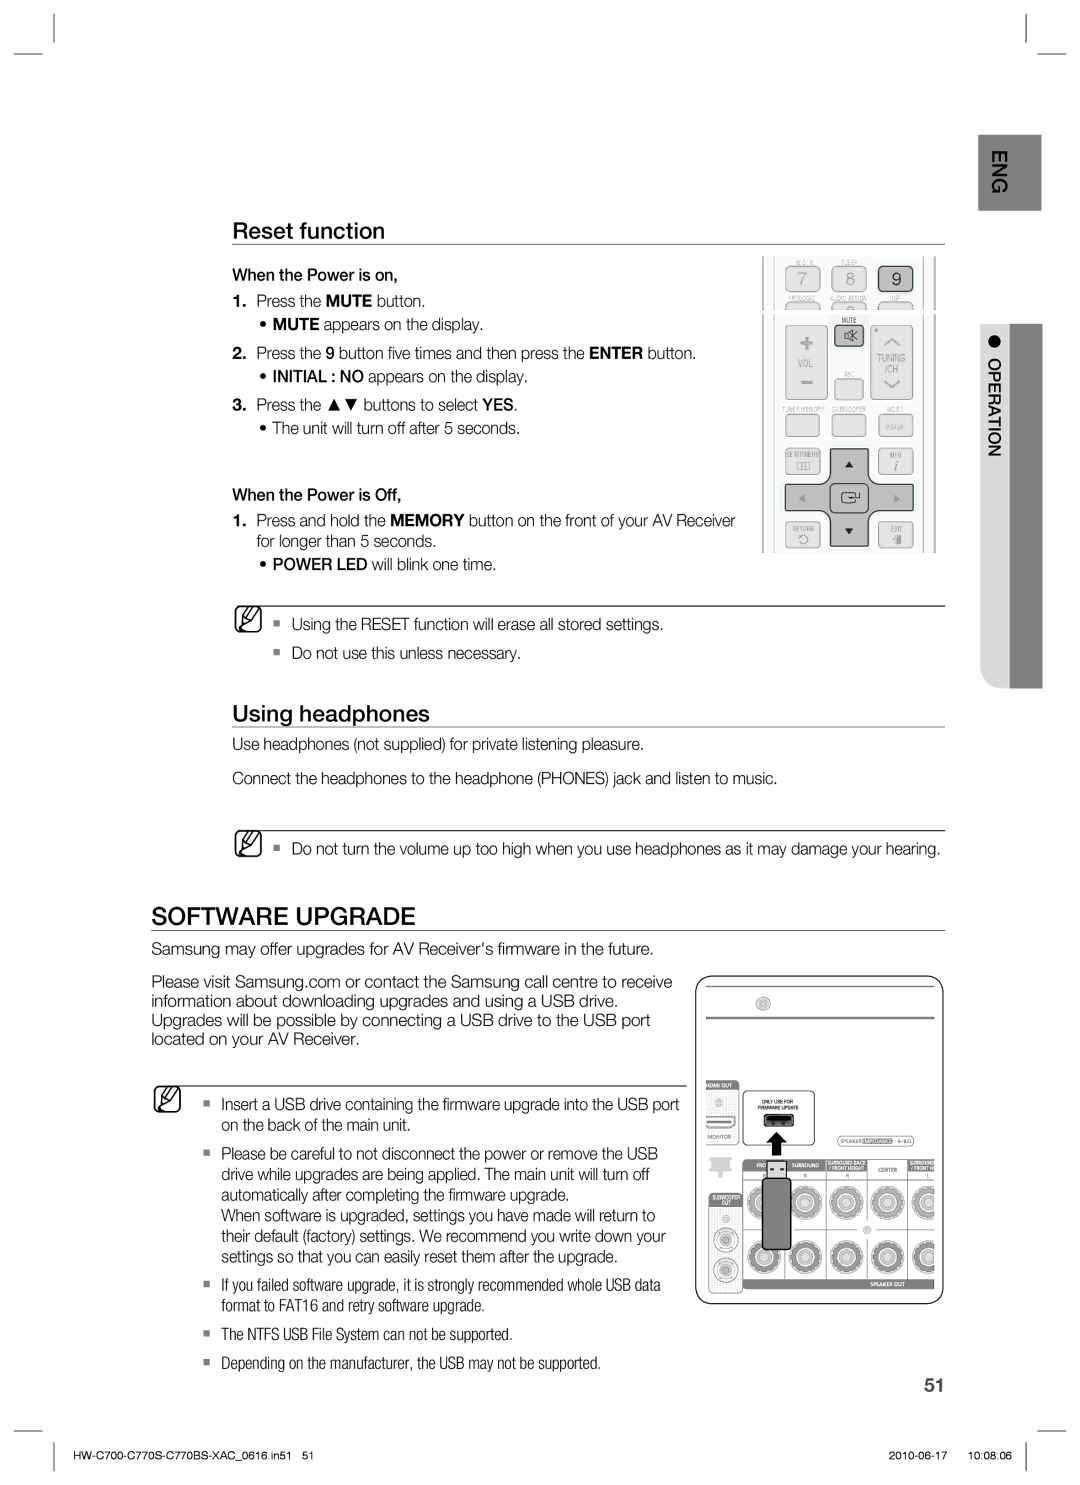
When the Power is on,
1.Press the MUTE button.
•MUTE appears on the display.
2.Press the 9 button five times and then press the ENTER button.
•INITIAL : NO appears on the display.
3.Press the ▲▼ buttons to select YES.
•The unit will turn off after 5 seconds.
|
|
|
|
|
|
|
|
|
|
|
|
|
|
|
|
|
|
|
|
|
|
|
|
|
|
|
|
|
|
|
| |
NEO : 6 | SLEEP |
|
|
|
|
|
|
|
|
|
|
| ||||||||||||||||||||
|
|
|
|
|
|
|
|
|
|
|
|
|
|
|
|
|
| 9 |
|
|
| |||||||||||
|
| 7 |
|
|
|
|
| 8 |
|
|
| |||||||||||||||||||||
|
|
|
|
|
|
|
|
|
|
|
|
|
|
|
|
|
|
|
|
|
|
|
|
|
|
|
|
|
|
|
| |
PROLOGIC | AUDIO ASSIGN | |||||||||||||||||||||||||||||||
|
|
|
|
| DSP | |||||||||||||||||||||||||||
|
|
|
|
|
|
|
|
|
|
|
|
|
| 0 |
|
|
|
|
|
|
|
|
|
|
|
|
|
|
|
| ||
|
|
|
|
|
|
|
|
|
|
|
|
| MUTE |
|
|
|
|
|
|
|
|
|
|
| ||||||||
|
|
|
|
|
|
|
|
|
|
|
|
|
|
|
|
|
|
|
|
|
|
|
|
|
|
|
|
|
| |||
|
|
|
|
|
|
|
|
|
|
|
|
|
|
|
|
|
|
|
|
|
|
|
|
|
|
|
| |||||
|
|
|
|
|
|
|
|
|
|
|
|
|
|
|
|
|
|
|
|
| TUNING | |||||||||||
|
|
|
| VOL |
|
|
|
|
|
|
|
|
|
|
|
|
|
| ||||||||||||||
|
|
|
|
|
|
|
|
|
|
|
|
|
|
|
|
|
|
|
|
|
|
|
|
|
|
|
|
| ||||
|
|
|
|
|
|
|
|
|
|
|
|
|
|
|
|
|
|
|
| /CH |
|
|
|
|
| |||||||
|
|
|
|
|
|
|
|
|
|
|
|
|
|
|
|
|
|
|
|
|
| |||||||||||
|
|
|
|
|
|
|
|
|
|
|
|
|
| ASC | ||||||||||||||||||
|
|
|
|
|
|
|
|
|
|
|
|
|
|
|
|
|
|
|
|
|
| |||||||||||
|
|
|
|
|
|
|
|
|
|
|
|
|
|
|
|
|
|
|
|
|
|
|
|
|
|
|
|
|
|
|
| |
|
|
|
|
|
|
|
|
|
|
|
|
|
|
|
|
|
|
| ||||||||||||||
TUNER MEMORY | SUBWOOFER | MO/ST | ||||||||||||||||||||||||||||||
|
|
|
|
|
|
|
|
|
|
|
|
|
|
|
|
|
|
|
|
|
|
|
|
|
| |||||||
|
|
|
|
|
|
|
|
|
|
|
|
|
|
|
|
|
|
|
|
|
|
| POPUP | |||||||||
● OPERATION
SETUP/MENUINFO
When the Power is Off,
1. Press and hold the MEMORY button on the front of your AV Receiver
for longer than 5 seconds.
•POWER LED will blink one time.
M Using the RESET function will erase all stored settings.
Do not use this unless necessary.
Using headphones
Use headphones (not supplied) for private listening pleasure.
RETURNEXIT
Connect the headphones to the headphone (PHONES) jack and listen to music.
M Do not turn the volume up too high when you use headphones as it may damage your hearing.
SOFTWARE UPGRADE
Samsung may offer upgrades for AV Receiver's firmware in the future.
Please visit Samsung.com or contact the Samsung call centre to receive information about downloading upgrades and using a USB drive. Upgrades will be possible by connecting a USB drive to the USB port located on your AV Receiver.
M Insert a USB drive containing the firmware upgrade into the USB port on the back of the main unit.
Please be careful to not disconnect the power or remove the USB drive while upgrades are being applied. The main unit will turn off automatically after completing the firmware upgrade.
When software is upgraded, settings you have made will return to their default (factory) settings. We recommend you write down your settings so that you can easily reset them after the upgrade.
If you failed software upgrade, it is strongly recommended whole USB data format to FAT16 and retry software upgrade.
The NTFS USB File System can not be supported.
Depending on the manufacturer, the USB may not be supported.
51
