Cooking Instructions

Auto Sensor Cook

The Auto Sensor allows you to cook your food automatically by detecting the amount of moistures generated from the food while cooking.

When cooking food, many kinds of moistures are generated. The Auto Sensor determines the proper time and power level by detecting these moistures from the food, eliminating the need to set the cooking time and power level.

When you cover a container with its lid or plastic wrap during Sensor Cooking, the Auto Sensor will detect the moistures generated after the container has been saturated with steam.

Shortly before cooking ends, the remaining cooking time will begin its count down. This will be a good time for you to rotate or stir the food for even cooking if it is necessary.

Before auto sensor cooking food may be seasoned with herbs, spices or browning sauces. A word of caution though, salt or sugar may cause burn spots on food so these ingredients should be added after cooking.

The More/Less function pad is used to increase or decrease cooking time. You should use this function to adjust the degree of cooking to suit your personal taste.

Utensils & Cover For Sensor Cooking

To obtain good cooking results with this function, follow the directions for selecting appropriate containers and covers in the charts in this book.

Always use microwave-safe containers and cover them with their lids or with plastic wrap. When using plastic wrap, turn back one corner to allow steam to escape at the proper rate.

Always cover with the lid intended for the utensil being used. If the utensil does not have its own lid, use plastic wrap.

Fill containers at least half full.

Foods that require stirring or rotating should be stirred or turned toward the end of the Sensor Cook cycle, after the time has started to count down on the display.

Important

It its not advisable to use the auto sensor cooking feature on a continuous cooking operation, i.e. one cooking operation immediately after another.

Install the oven in a well ventilated location for proper cooling and airflow and to ensure the sensor will operate accurately.

To avoid poor results, do not use the Auto sensor when the room ambient temperature is too high or too low.

Do not use volatile detergent to clean your oven. Moisture resulting from this detergent may affect the sensor.

Avoid placing the oven near high moisture or gas emitting appliances, since this will interfere with the proper performance of the Auto Sensor.

Always keep the inside of the oven clean. Wipe all spills with a damp cloth.

This oven is designed for household use only.

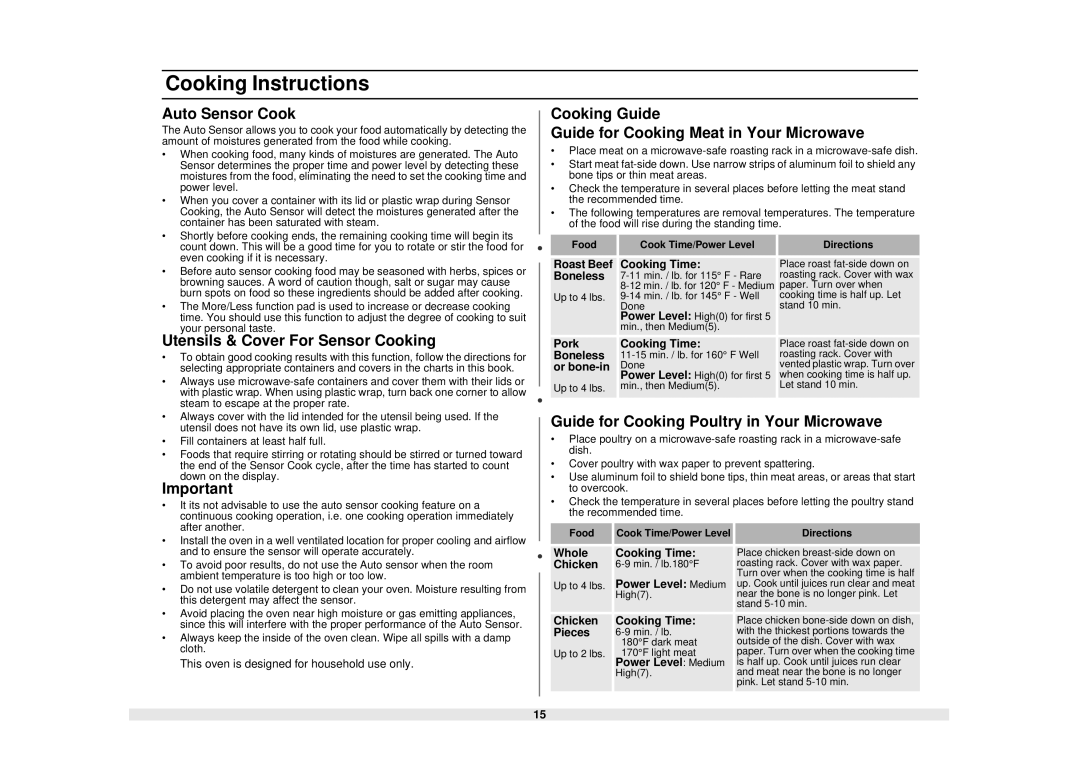
Cooking Guide

Guide for Cooking Meat in Your Microwave

Place meat on a microwave-safe roasting rack in a microwave-safe dish.

Start meat fat-side down. Use narrow strips of aluminum foil to shield any bone tips or thin meat areas.

Check the temperature in several places before letting the meat stand the recommended time.

The following temperatures are removal temperatures. The temperature of the food will rise during the standing time.

Food

Cook Time/Power Level

Directions


Roast Beef

Cooking Time:

Place roast fat-side down on

Boneless

7-11 min. / lb. for 115° F - Rare

roasting rack. Cover with wax


8-12 min. / lb. for 120° F - Medium

paper. Turn over when

Up to 4 lbs.

9-14 min. / lb. for 145° F - Well

cooking time is half up. Let


Done

stand 10 min.


Power Level: High(0) for first 5


min., then Medium(5).


Pork

Cooking Time:

Place roast fat-side down on

Boneless

11-15 min. / lb. for 160° F Well

roasting rack. Cover with

or bone-in

Done

vented plastic wrap. Turn over


Power Level: High(0) for first 5

when cooking time is half up.

Up to 4 lbs.

min., then Medium(5).

Let stand 10 min.


Guide for Cooking Poultry in Your Microwave

Place poultry on a microwave-safe roasting rack in a microwave-safe dish.

Cover poultry with wax paper to prevent spattering.

Use aluminum foil to shield bone tips, thin meat areas, or areas that start to overcook.

Check the temperature in several places before letting the poultry stand the recommended time.

Food

Cook Time/Power Level

Directions


Whole

Cooking Time:

Place chicken breast-side down on

Chicken

6-9 min. / lb.180°F

roasting rack. Cover with wax paper.


Power Level: Medium

Turn over when the cooking time is half

Up to 4 lbs.

up. Cook until juices run clear and meat


High(7).

near the bone is no longer pink. Let


stand 5-10 min.

Chicken

Cooking Time:

Place chicken bone-side down on dish,

Pieces

6-9 min. / lb.

with the thickest portions towards the


180°F dark meat

outside of the dish. Cover with wax

Up to 2 lbs.

170°F light meat

paper. Turn over when the cooking time


Power Level: Medium

is half up. Cook until juices run clear


High(7).

and meat near the bone is no longer


pink. Let stand 5-10 min.


15

Page 15
Image 15
Samsung MS1440WB Auto Sensor Cook, Utensils & Cover For Sensor Cooking, Guide for Cooking Poultry in Your Microwave

MS1440WB, MS1240WB, MS1040WB, MS840WB specifications

The Samsung MS840WB, MS1240WB, MS1040WB, and MS1440WB represent a modern lineup of microwave ovens that incorporate cutting-edge technologies and user-friendly features, designed to enhance the cooking experience in any kitchen.

The Samsung MS840WB microwave stands out with its sleek design and powerful 800 watts of cooking power, making it a reliable tool for quick meal preparation. This model features Samsung's innovative Sensor Cook technology, which automatically adjusts cooking time and power based on the moisture emitted from the food, ensuring optimal results every time. Additionally, it comes equipped with a ceramic enamel interior that is not only easy to clean but also resistant to scratching and bacterial growth.

Similar to the MS840WB, the Samsung MS1240WB microwave offers enhanced functionality with a slightly higher capacity. Its 1.2 cubic feet interior allows for larger dishes, making it ideal for families or meal prepping. The intuitive control panel features pre-programmed cooking options that simplify meal preparation, allowing users to easily select settings tailored to specific foods. The MS1240WB also benefits from Samsung’s Eco Mode, which reduces energy consumption when the microwave is not in use.

The Samsung MS1040WB model emphasizes convenience and fast cooking with its compact design, making it a perfect fit for smaller kitchens or dormitories. Despite its size, it boasts 1000 watts of cooking power and offers a range of cooking presets for everything from popcorn to pizza. The easy-to-read display and one-touch buttons enhance usability, while its durable construction ensures longevity.

Finally, the Samsung MS1440WB microwave features a larger capacity of 1.4 cubic feet, catering to diverse cooking needs. It combines smart technology with a stylish exterior, featuring a stainless steel finish that complements any modern kitchen. The MS1440WB includes a dedicated defrost function, making it easy to thaw frozen foods quickly and evenly, while the child lock feature enhances safety in homes with young children.

In summary, the Samsung MS840WB, MS1240WB, MS1040WB, and MS1440WB microwaves each offer distinctive features that cater to a variety of cooking needs. With advancements in microwave technology, user-friendly controls, and efficient cooking power, these models represent Samsung's commitment to enhancing everyday cooking. Whether you are heating up leftovers or preparing meals from scratch, these microwaves provide versatility and convenience for every household.