Page
Instructions
Getting to Know your camera
Check the cameras power
Take a picture Insert the USB cable
Danger
Contents
READY RECORDING
026 Things to Watch Out for When Taking Pictures
Using the camera buttons to set the camera
Setting up the play back function using
PLAY
078 File Options
System chart
Package Contents
Sold Separately
Identification of features
Front & Top
Back
MENU button Camera status lamp MODE button Strap eyelet LCD monitor
Fn/Delete button
5 function button
Bottom
5 Function button
Self-timer lamp
Mode icon
Camera Status Lamp
Connecting to a Power Source
BP70A rechargeable battery Specification
Number of images and battery life Using the BP70A
Using an AC cable
How to charge the rechargeable battery
Guideline of recharging the battery
Guidelines of disposal
Inserting the memory card
Insert the battery as shown
Insert the memory card as shown
Instructions on how to use the memory card
The camera can use SD/SDHC Memory Cards
LCD monitor indicator
Optical / Digital Zoom bar
Digital Zoom rate
How to use the menu
2. Use the up or down button to navigate through the menus
3. Use the left or right button to select a sub menu
How to use Smart Auto mode
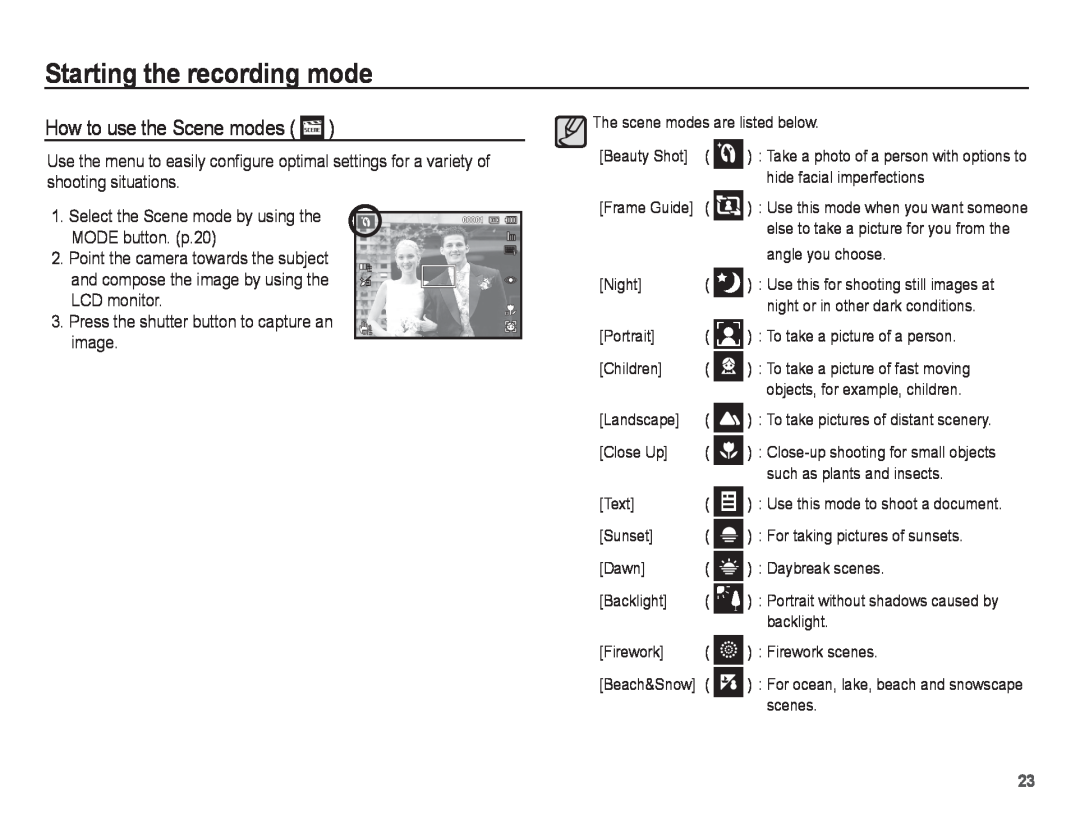
Starting the recording mode
Selecting modes
Each scene is recognized in the following conditions
How to use the Program mode
How to use the Scene modes
Changing the Shutter speed and Aperture value
How to use the Movie clip mode
Recording the movie clip without sound
Things to Watch Out for When Taking Pictures
POWER button
Using the camera buttons to set the camera
SHUTTER button
Smart button
In MOVIE CLIP mode Pressing the shutter button down
to stop recording, press the shutter button again In Still image mode
Zoom W/T Lever
Info DISP / Up button
You may notice a decrease in image quality when using the digital zoom
Macro / Down button
Focus lock
Available focusing method, by recording mode
Using the Focus Lock
1. Ensure the subject is in the center of the autofocus frame
Flash / Left button
Selecting the flash mode
1. Select the desired Recording mode, except for the Movie mode. p.20
Flash range
Auto flash
Self-timer / Right button
Selecting the self-timer
button until the desired mode indicator
Use a tripod to prevent the camera from shaking
Motion Timer
Starting the
Do not move
Taking an image after 2 sec
MENU button
OK button
Shooting
How to Enable Functions Using the MENU Button
Shooting
Photo Size / Movie Size
Quality / Frame rate
Exposure compensation
White balance
Face Detection
Ä Selectable modes Program, Portrait, Children, Beach & Snow
Face Tone
Auto Focus type
Face Retouch
Tracking AF
Metering
Drive mode
Photo Style Selector
Image Adjust
OIS Optical image Stabilization
Voice Memo
Voice Recording
Setting movie recording
Recording the movie clip without voice
Smart mode
Smart mode display
Starting Smart mode
How to use Smart Movie Clip mode
Volume
Sound menu
Sound
Start up sound
Setup menu
Display
AF sound
Language
Start up image
Quick view
Display Brightness
Display Save
Settings
Formatting a memory
Initialization
Setting up the Date / Time / Date type
File name
Time Zone
Auto power off
Imprinting the recording date
After replacing the battery, the power off setting will be preserved
Date & Time The Date & Time will be
Auto Focus lamp
Selecting Video out type
Setting the USB
Starting play mode
Playing back a still image
Playing back a movie clip
Movie clip capture function
Playing back a recorded voice
To pause a recorded voice file, while
playing it back, press the OK button
LCD monitor Indicator
Playing back a voice memo
1. Select a still image that has the voice memo
2. Press the OK button to play back the voice memo
Play mode button
Thumbnail º / Enlargement í Lever
Smart Album
Ŷ Searching or Deleting Files
1. Turn the Thumbnail lever to the left on the Smart Album screen
3. Select the file by pressing the Up/Down/ Left/Right buttons
4. Press the Delete Õ button to delete the selected file
Image enlargement
Play & Pause / OK button
In Play mode, the play & pause/ OK button works as follows
Left / Right / Down / MENU button
Delete Õ button
Right button While the menu is showing, the Right button
Down button While the menu is showing, the Down button
Setting up the play back function using the LCD monitor
Sub Menu
Setting up the play back function using the LCD monitor
Edit
Resize
Rotating an image
Rotate picture
counter-clock-wise direction
Rotate picture vertically
Image Adjust
Edit
Edit
Starting the Multi Slide Show
Start the Multi Slide Show
Selecting Images
Setting play interval
Setting Background Music
Configure Multi Slide show effects
File Options
Deleting images
Protecting images
Voice memo
You can add your voice to a stored still image
To stop the recording, press the shutter button
Voice is recording
DPOF
When the wide angle image is printed as a wide angle print
Reset Cancel the print setup
Standard
Right button again. Sub menu will
Up / Down button Select a print size
Voice memo
Copy to Card
1. Select the Copy to Card menu tab by
pressing the Up / Down button. And
2. Select a desired sub menu by pressing
PictBridge
PictBridge Print Setting
PictBridge Picture Selection
PictBridge Reset
Important notes
Caution on Using the Lens
Camera Maintenance
Extremes in temperature may cause problems
Do not attempt to disassemble or modify the camera
Warning indicator
File Error
Low Battery
Card Locked
Before contacting a service center
The flash does not fire Flash off mode has been selected
Specifications
Movie Clip
Power Source
Transferring files to your computer for Windows
For Windows users
1. Insert the installation CD in a compatible CD-ROM drive
2. Turn on the camera
Using Intelli-studio
Transferring files to your computer for Mac
For Mac users
Transferring files to your computer for Mac
Page
When the movie clip doesn’t play back on the PC
Correct Disposal of This Product
Correct disposal of batteries in this product

 )
)