INSTALLING A REGULAR BOTTLE
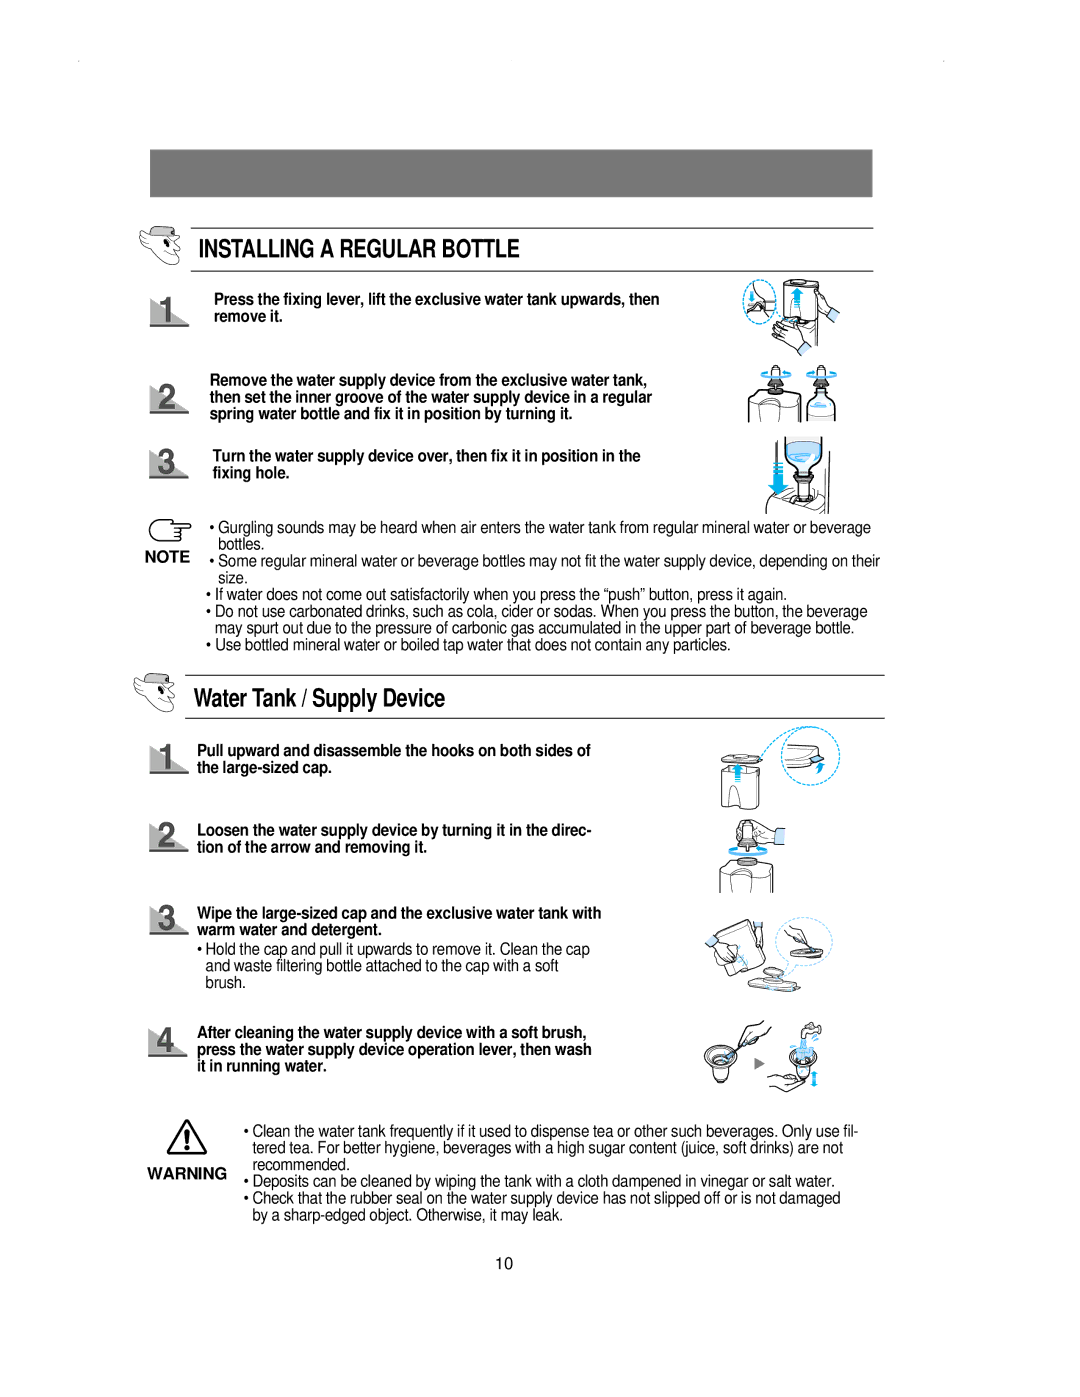
Press the fixing lever, lift the exclusive water tank upwards, then remove it.
Remove the water supply device from the exclusive water tank, then set the inner groove of the water supply device in a regular spring water bottle and fix it in position by turning it.
Turn the water supply device over, then fix it in position in the fixing hole.
• Gurgling sounds may be heard when air enters the water tank from regular mineral water or beverage bottles.
NOTE • Some regular mineral water or beverage bottles may not fit the water supply device, depending on their size.
•If water does not come out satisfactorily when you press the “push” button, press it again.
•Do not use carbonated drinks, such as cola, cider or sodas. When you press the button, the beverage may spurt out due to the pressure of carbonic gas accumulated in the upper part of beverage bottle.
•Use bottled mineral water or boiled tap water that does not contain any particles.
Water Tank / Supply Device
Pull upward and disassemble the hooks on both sides of the
Loosen the water supply device by turning it in the direc- tion of the arrow and removing it.
Wipe the
• Hold the cap and pull it upwards to remove it. Clean the cap and waste filtering bottle attached to the cap with a soft brush.
After cleaning the water supply device with a soft brush, press the water supply device operation lever, then wash it in running water.
| • Clean the water tank frequently if it used to dispense tea or other such beverages. Only use fil- |
| tered tea. For better hygiene, beverages with a high sugar content (juice, soft drinks) are not |
WARNING | recommended. |
• Deposits can be cleaned by wiping the tank with a cloth dampened in vinegar or salt water. |
•Check that the rubber seal on the water supply device has not slipped off or is not damaged by a
10
